

Paper Plate Snow Globe Craft
Create a delightful snow globe using simple materials that you likely already have around your home! This paper plate snow globe craft is perfect for children and families to enjoy together, offering an engaging way to express creativity as the seasons change. You may also find Rainbow Paper Plate Pumpkin Shaker Craft useful.
Why You’ll Love This Project
- Easy and Fun: This craft uses everyday materials, making it simple and accessible for everyone, even beginners!
- Creative Expression: Personalize your snow globe with colors, designs, and themes, allowing each creation to be unique.
- Great for Kids: It encourages creativity and fine motor skill development in children while being a fun group activity.
- Seasonal Decoration: These snow globes can serve as charming decorations for the winter season or for holiday gifts.

You may also find Diy Paper Towel Tube Crafts For Kids useful.
Materials You’ll Need
- Two paper plates
- Scissors
- Cotton balls or fake snow
- Glitter (optional)
- Markers or paint
- Tape or glue
- Small figurines or pictures for inside the globe
How to Make Paper Plate Snow Globe Craft
Prepare the Base: Take one paper plate and use the markers or paint to decorate the edge in a color of your choice. This will be the base of your snow globe. You may also find Rainbow Paper Plate Ghost Shaker Halloween Decor useful.
Create the Dome: Take the second paper plate and cut a circle out of the center to create a frame. This will act as the dome for your snow globe. You may also find Rainbow Paper Tree Craft For Kids useful.
Add the Snow: On the inner side of the dome, place a generous amount of cotton balls or fake snow. You can sprinkle some glitter on top for extra sparkle!
Insert Your Decor: Secure any small figurines or pictures in the center of the snow (consider using tape for stability).
Seal the Globe: Carefully tape or glue the rim of the dome onto the base plate, ensuring that all sides are firmly sealed so the “snow” doesn’t escape.
Let It Dry: Allow your snow globe to dry completely before displaying it.

Helpful Tips
- Supervision for Younger Crafters: If crafting with young children, consider doing the cutting and gluing steps for them while they handle decorating.
- Customize the Theme: Create seasonal snow globes featuring holiday themes, winter animals, or any favorite characters for added personalization.
- Display Ideas: Use stands or small easels to display your snow globe, creating a festive atmosphere in your home.
Creative Variations
- Color Themes: Use pastels for a soft winter wonderland, or bright colors for a whimsical look.
- Add Photos: Instead of figurines, include personal photos or drawings that your children made.
- Layering Effects: Experiment with multiple layers of snowy materials, combining cotton balls and different types of glitter for a textured effect.
Making It With Kids
This project is a fantastic opportunity for kids to develop creativity and motor skills. Just be mindful to assist with any sharp tools and glue, ensuring their safety throughout the craft.
How to Display, Use, or Gift It
Once you’ve made your enchanting snow globes, they make lovely gifts or decorative pieces around your home! Consider placing them on a mantel, using them as table centerpieces, or wrapping them up as personalized gifts for family and friends.

Frequently Asked Questions
1. Can I use real snow in the globe?
Real snow is not recommended, as it will melt and create a mess. It’s best to stick with cotton or faux snow.
2. How long does it take to dry?
Drying time will vary based on the type of glue used, but generally, it takes about an hour to fully set.
3. What if I don’t have small figurines?
You can cut images from magazines or print out illustrations that your children love to use instead.
4. Can we use multiple colors?
Absolutely! Mixing and matching colors can enhance your designs and personalize your snow globe.
Conclusion
Crafting a snow globe from paper plates allows for creativity and fun during the winter season. For an additional craft idea to explore, check out this Paper Plate Winter Snow Globe | Crayola DIY Crafts for Kids. Enjoy crafting!
Print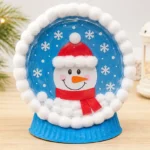
Paper Plate Snow Globe Craft
- Total Time: 75 minutes
- Makes: 1 snow globe
Description
Create a delightful snow globe using simple materials that you likely already have around your home! This craft is perfect for children and families to enjoy together.
Materials
- Two paper plates
- Scissors
- Cotton balls or fake snow
- Glitter (optional)
- Markers or paint
- Tape or glue
- Small figurines or pictures for inside the globe
Instructions
- Prepare the Base: Take one paper plate and use the markers or paint to decorate the edge in a color of your choice.
- Create the Dome: Take the second paper plate and cut a circle out of the center.
- Add the Snow: On the inner side of the dome, place a generous amount of cotton balls or fake snow, and sprinkle some glitter on top.
- Insert Your Decor: Secure any small figurines or pictures in the center.
- Seal the Globe: Tape or glue the rim of the dome onto the base plate, ensuring it’s firmly sealed.
- Let It Dry: Allow your snow globe to dry completely before displaying it.
Notes
Supervision for younger crafters is recommended.