

Rainbow Paper-Plate Ghost Shaker Becomes Decor
Creating a delightful Rainbow Paper-Plate Ghost Shaker is a wonderful way to bring some festive cheer into your home. This project is not only simple and fun, but it also transforms everyday materials into a charming decoration that kids will love. Plus, it offers an opportunity to engage in some creative play. You may also find Clear Rainbow Ghost Shaker Suncatcher Craft For Kids useful.
Why You’ll Love This Project
- Easy and Accessible: All materials are simple and usually available at home, making it an easy craft for families.
- Interactive Fun: Kids get to shake the ghost and see the colorful elements inside, adding an exciting twist to decor.
- Encourages Creativity: Each ghost can be personalized with various colors and patterns, allowing children to express their uniqueness.
- Perfect for Seasonal Celebrations: This craft aligns perfectly with Halloween, making it a great addition to your festive decorations.
- Skill Development: As children participate, they enhance their fine motor skills and hand-eye coordination through cutting and assembling.

You may also find Rainbow Ghost Cupcake Liner Garland Halloween Decor useful.
Materials You’ll Need
- Paper plates
- Black marker
- Scissors
- Tape or glue
- Colorful confetti or glitter
- White string or yarn (for hanging)
How to Make Rainbow Paper-Plate Ghost Shaker Becomes Decor
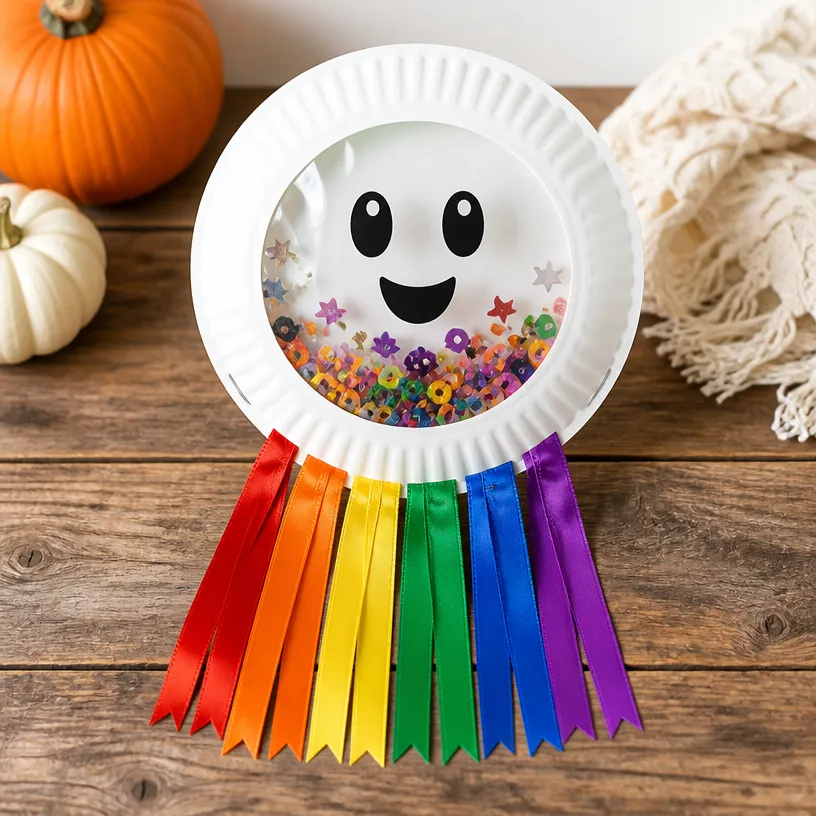
Prepare the Plates: Take two paper plates and set them with the bottom sides facing up. Use the black marker to draw a face on one of the plates it can have silly eyes and a spooky smile! You may also find Colorful Rainbow Puppy Lantern Ghost Glow Nightlight useful.
Fill the Shaker: Sprinkle colorful confetti or glitter in the center of the plate without the face. This provides the fun “shaking” effect that makes your ghost shiver with excitement! You may also find Glowing Rainbow Ghost Lanterns useful.
Seal the Plates: Carefully place the decorated plate face-down onto the filled plate. Use tape or glue around the edges to secure them together, creating a sealed shaker.
Add a Hanger: Cut a piece of string or yarn about 12 inches long. Use tape to attach one end of the string to the top of the paper plate ghost, letting it hang down for display.
Display Your Ghost: Once everything is dry, hang your ghost in a window or any other creative space where it can brighten up the atmosphere.
Helpful Tips
- Storage: If you’re making these with kids, encourage them to create multiple ghosts and store the extras for future decorations.
- Mess Control: To manage any mess from confetti, consider doing the filling step over a large tray to catch any spills.
- Adult Supervision: If children are using scissors, ensure an adult is nearby to help with any tricky parts.
Creative Variations
- Color Choices: Use different shades of confetti for a more vibrant look or pastel colors for a soft, enchanting appearance.
- Theme Adaptations: Incorporate themed elements like spooky stickers, Halloween-themed ribbon, or even seasonal colors for other holidays.
- Size Changes: Experiment with different sizes of paper plates, creating both small and large ghost decorations for varied displays.
Making It With Kids
Crafting this ghost shaker is an excellent way to bond with children. Encourage them to decorate the plates as they wish, allowing room for their creativity to flourish. Make sure to supervise any cutting or use of tape, ensuring a safe and enjoyable crafting experience.
How to Display, Use, or Gift It
These ghost shakers can serve as festive window hangings or be placed as part of your Halloween table decor. Alternatively, they make wonderful DIY gifts for friends and family, bringing a touch of homemade charm to their festive celebrations.

Frequently Asked Questions
1. How can I make my ghost sturdier?
You can reinforce the edges with additional tape or use cardstock instead of regular paper plates for a more sturdy structure.
2. What if I don’t have confetti?
You can substitute with small pieces of paper, rice, or beads that will create a shaking sound and visual effect.
3. Can adults do this project?
Absolutely! This project can be a delightful activity for all ages, perfect for parties or community events.
4. How do I clean up the glitter?
Using a damp cloth or a sticky roller can help pick up any remaining glitter after crafting.
5. Is this project reusable?
Yes, these ghost shakers are durable, and you can store them away and use them year after year!
Conclusion
Crafting a Rainbow Paper-Plate Ghost Shaker is a creative and enjoyable activity to share with family and friends. This project embodies the warmth and joy of seasonal crafting, providing endless fun and opportunities for creativity. For another fantastic craft idea, check out this Paper Plate Rainbow Cloud.
Print
Rainbow Paper-Plate Ghost Shaker
- Total Time: 15 minutes
- Makes: 4 decorations
Description
Craft a delightful Rainbow Paper-Plate Ghost Shaker that adds festive cheer and encourages creativity in children.
Materials
- 2 paper plates
- Black marker
- Scissors
- Tape or glue
- Colorful confetti or glitter
- White string or yarn (for hanging)
Instructions
- Prepare the plates: Take two paper plates and draw a face on one of them with a black marker.
- Fill the shaker: Sprinkle colorful confetti or glitter in the center of the plate without the face.
- Seal the plates: Place the decorated plate face-down onto the filled plate and secure with tape or glue.
- Add a hanger: Cut a piece of string or yarn about 12 inches long and attach one end to the top of the ghost.
- Display your ghost: Once dry, hang the ghost in a window or creative space for festive decoration.
Notes
Encourage kids to create multiple ghosts for extra decorations. Adult supervision is recommended when using scissors.