

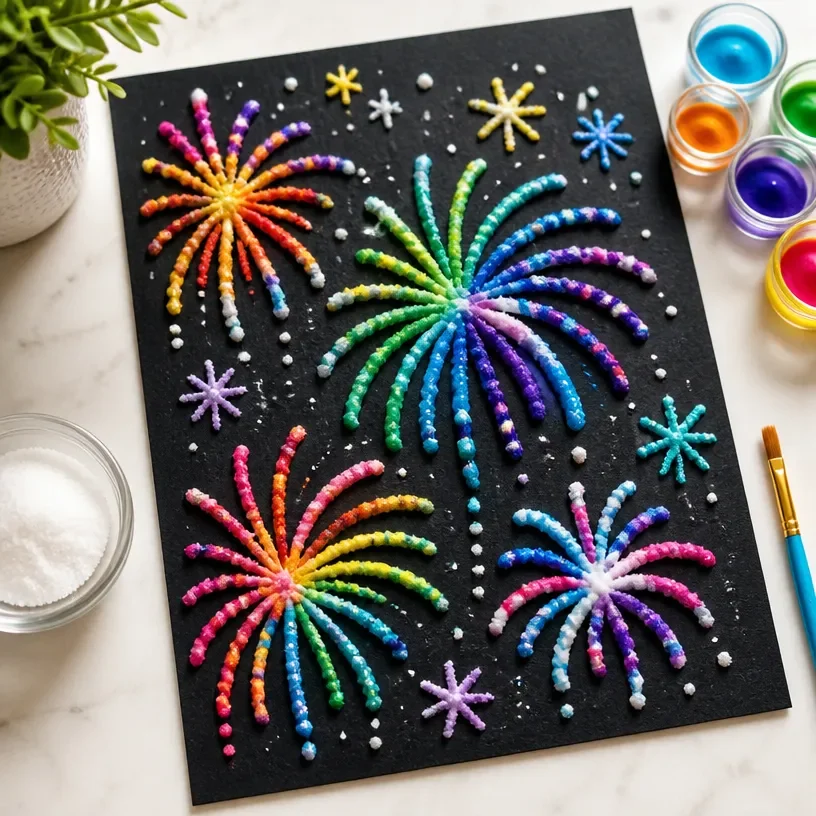
Salt Art for Kids: Textured Watercolor with Glue-and-Salt Technique
Create stunning and textured watercolor art with your kids using simple materials and the glue-and-salt technique. This project not only results in beautiful artwork but is also a delightful way for kids to explore their creativity and experiment with colors. You can even pair this craft with other creative projects for a whole day of fun, like making an alphabet garland!
Why You’ll Love This Project
- Easy to Follow: The steps are straightforward, making it perfect for children of all ages to engage with.
- Creative Expression: Kids can mix and match colors, creating unique designs that reflect their personalities.
- Textural Fun: The salt adds a fascinating texture to the watercolor, transforming the artwork in unexpected ways.
- Educational Opportunity: This project is a wonderful way to discuss color theory, patterns, and textures while crafting.

You may also find 3D Raised Salt Painting Colorful Artwork For Kids useful.
Materials You’ll Need
- White glue
- Watercolor paints
- Salt
- Water
- Paintbrush
- Thick paper or cardstock
- Tray or a surface to catch excess salt
How to Make Salt Art for Kids: Textured Watercolor with Glue-and-Salt Technique
- Prepare the Paper: Lay your thick paper or cardstock flat on a table. This will be the canvas for your artwork.
- Create a Design: Using the white glue, draw a design or pattern on the paper. Encourage the kids to be creative spirals, stars, or even abstract shapes work well!
- Add Salt: While the glue is still wet, sprinkle salt generously over the entire glue design. Ensure that all the glue is covered with salt.
- Mix the Paint: In a tray, mix your watercolor paints with a little water to achieve a fluid consistency.
- Apply the Paint: With a paintbrush, gently touch the watercolor to the salt on the glue. Watch as the salt absorbs the color and creates a beautiful textured effect!
- Let It Dry: Allow the artwork to dry completely. This might take a few hours, so be patient!
- Shake Off Excess Salt: Once it’s dry, you can gently shake off any excess salt to lively reveal your masterpiece.

Helpful Tips
- Less is More: When applying salt, it’s better to use too much than too little, as the salt helps draw the paint into interesting patterns.
- Experiment with Colors: Encourage kids to blend different colors to see how they interact when combined.
- Drying Station: Set up a designated area for the artwork to dry where it won’t be disturbed.
Creative Variations
- Seasonal Themes: Adapt the project for holidays, such as using red and green for Christmas or pastel colors for Easter.
- Different Shapes: Encourage kids to explore other shapes, like animals or flowers, for added excitement.
- Layering Techniques: After the first layer dries, kids can add more glue and salt for a multi-dimensional effect.
Making It With Kids
Supervision might be needed during the mixing of materials, especially with younger children. Ensure that the workspace is protected to avoid messiness. Encourage kids to share ideas and collaborate on designs to foster teamwork and creativity. You may also find Melted Crayon Rainbow Heart Suncatcher For Kids useful.
How to Display, Use, or Gift It
Once your salt art is finished and dry, consider framing the pieces or hanging them on a string for a colorful display. These artworks also make wonderful personalized gifts for family and friends, brightening up any room they adorn. You may also find Textured Pinwheel Paintings Bubble Wrap Art Kids useful.

Frequently Asked Questions
Can I use regular salt?
Yes, regular table salt works just fine; however, kosher salt won’t dissolve as quickly and can create different textures.
What happens if the salt absorbs too much paint?
If it does, simply shake off the excess once everything is dried each piece is unique!
Is there a best time to create this art?
A day when kids can be patient while waiting for their art to dry is ideal, so weekends or school breaks are great options.
Can I reuse the salt?
While the salt can be reused for other projects, it’s best to avoid using it for cooking afterward due to the paint pigments.
How can I make my art last longer?
Once completely dry, you can seal it with a clear spray to protect the artwork.
Will the colors fade?
Watercolor paints can fade over time, so it’s best to display the artwork away from direct sunlight.
Conclusion
Embark on a colorful journey with your children as you explore the art of salt painting! Not only is it a creative craft, but you can also learn more techniques like the glue-and-salt method by visiting this informative guide. Enjoy crafting together!
Print
Salt Art for Kids: Textured Watercolor with Glue-and-Salt Technique
- Total Time: 180 minutes
- Makes: 1 masterpiece
Description
Create stunning textured watercolor art with kids using the glue-and-salt technique, perfect for fostering creativity and exploration.
Materials
- White glue
- Watercolor paints
- Salt
- Water
- Paintbrush
- Thick paper or cardstock
- Tray or a surface to catch excess salt
Instructions
- Prepare the paper by laying your thick paper or cardstock flat on a table.
- Create a design using the white glue, encouraging creativity.
- Add salt while the glue is still wet, covering the design completely.
- Mix your watercolor paints with a little water for a fluid consistency.
- Apply the paint gently to the salt on the glue.
- Let it dry completely, allowing a few hours for best results.
- Shake off excess salt to reveal your masterpiece.
Notes
Encourage kids to experiment with color blending and shape designs.