
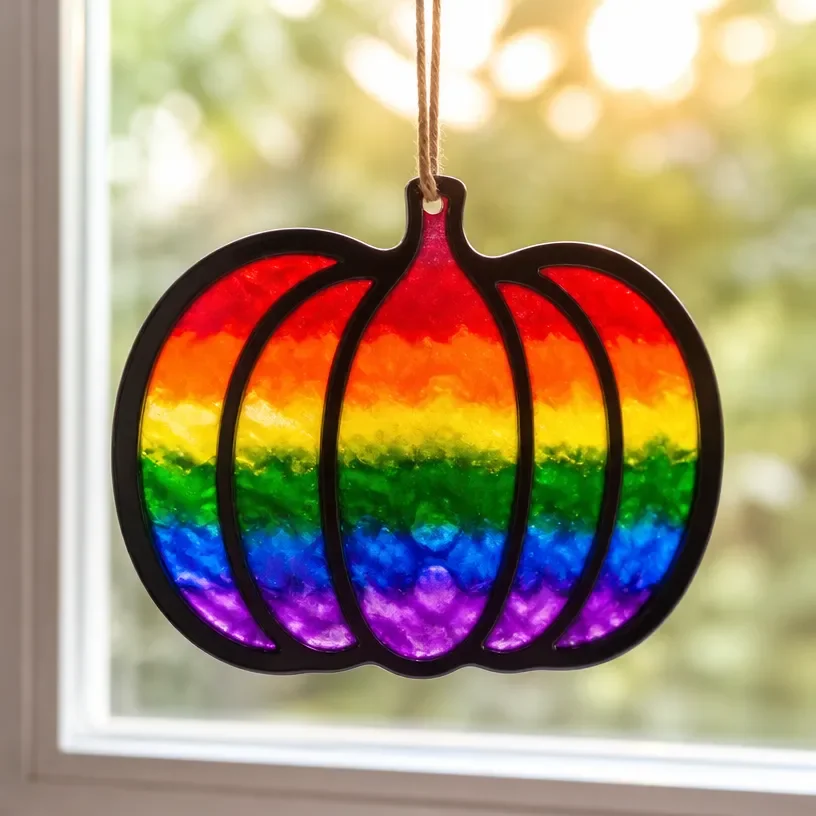
DIY Rainbow Crayon Melted Pumpkin Suncatcher Tutorial
Creating a melted crayon suncatcher is a delightful way to shake up your crafting routine and add a burst of color to your space. This DIY Rainbow Crayon Melted Pumpkin Suncatcher not only celebrates the fall season but also brightens any window with its vibrant hues. It’s a simple project that’s enjoyable for kids and adults alike, making it a perfect weekend activity. You may also find Melted Crayon Rainbow Butterfly Suncatcher For Kids useful.
Why You’ll Love This Project
- Colorful Display: The melted crayon shavings create a beautiful mosaic of colors that look stunning when sunlight filters through.
- Easy to Make: With just a few steps and materials, you can create a lovely piece of art without any complicated techniques.
- Fun for All Ages: This project is a great way to bond with kids as they can help with the crayon shavings and decorating.
- Use Recycled Materials: Turn broken and old crayons into something beautiful, promoting creative recycling in your home.
You may also find Melted Crayon Rainbow Butterfly Suncatcher useful.
Materials You’ll Need
- Pumpkin-shaped cookie cutters
- Non-toxic crayons
- Wax paper
- Iron
- String (for hanging)
How to Make DIY Rainbow Crayon Melted Pumpkin Suncatcher Tutorial
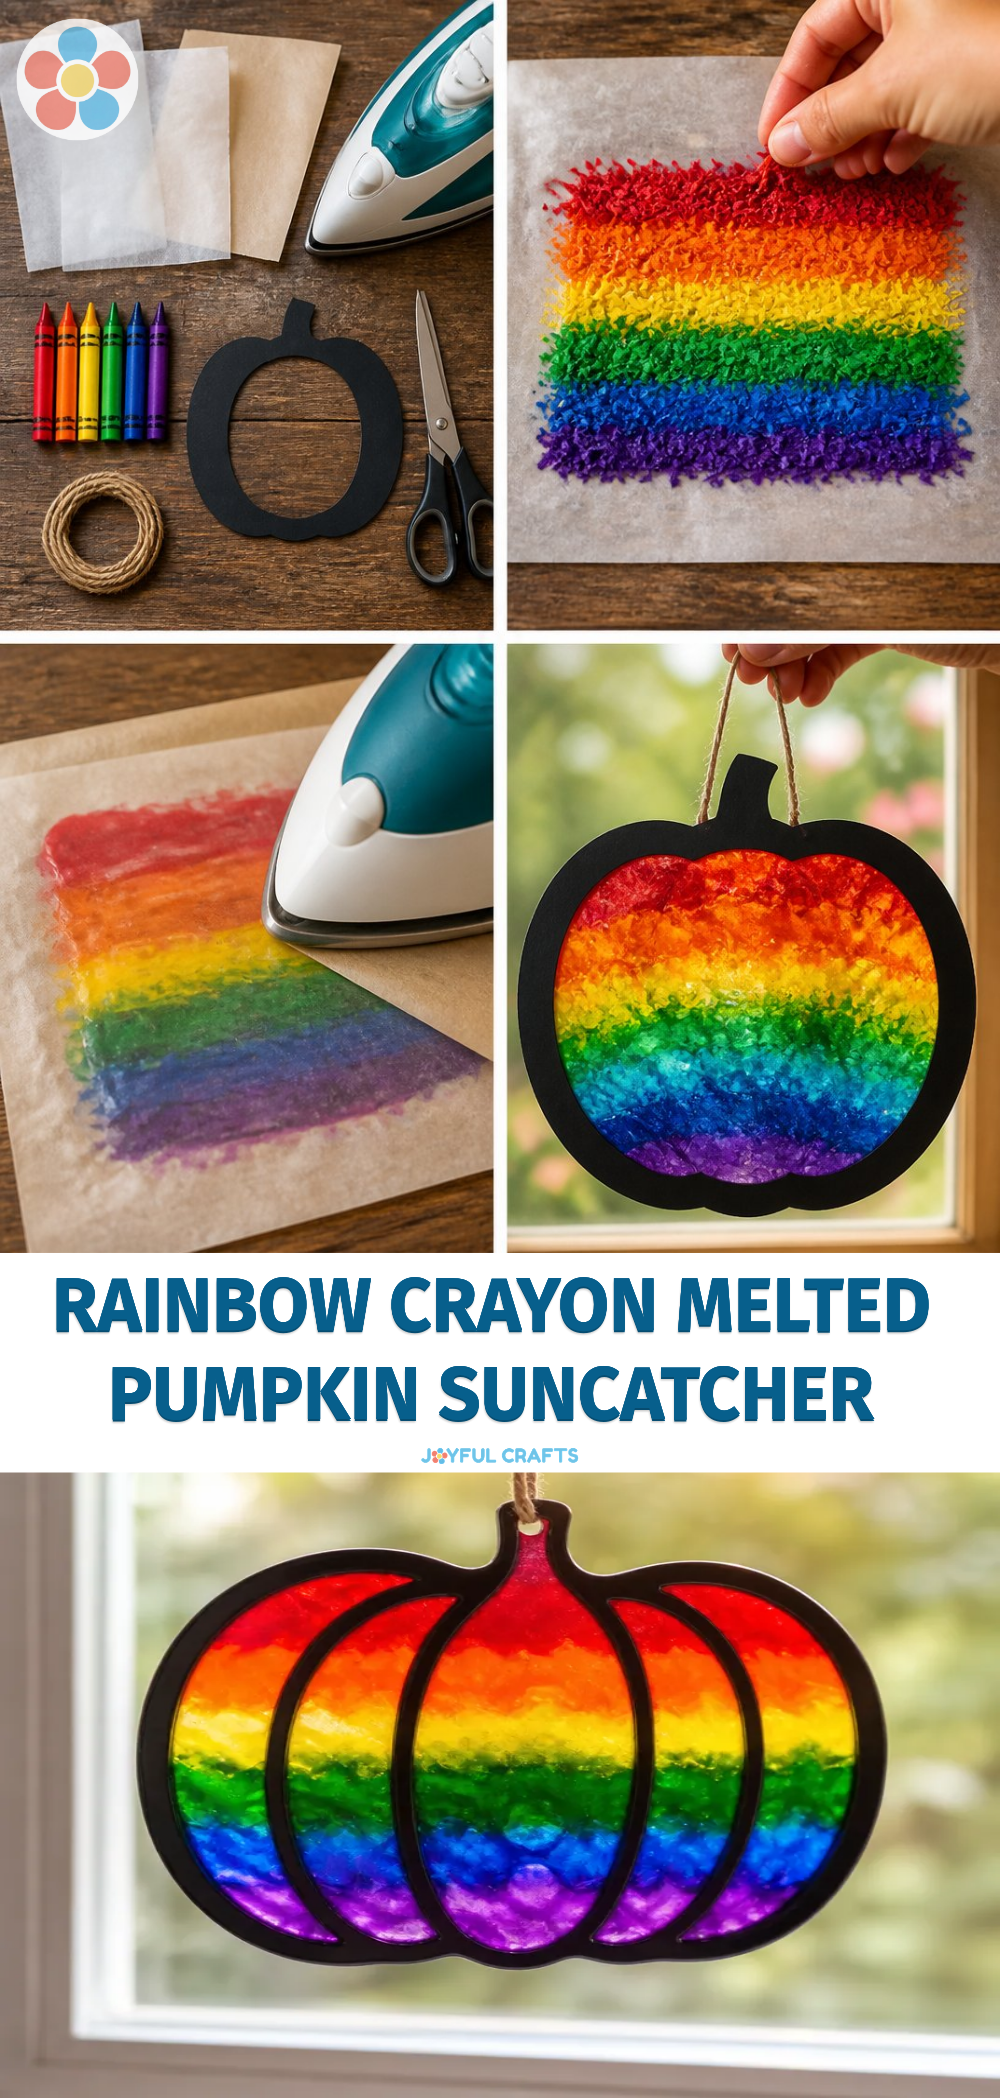
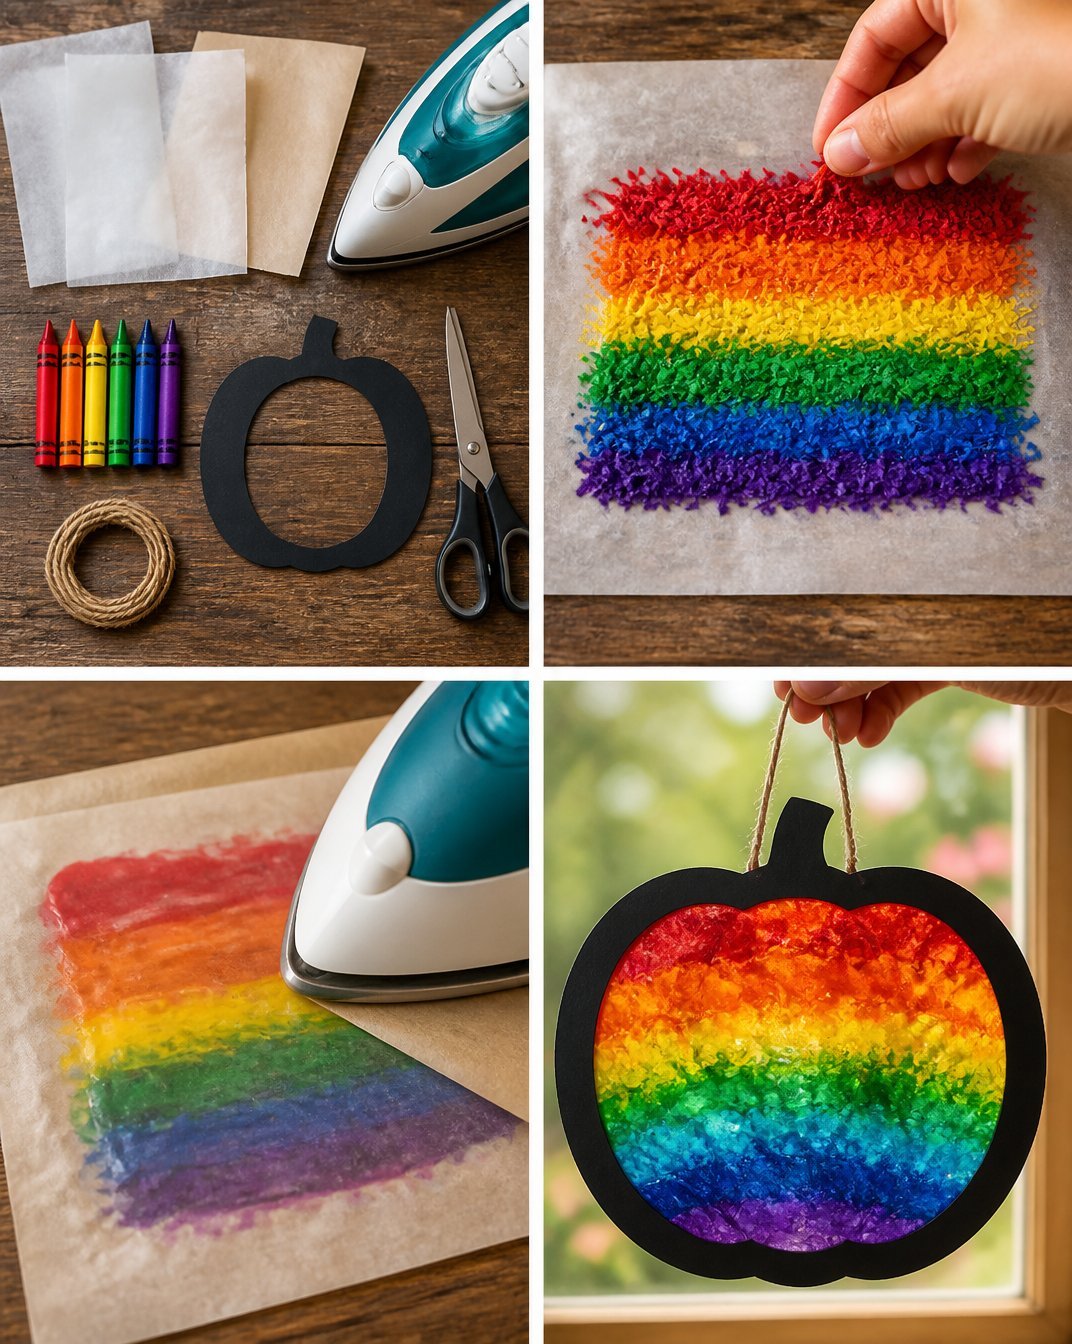
- Preheat your iron to a low setting.
- Remove the paper from the crayons and sharpen them into small shavings.
- Lay down a piece of wax paper on a flat surface.
- Sprinkle the crayon shavings onto the wax paper inside your cookie cutter shape.
- Cover the shavings with another piece of wax paper.
- Gently press the iron over the top of the wax paper to melt the crayons.
- Allow it to cool, then carefully remove the cookie cutter.
- Punch a hole at the top and attach string for hanging.
- Display your rainbow pumpkin suncatcher in a window.
Creating your suncatcher is that simple! Make sure to watch the vibrant colors blend together as they melt. You may also find Melted Crayon Rainbow Ghost Suncatcher Crayon Suncatcher useful.
Helpful Tips
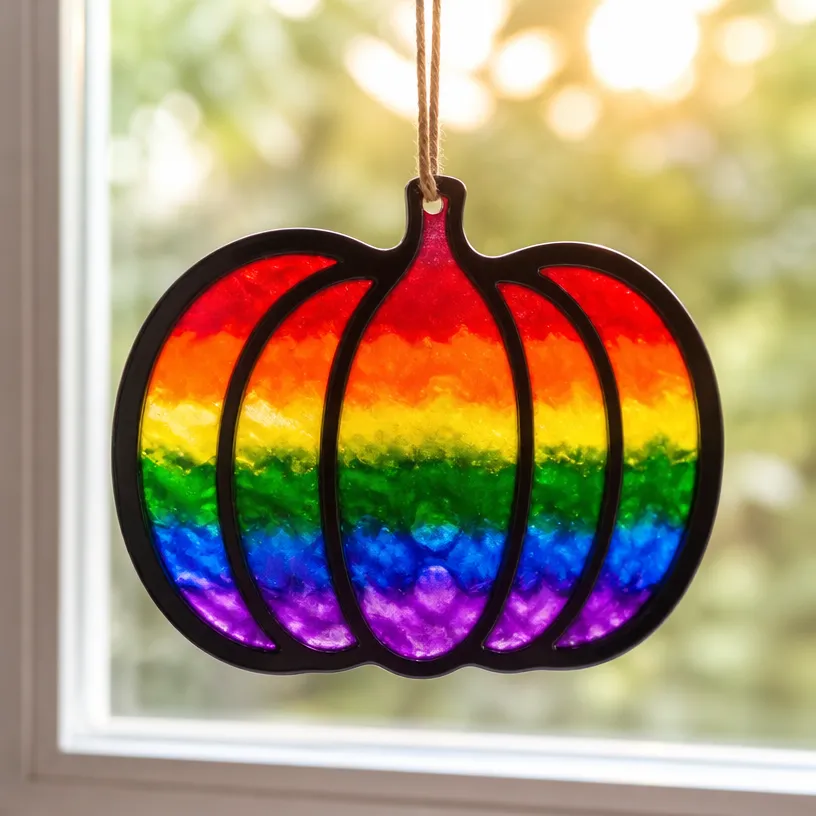
- Use a variety of colors to create a more dynamic suncatcher. You can mix warm tones like red and yellow or cool tones like blue and green.
- Make sure to keep the iron moving to avoid burning the wax paper or the crayons.
- If the crayons don’t melt completely, you can reheat them briefly until they do.
Creative Variations
Consider these ways to personalize your suncatcher: You may also find Melted Crayon Rainbow Haunted House Suncatcher Craft useful.
- Use other cookie cutter shapes such as stars or hearts for different seasonal decorations.
- Add glitter to the crayon shavings for some added sparkle.
- Experiment with different sizes of suncatchers depending on your window space.
Making It With Kids
This craft is perfect for kids, but it’s important that an adult handles the iron to ensure safety. Allow kids to get involved by letting them choose their crayon colors and help with layering the shavings.
How to Display, Use, or Gift It
Once you’ve completed your suncatcher, hang it in a sunny spot to maximize its visual impact. These suncatchers also make wonderful gifts for friends and family during the fall season. Wrap them nicely or present them in a handmade card for an extra special touch.
Frequently Asked Questions
1. Can I use regular crayons or should they be non-toxic?
It’s best to use non-toxic crayons, especially when children are involved in the crafting process.
2. What’s the best way to clean the iron if it gets crayon on it?
If some crayon gets on your iron, while it’s still warm, you can use a cloth to wipe it clean. Make sure to unplug it and let it cool down afterward.
3. How long do these suncatchers last?
With proper care, your suncatchers can last a long time. However, avoid placing them in direct sunlight for extended periods, as it may fade the colors over time.
4. Can I use this method with other shapes?
Absolutely! Feel free to use any cookie cutter shapes you have around for various festive themes.
Conclusion
Now that you’ve created your lovely DIY Rainbow Crayon Melted Pumpkin Suncatcher, why not explore more exciting melted crayon crafts? One delightful option is the Melted Crayon Pumpkin, perfect for the fall season. Enjoy your crafting, and let your imagination shine!
Print
DIY Rainbow Crayon Melted Pumpkin Suncatcher
- Total Time: 25 minutes
- Makes: 2 suncatchers
Description
A fun and colorful DIY project to create beautiful melted crayon pumpkin suncatchers that brighten up any window.
Materials
- Pumpkin-shaped cookie cutters
- Non-toxic crayons
- Wax paper
- Iron
- String (for hanging)
Instructions
- Preheat your iron to a low setting.
- Remove the paper from the crayons and sharpen them into small shavings.
- Lay down a piece of wax paper on a flat surface.
- Sprinkle the crayon shavings onto the wax paper inside your cookie cutter shape.
- Cover the shavings with another piece of wax paper.
- Gently press the iron over the top of the wax paper to melt the crayons.
- Allow it to cool, then carefully remove the cookie cutter.
- Punch a hole at the top and attach string for hanging.
- Display your rainbow pumpkin suncatcher in a window.
Notes
Make sure to keep the iron moving to avoid burning the wax paper or the crayons.