
DIY Melted Crayon Rainbow Ghost Suncatcher Tutorial
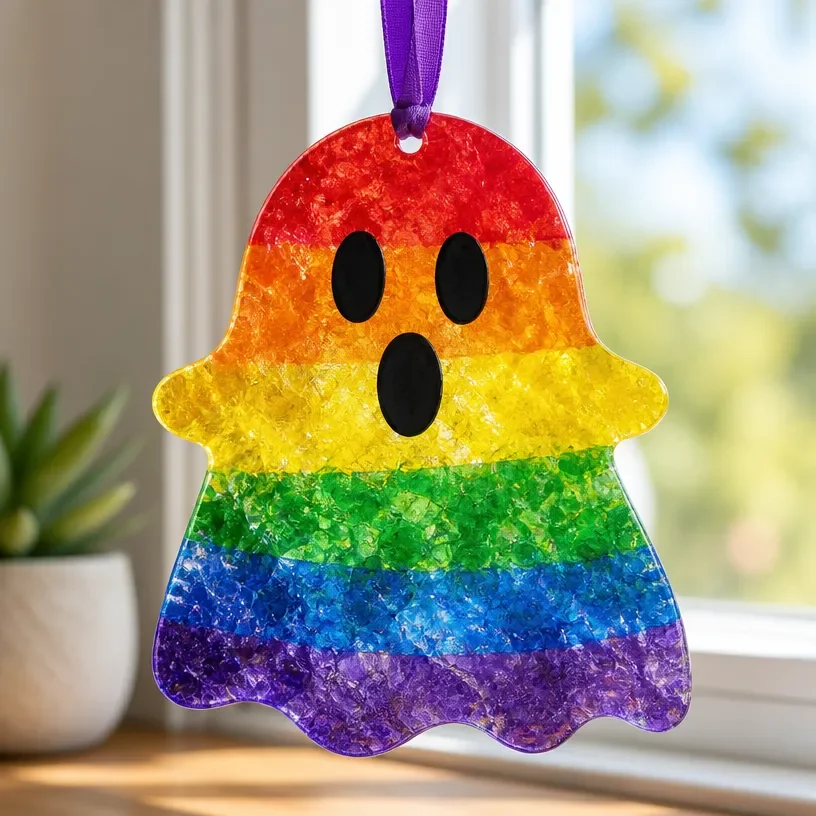
Creating a melted crayon rainbow ghost suncatcher is a delightful way to bring a splash of color into your home. This craft is not only easy and fun but also allows you and your children to explore your creativity. With just a few materials, you’ll create a beautiful decoration that can catch the light and brighten up any space. You may also find Melted Crayon Rainbow Butterfly Suncatcher For Kids useful.
Why You’ll Love This Project
- Creative Expression: This craft gives kids a chance to experiment with colors and designs while expressing themselves artistically.
- Hands-On Fun: The melting aspect of the crayon offers a captivating and unique experience as they watch the colors blend together.
- Seasonal Decor: This ghost-themed suncatcher is perfect for Halloween or as a joyful autumn decoration.
- Simplicity: The step-by-step instructions make it accessible for beginners and enjoyable for the whole family.
You may also find Clear Rainbow Ghost Shaker Suncatcher Craft For Kids useful.
Materials You’ll Need
- Crayons (any colors you like)
- A pencil sharpener or knife
- Wax paper
- An iron (adult supervision required)
- Scissors
- A black marker (for ghost outlines)
- A string or ribbon for hanging
How to Make DIY Melted Crayon Rainbow Ghost Suncatcher Tutorial
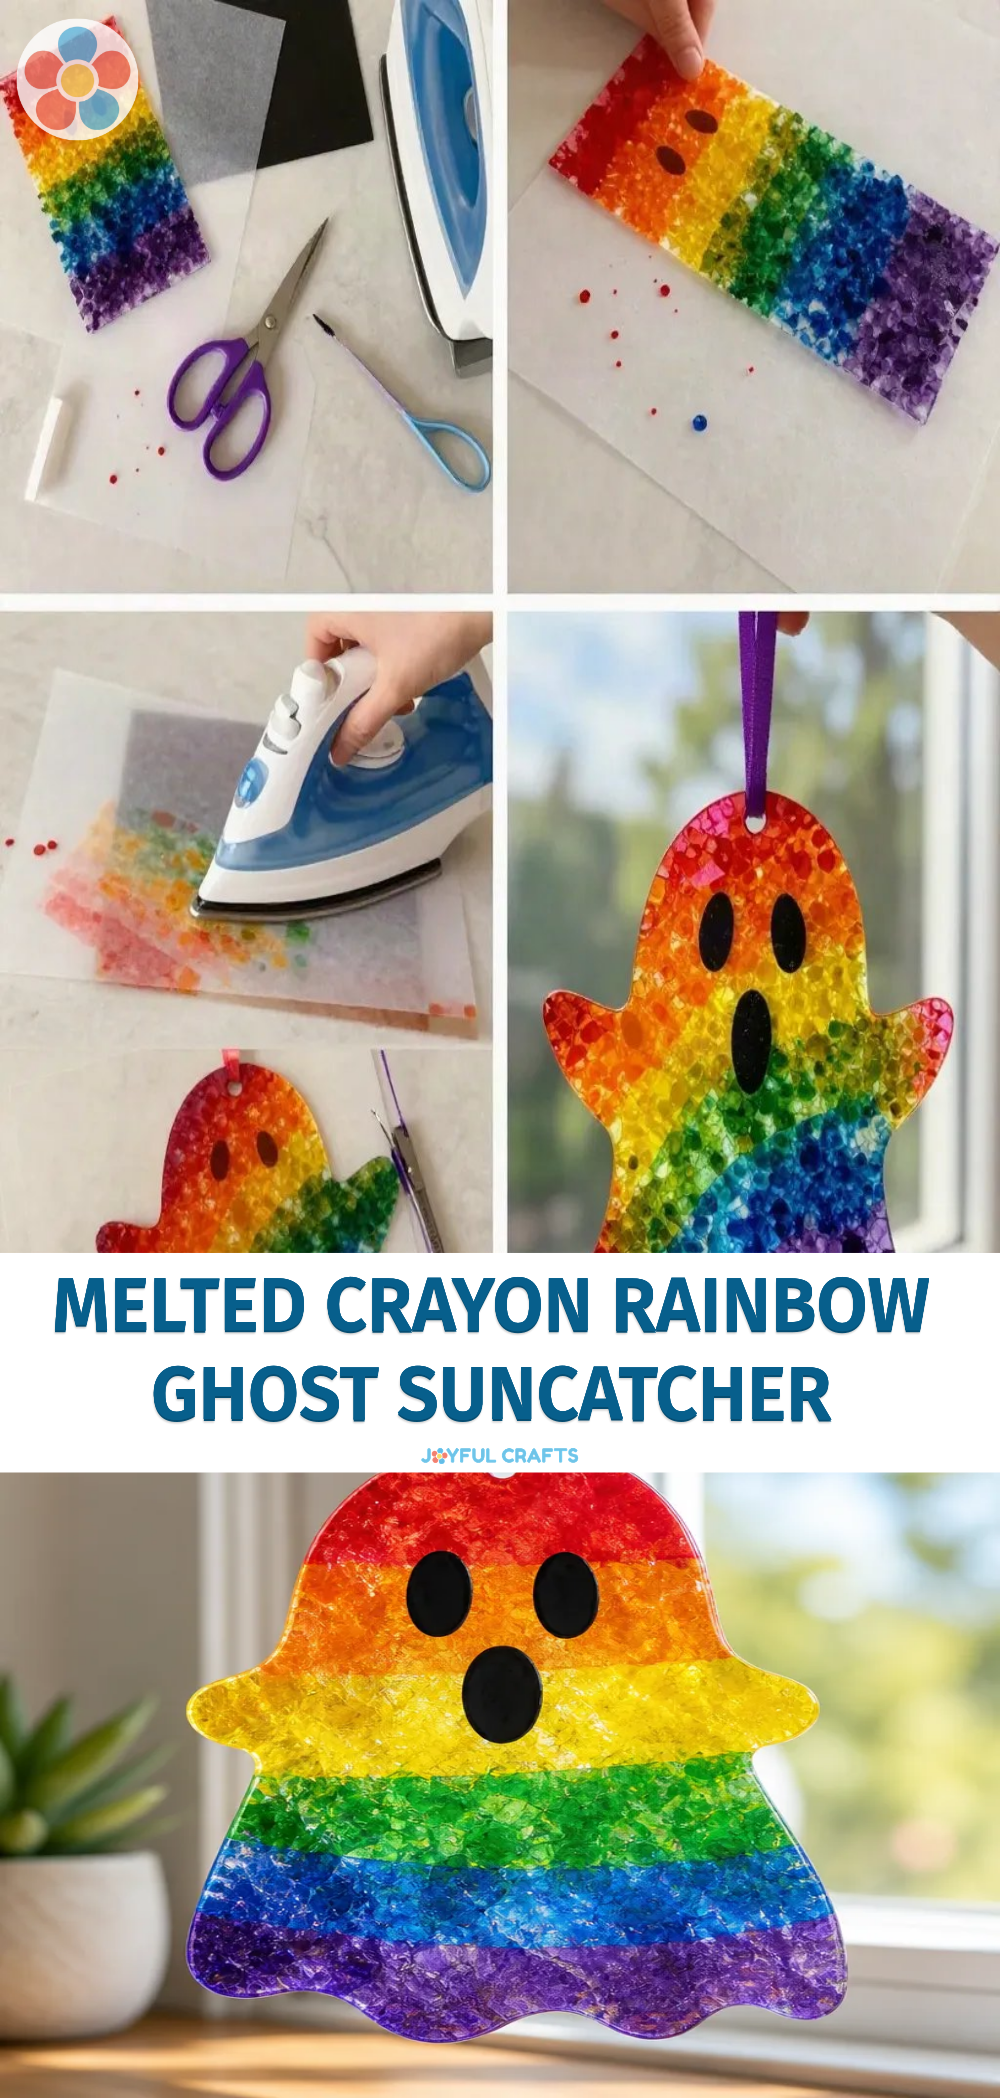
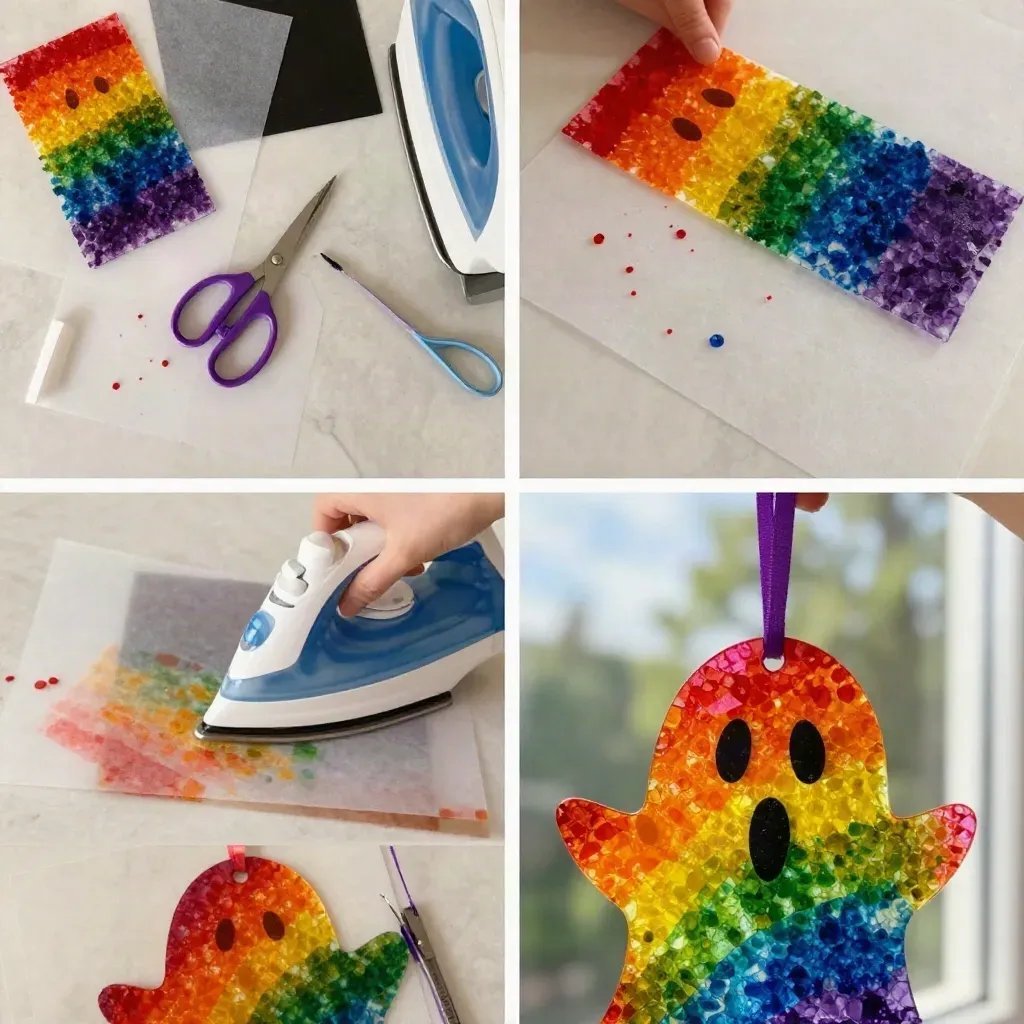
Prepare the Crayons: Start by peeling the labels off your crayons. Use a pencil sharpener or knife to shave the crayons into small pieces. Alternatively, you can use a grater for faster results.
Create the Template: Draw a ghost shape on a piece of wax paper using a black marker. Ensure it has some dimension for a more playful effect.
Layer the Crayon Shavings: Place the ghost template on a flat surface. Scatter the crayon shavings inside the ghost shape, ensuring an even layer. You can mix colors to create a rainbow effect. For more inspirations, check out other exciting projects like the melted crayon rainbow heart suncatcher.
Cover and Melt: Place another sheet of wax paper on top of your crayon shavings. With adult supervision, carefully press an iron onto the top layer of wax paper for a few seconds until the crayon shavings melt.
Cut Out the Ghost: Once cooled, gently peel apart the wax paper layers to reveal your colorful ghost. Use scissors to cut out the shape, leaving a border of wax paper if you like.
Add a Hanging Loop: Attach a piece of string or ribbon to the top of your ghost so it can be hung in a window or any desired area.
Helpful Tips
- Managing Mess: Cover your work surface with newspaper or an old cloth to catch any crayon shavings that may fall.
- Melting: If using an iron, start with a low setting to avoid burning the paper. Always keep a close eye while melting.
- Creative Extensions: You can create other shapes too! Try making a haunted house by following the tutorial for the melted crayon rainbow haunted house suncatcher craft.
Creative Variations
- Try using different shapes like pumpkins or bats for other holidays.
- Adjust the colors to reflect specific seasons: pastel hues for spring or bright colors for summer.
- Decorate the ghost with glitter or additional drawings with a black marker to give it more personality.
Making It With Kids
This project is perfect for crafting with children, but adult supervision is essential, especially with the use of the iron. Encourage kids to pick their favorite colors and enjoy the process of melting the crayons together. If younger children are participating, you can handle the ironing while they help with the preparation.
How to Display, Use, or Gift It
Once your ghost is complete, consider hanging it in a window where sunlight can shine through. You can also use it as a delightful seasonal decoration or gift it to friends and family as a surprise.
Frequently Asked Questions
1. What type of crayons work best?
Regular wax crayons work well for this project. Avoid using very soft crayons as they may produce uneven results.
2. Can I use colored pencils instead of crayons?
No, colored pencils won’t melt the same way as crayons and won’t give the desired colorful effect.
3. How can I store my suncatcher?
For best results, store your suncatcher flat and away from direct sunlight to prevent any warping.
4. Is this project safe for young children?
While the craft is safe overall, be sure to provide adult supervision during the melting process for safety.
5. How long does it take to complete this craft?
The entire process can take about 30 to 45 minutes, depending on how involved you get with decorating.
6. What if we accidentally burned the wax paper?
If the wax paper burns, it’s best to start over as burnt wax can produce harmful fumes.
Conclusion
Creating crafts like this melted crayon rainbow ghost suncatcher is not just an enjoyable activity for families, but it also provides a beautiful result that can brighten your living space. If you’re interested in exploring more melted crayon ideas, you might want to try making melted crayon rocks for an additional crafty experience!
Print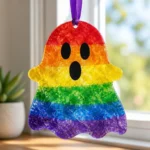
DIY Melted Crayon Rainbow Ghost Suncatcher
- Total Time: 30 minutes
- Makes: 1 suncatcher
Description
Create a vibrant melted crayon ghost suncatcher that brings color and creativity into your home.
Materials
- Crayons (any colors you like)
- A pencil sharpener or knife
- Wax paper
- An iron (adult supervision required)
- Scissors
- A black marker (for ghost outlines)
- A string or ribbon for hanging
Instructions
- Prepare the crayons by peeling the labels off and shaving them into small pieces.
- Create a ghost shape on wax paper using a black marker.
- Layer the crayon shavings inside the ghost shape, mixing colors for a rainbow effect.
- Cover with another sheet of wax paper and carefully press an iron on top to melt the shavings.
- Cut out the ghost shape once cooled, leaving a border of wax paper if desired.
- Add a piece of string or ribbon to hang your ghost in a window.
Notes
Adult supervision is required while using the iron. Cover surfaces to manage mess.