

DIY Melted Crayon Rainbow Butterfly Suncatcher
Creating a DIY melted crayon rainbow butterfly suncatcher is a delightful project that is perfect for kids and families. This craft not only brings out creativity but also brightens up your windows with dazzling colors! With simple materials and easy-to-follow steps, you’ll have a vibrant suncatcher that showcases the beauty of rainbows no matter the season. You may also find Melted Crayon Rainbow Butterfly Suncatcher For Kids useful.
Why You’ll Love This Project
- Creative Expression: This craft allows children to choose their favorite crayon colors, fostering their artistic abilities.
- Brightens Your Space: Once completed, these suncatchers bring a cheerful splash of color to any room.
- Simple and Safe for Kids: Using minimal supplies and safe materials makes it an ideal project for children.
- Engaging Activity: It’s a great way to spend time together as a family, encouraging collaboration and fun.
You may also find Melted Crayon Rainbow Haunted House Suncatcher Craft useful.
Materials You’ll Need
- Crayons (various colors)
- Wax paper
- Cookie sheet
- Oven
- Scissors
- Butterfly template (optional)
How to Make DIY Melted Crayon Rainbow Butterfly Suncatcher
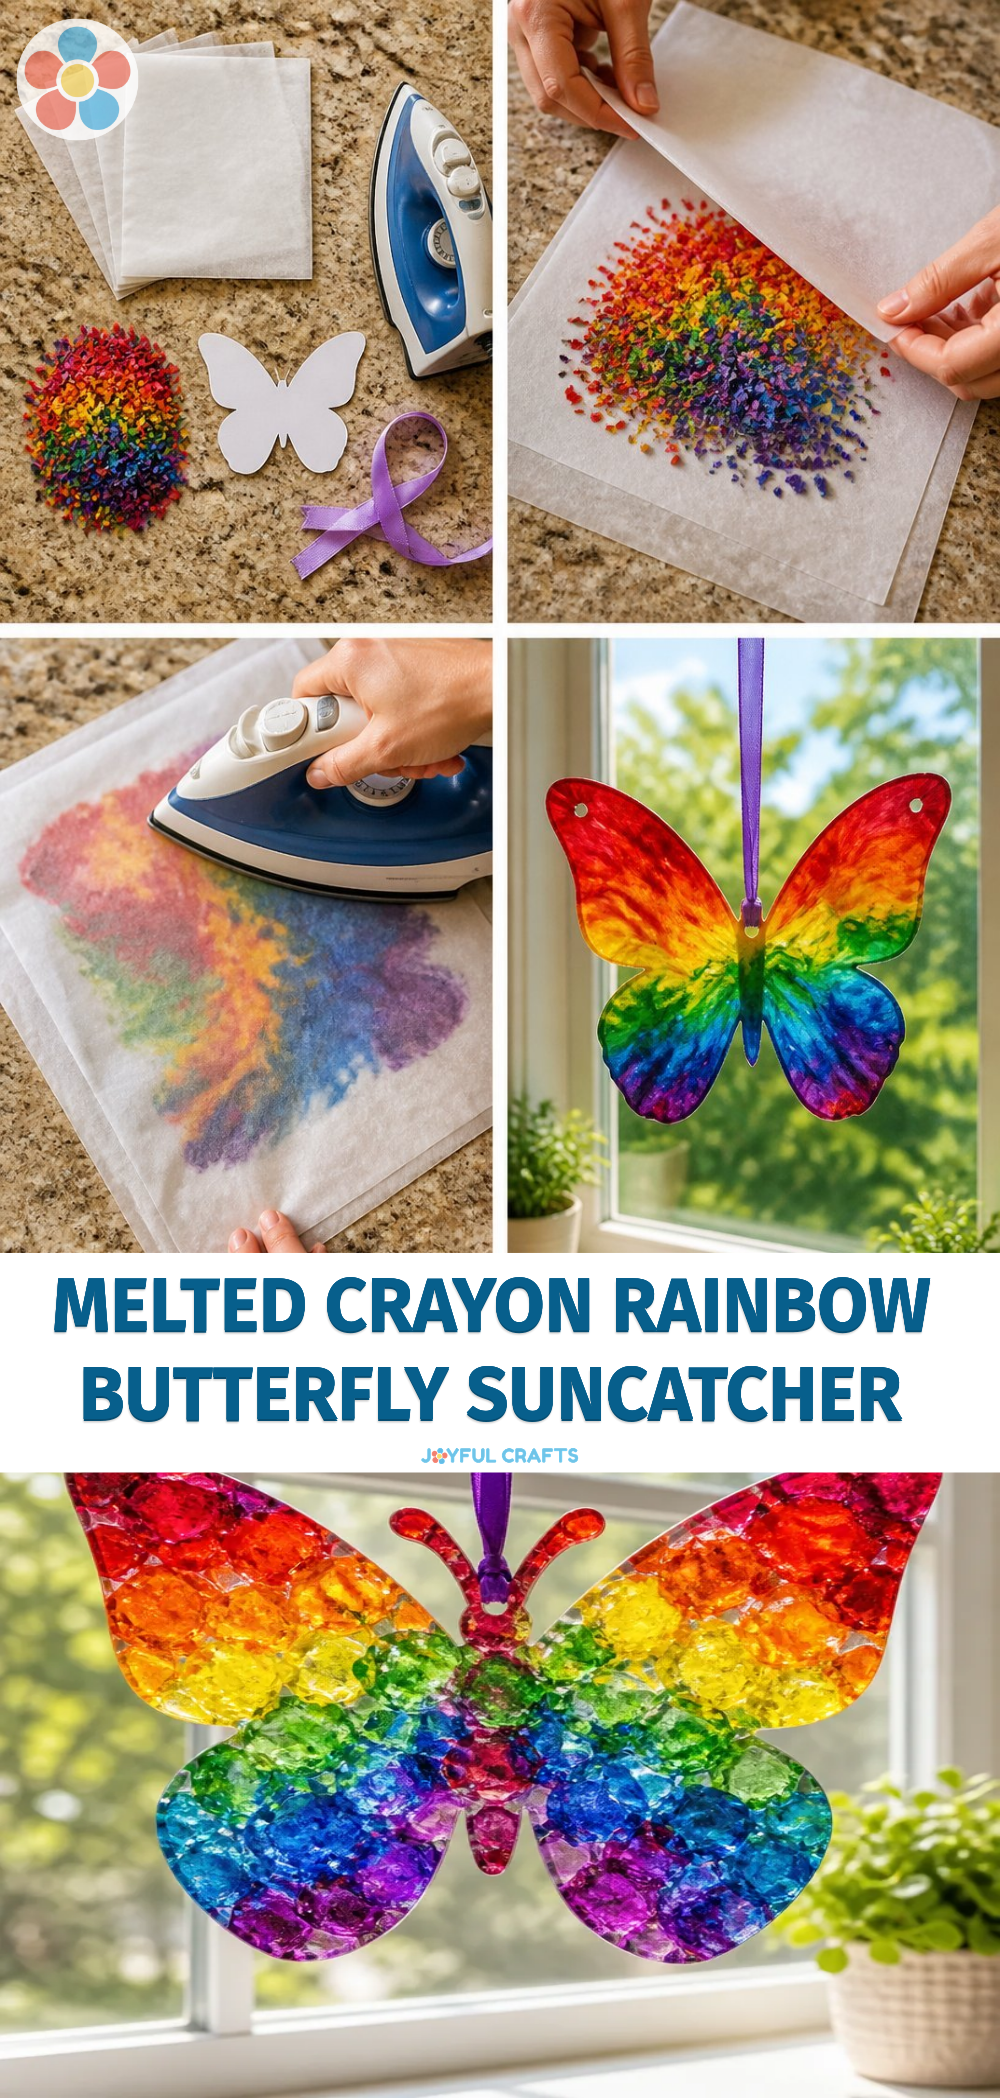
Prepare Your Crayons: Start by removing the paper from the crayons, then break them into small pieces. This will help them melt more evenly. You may also find Melted Crayon Rainbow Heart Suncatcher For Kids useful.
Set Up Your Baking Sheet: Line your cookie sheet with wax paper. If you’re using a butterfly template, place it underneath the wax paper as a guide.
Arrange Crayon Pieces: Scatter the crayon pieces on the wax paper in a colorful pattern. Feel free to mix and match to create your unique design.
Melt the Crayons: Preheat your oven to 200°F (100°C) and place the cookie sheet in the oven. Watch closely as the crayons melt, which typically takes about 8-10 minutes. Once melted, remove the sheet from the oven and let it cool.
Cut Out Your Butterfly: After the crayon wax has hardened, carefully peel the wax paper off. Use scissors to cut out the butterfly shape.
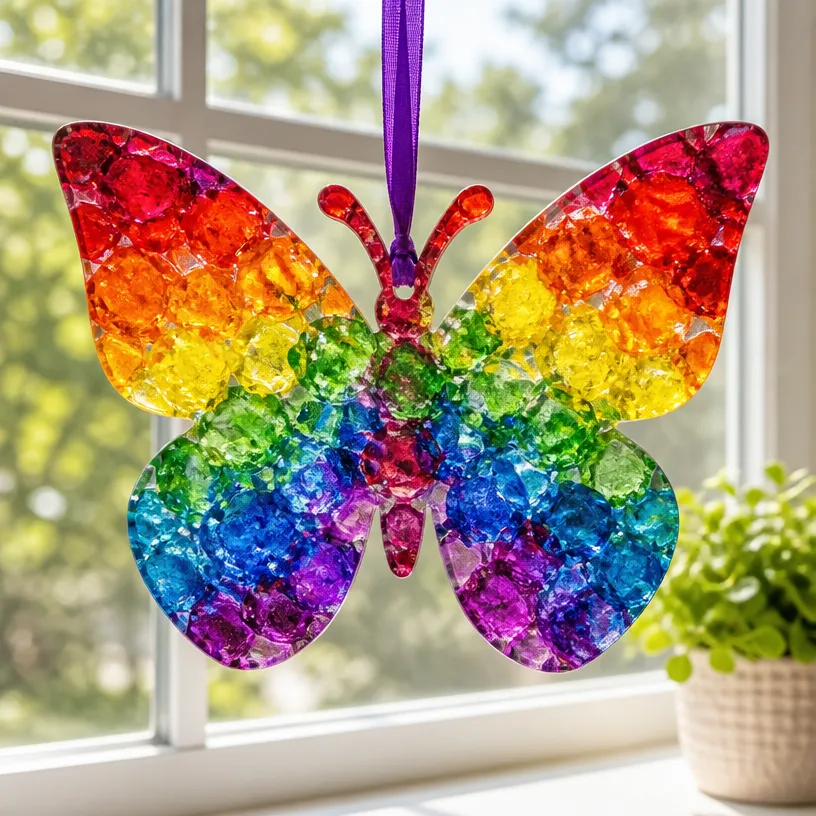
Display Your Suncatcher: Hang your butterfly suncatcher in a sunny window to enjoy the colorful display of light as it shines through.
Helpful Tips
- While melting the crayons, keep an eye on them to avoid any over-melting or burning.
- If your kids are helping, make sure they handle the scissors and the oven with care, and consider supervising them during the melting stage.
- You can easily create other themed suncatchers, such as a rainbow ghost, by following similar steps outlined in other projects like the melted crayon rainbow ghost suncatcher!
Creative Variations
- Experiment with different shapes, such as hearts or stars, to personalize your suncatcher.
- Use metallic or glitter crayons for a more unique shimmer in your design.
- Create seasonal variations, like a fall-themed butterfly with orange and yellow hues.
Making It With Kids
This craft is excellent for kids of all ages! Just ensure that younger children have adult supervision, especially during the melting process. Keep safety scissors on hand if cutting is required, and let the kids select their favorite colors to spark their enthusiasm!
How to Display, Use, or Gift It
Once your suncatcher is complete, it’s perfect for hanging in your window or gifting to a loved one. These colorful creations can also make beautiful decorations for parties or seasonal celebrations, adding a personal touch to your décor.

Frequently Asked Questions
Can I use old crayons?
Yes! Old or broken crayons work perfectly for this project.
What if I don’t have a butterfly template?
You can freehand the shape, or create your own design!
How long does the suncatcher last?
As long as it’s kept out of direct sunlight for long periods, it should hold up well.
Can I add stickers or other decorations?
Absolutely! Adding stickers after the suncatcher is cut can make it even more fun.
Conclusion
The DIY melted crayon rainbow butterfly suncatcher is a wonderful way to enjoy the colorful beauty of art in your home. For more inspiration on melted crayon crafts, you can check out this fantastic resource for additional ideas that will surely spark creativity in your crafting adventures!
Print
DIY Melted Crayon Rainbow Butterfly Suncatcher
- Total Time: 25 minutes
- Makes: 1 suncatcher
Description
A fun and colorful DIY project for kids to create beautiful butterfly suncatchers using melted crayons.
Materials
- Crayons (various colors)
- Wax paper
- Cookie sheet
- Oven
- Scissors
- Butterfly template (optional)
Instructions
- Prepare your crayons by removing the paper and breaking them into small pieces.
- Set up your baking sheet by lining it with wax paper.
- Arrange crayon pieces on the wax paper in a colorful pattern.
- Melt the crayons in a preheated oven at 200°F (100°C) for 8-10 minutes.
- Cut out your butterfly shape after the wax has hardened.
- Display your suncatcher in a sunny window to enjoy the colors.
Notes
Keep an eye on the crayons while melting to prevent burning. Supervise kids when using scissors and the oven.