


Acrylic Rock Painting on Both Sides
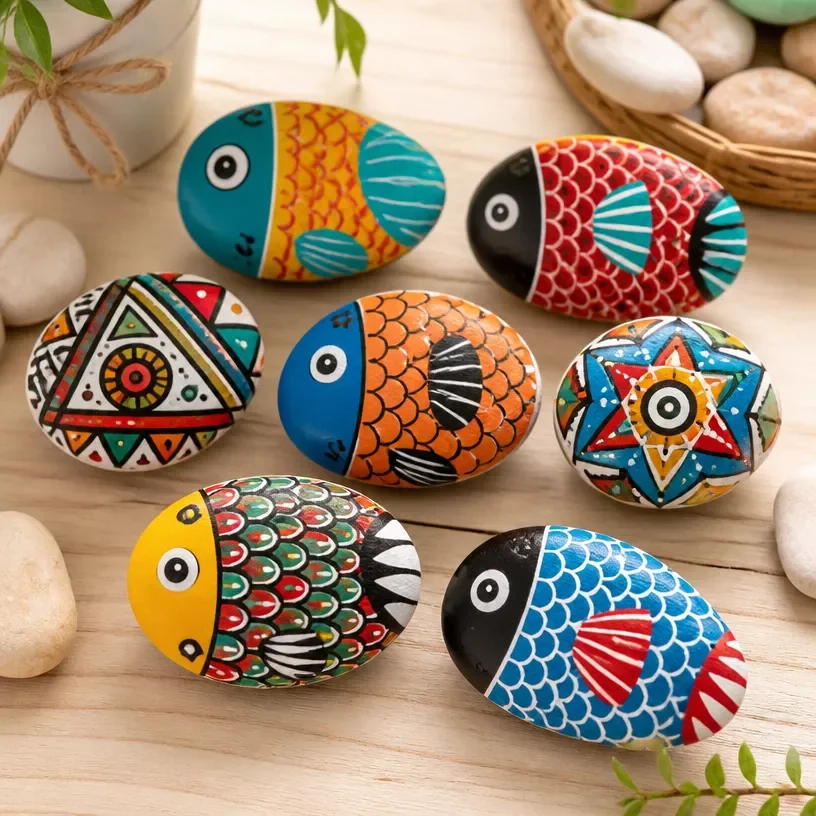
Rock painting is a delightful way to express your creativity while spending quality time with family or friends. This project allows you to decorate rocks with vibrant colors and designs, transforming ordinary stones into beautiful pieces of art. Plus, the joy of seeing your creations displayed around your home or yard is truly rewarding. In this guide, we’ll explore how to paint on both sides of a rock, ensuring your artwork shines from every angle. You may also find Diy Pinwheel Painting Water Balloons Kids useful.
Why You’ll Love This Project
- Creativity Unleashed: Painting rocks encourages self-expression and creativity. You can choose any design that inspires you!
- Easy for All Ages: This project is suitable for both kids and adults, making it perfect for family craft days.
- Outdoor Fun: You can enjoy this craft outdoors, allowing for a refreshing change of scenery.
- Personal Keepsakes: These painted rocks can serve as personalized gifts or decorative accents in your home.
- Connect with Nature: Collecting rocks from your surroundings adds an element of nature to your creative process.

You may also find Water Balloon Painting Pinwheels For Kids useful.
Materials You’ll Need
- Smooth river stones
- Acrylic paints
- Paintbrushes in various sizes
- Sealer (optional)
- Water container for rinsing brushes
- Paper towels or cloth for drying
- Palette for mixing colors
How to Make Acrylic Rock Painting on Both Sides
- Prepare Your Workspace: Start by cleaning the rocks under running water to remove any dust or dirt. Dry them off with a cloth.
- Plan Your Design: Think about what you want to paint on each side of the rock. You might want to create matching designs or different themes.
- First Side Painting: Use your acrylic paints and brushes to begin painting on one side of the rock. Allow your creativity to flow, whether you’re painting patterns, characters, or scenery.
- Let It Dry: After finishing the first side, let the paint dry completely. This usually takes about 30-60 minutes, depending on the thickness of the paint.
- Flip for the Second Side: Once the first side is dry, flip the rock over to paint the second side. Remember to take your time and ensure the paint application is just as fun as the first side.
- Apply a Sealer (Optional): If you want to protect your artwork, consider applying a sealer. This is especially useful if you plan to display the rocks outdoors.
- Display Your Rocks: Once everything is dried and sealed, find a lovely spot for your newly painted rocks.

Helpful Tips
- Use Thin Coats: Instead of thick applications, use thin layers of paint to avoid drips and ensure even coverage.
- Mix Colors: Don’t hesitate to mix your colors for unique shades and effects.
- Use Natural Light: Painting in natural light helps you see true colors and details better.
- Work with Friends: Share the joy by inviting family or friends to join in on the rock painting fun.
Creative Variations
- Seasonal Designs: Decorate rocks with seasonal themes like autumn leaves, winter snowflakes, or spring flowers.
- Personal Messages: Consider adding inspirational words or phrases to your rocks.
- Use Different Techniques: Experiment with sponging, stippling, or even splattering paint for diverse textures and appearances.
Making It With Kids
This project is a fantastic way to engage children in art. Ensure they have adult supervision, especially with paintbrushes and other materials. Encourage them to embrace their creative side by allowing complete freedom in their designs. For younger kids, consider using larger rocks which are easier to handle and paint. You may also find 3D Raised Salt Painting Colorful Artwork For Kids useful.
How to Display, Use, or Gift It
Once you’ve completed the rock painting project, you can display your art around your home, in your garden, or even use them as paperweights on your desk. These rocks also make lovely personalized gifts for family and friends, brightening their spaces and spreading joy. You may also find Blue Lagoon Sensory Bottle Calm Relaxation useful.
Frequently Asked Questions
Can I use regular paint instead of acrylic?
While you could use other types of paint, acrylic is preferred for its durability and ease of use on stone.
What if it rains?
If you plan to display your painted rocks outside, using a sealer will help protect your art from rain and moisture.
Can I paint on any type of rock?
Smooth river stones are best as they provide a nice surface for painting. Other types of stones can be used but may need more preparation.
How do I erase mistakes?
If you make a mistake while painting, simply allow it to dry and use white acrylic paint to cover it, then paint over with your desired color.
Are there any safety precautions for kids?
Yes, make sure kids have adult supervision. Provide aprons or old t-shirts to protect their clothing from paint stains.
How long will my painted rocks last?
With proper sealing and care, your painted rocks can last for years, preserved as beautiful pieces of art.
Conclusion
Acrylic rock painting is a joyful craft that anyone can enjoy, bringing creativity into your home. It’s a way to connect with nature and create beautiful, personalized art. For further inspiration and guidance on painting projects, check out How to Paint Rocks – A Beginner’s Rock Painting Guide.
Print
Acrylic Rock Painting on Both Sides
- Total Time: 1 hour
- Makes: Multiple decorative rocks
Description
Transform ordinary stones into beautiful pieces of art with this fun and creative acrylic rock painting project.
Materials
- Smooth river stones
- Acrylic paints
- Paintbrushes in various sizes
- Sealer (optional)
- Water container for rinsing brushes
- Paper towels or cloth for drying
- Palette for mixing colors
Instructions
- Prepare your workspace by cleaning the rocks under running water.
- Plan your design for each side of the rock.
- Begin painting on one side of the rock with your acrylic paints.
- Let the paint dry completely, which can take 30-60 minutes.
- Flip the rock over to paint the second side.
- Apply a sealer if desired to protect your artwork.
- Display your newly painted rocks in a lovely spot.
Notes
Use thin coats of paint for even coverage and consider using natural light for the best results.