

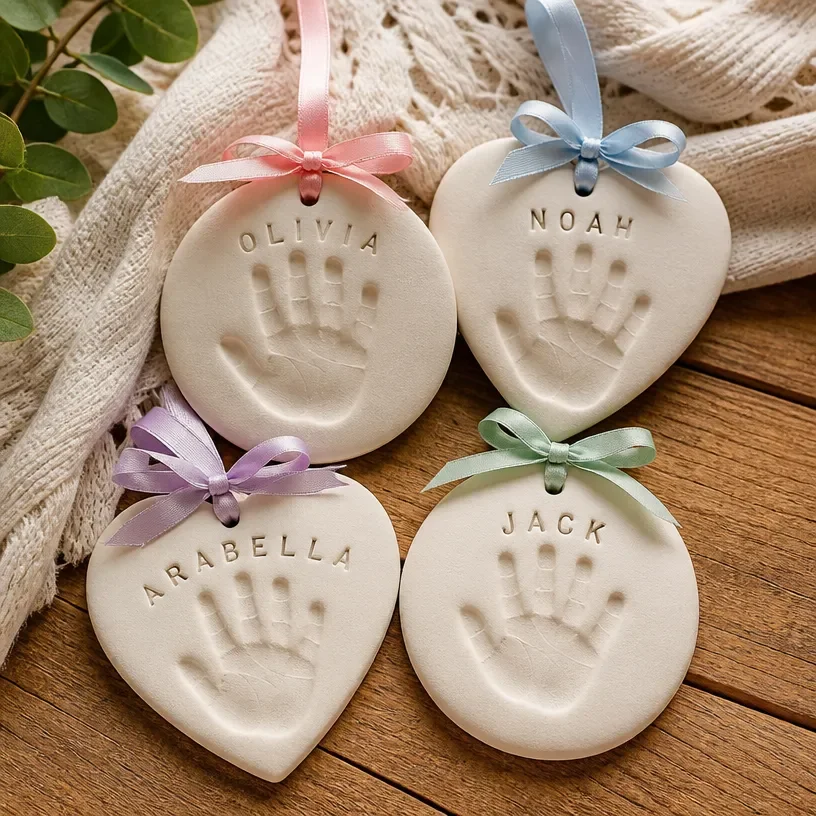
Salt Dough Handprint Keepsake
Creating a Salt Dough Handprint Keepsake is a delightful way to capture precious memories of your child’s growth. This hands-on project not only offers a fun crafting experience but results in a timeless memento that you can cherish for years to come. Plus, it’s an excellent way to engage with your kids while they learn about crafting techniques. You may also find 3D Raised Salt Painting Colorful Artwork For Kids useful.
Why You’ll Love This Project
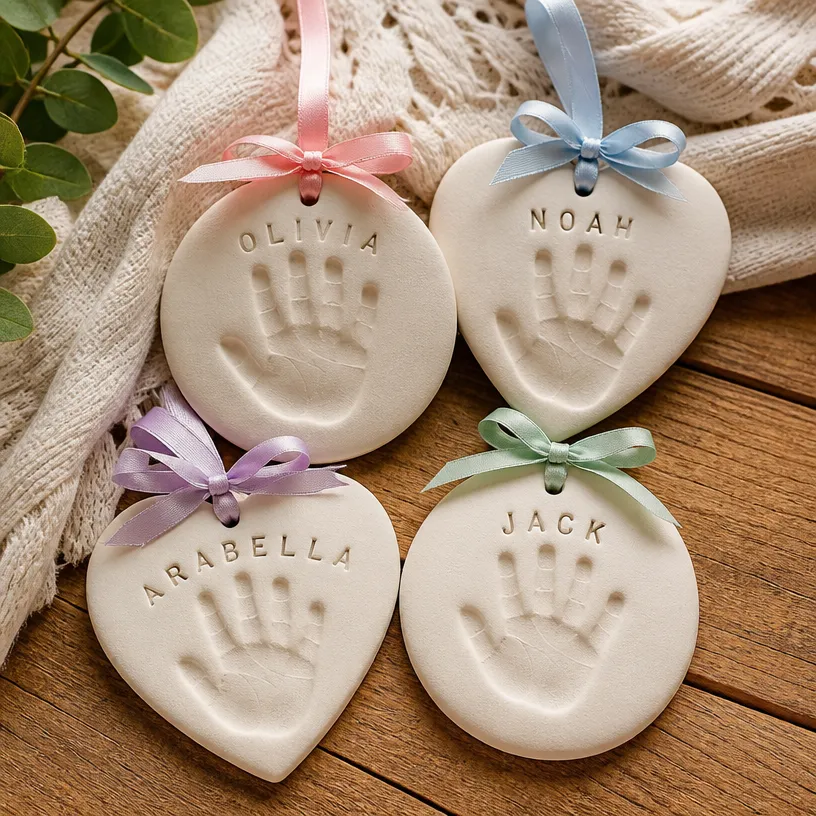
- Memorable Keepsake: This project creates a unique and personalized piece of art that reflects your child’s handprint at a specific age.
- Easy and Affordable: With simple materials, you can create this beautiful keepsake without breaking the bank.
- Quality Family Time: Enjoy the bonding experience as you craft together, sharing stories and laughter along the way.
- Versatile Decor: Once completed, these handprints can be displayed throughout your home or given as thoughtful gifts to family members.
- Creativity Unleashed: This project encourages kids to express their creativity, whether through painting, decorating, or adding personal touches.
You may also find Bubble Dough Sensory Play For Kids useful.
Materials You’ll Need
- 2 cups all-purpose flour
- 1 cup salt
- 1 cup water
- Cookie cutters (optional for shapes)
- Rolling pin
- Acrylic paints (for decorating)
- Paintbrush (for applying paint)
- A straw (to make a hole for hanging, if desired)
- A baking sheet
How to Make Salt Dough Handprint Keepsake
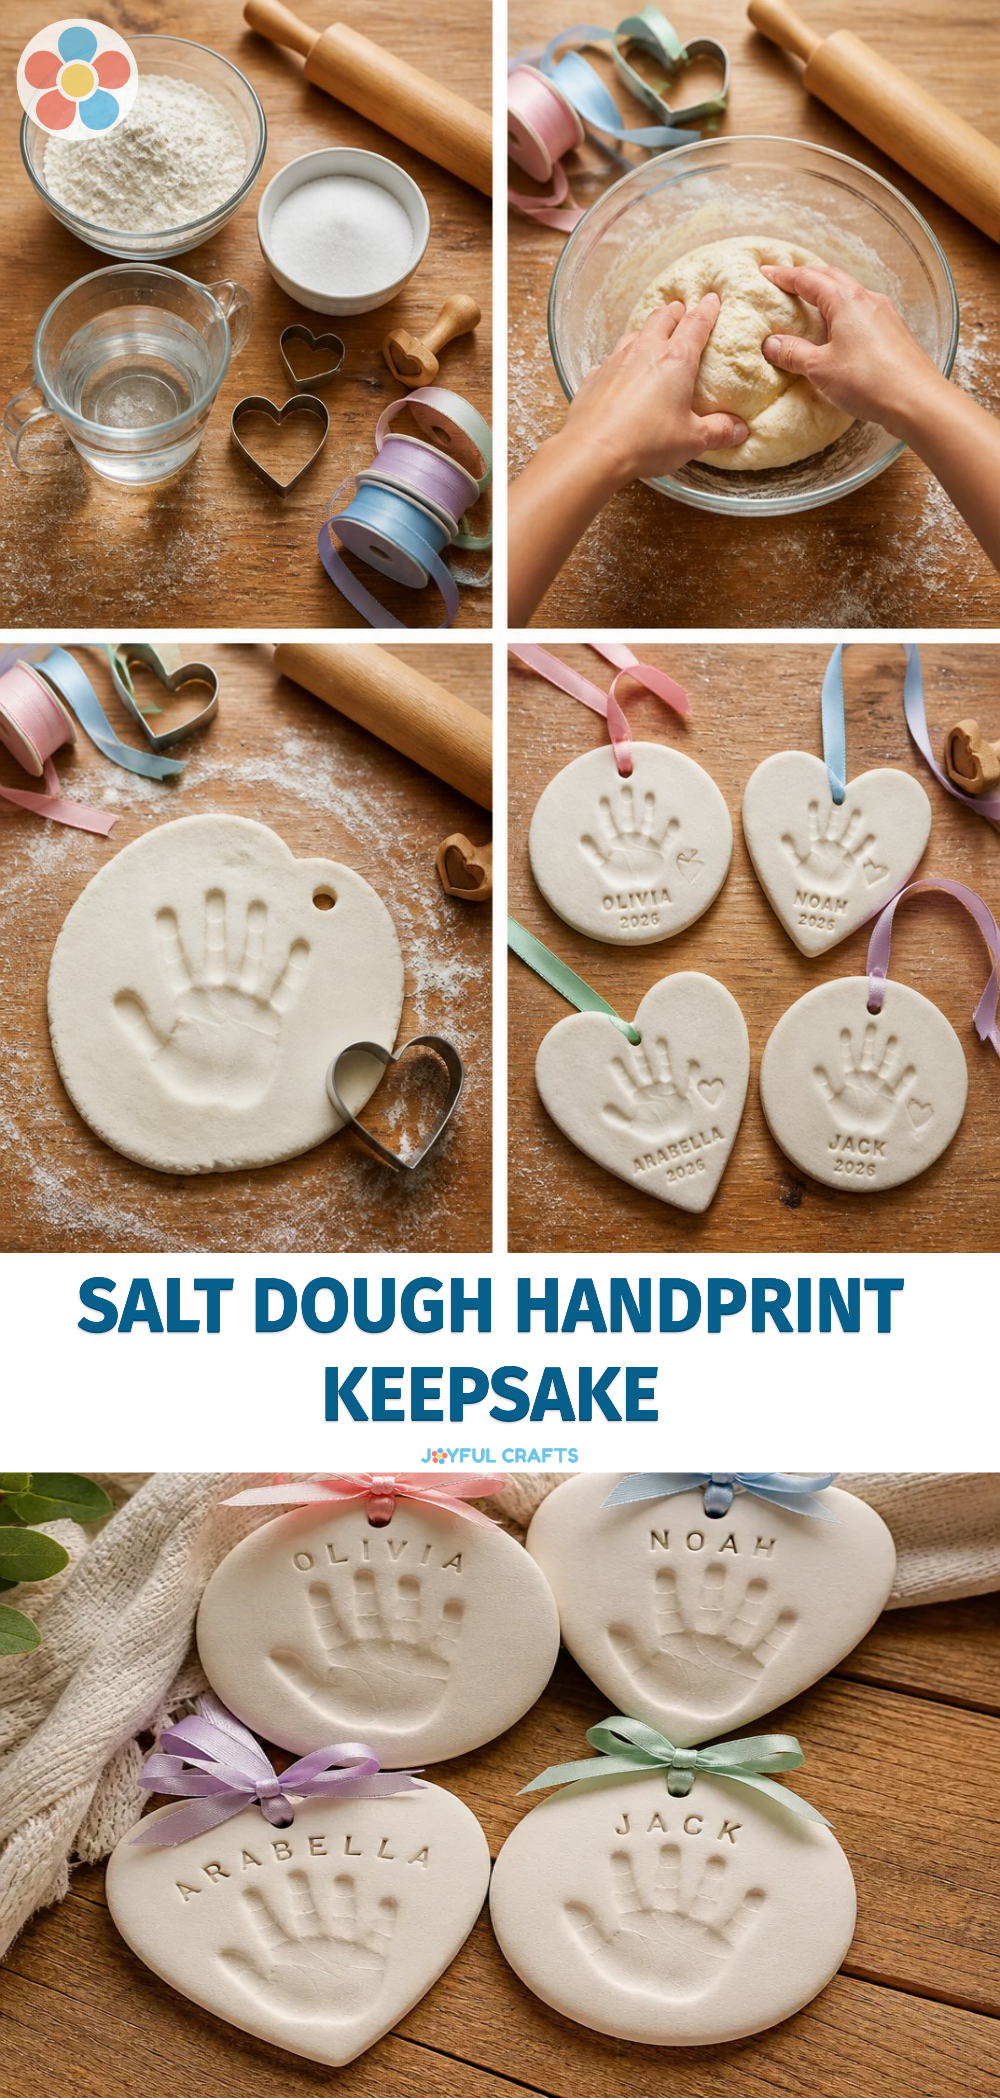
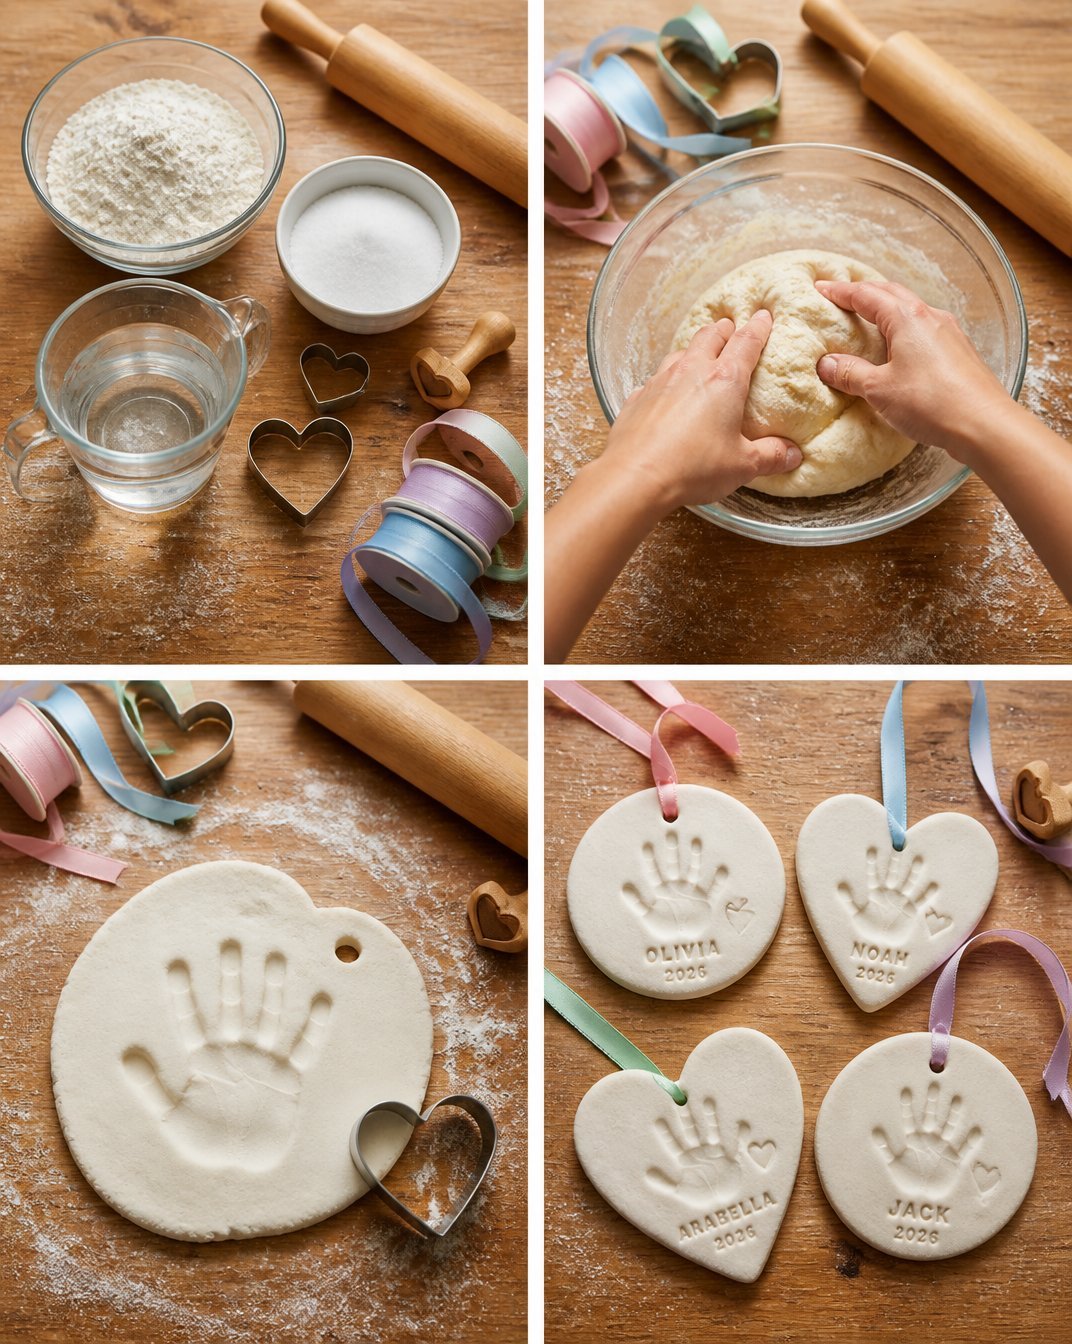
- Prepare the Dough: In a large bowl, mix the flour and salt. Gradually add the water until a dough forms. Knead it for a few minutes until smooth.
- Roll Out the Dough: Use a rolling pin to flatten the dough to about 1/2 inch thick on a clean surface.
- Create Handprints: Press your child’s hand firmly into the dough to make an impression. If you’re using cookie cutters, you can cut shapes around the handprint.
- Make a Hole: If you would like to hang the keepsake, use a straw to create a small hole at the top.
- Bake: Place the dough on a baking sheet and bake it in the oven at 200°F for about 2-3 hours or until it’s completely hardened. Check frequently to prevent burning.
- Cool and Paint: Let it cool completely. Then, let your child paint and decorate their keepsake as they wish.
- Display: Once the paint is dry, your keepsake is ready to be displayed or gifted!
Helpful Tips
- Mess Management: Lay down a plastic tablecloth or newspaper to contain any mess, making cleanup easier.
- Adult Supervision: If using scissors or hot surfaces, be sure to supervise your child at all times.
- Personalize: Encourage your child to get creative with colors and designs. They can add their name or the date using paint or markers.
Creative Variations
- Seasonal Themes: Consider creating themed decorations for holidays by using festive colors or adding embellishments.
- Different Shapes: Instead of just handprints, you could make foot prints, or even use cookie cutters to create various shapes.
- Multi-Hand Keepsake: Create a family keepsake by including multiple handprints of siblings or parents together.
Making It With Kids
This project is perfect for kids of any age, but younger children may need more guidance. Older children can take the lead with painting and decorating. Be patient and enjoy the process every handprint is unique! You may also find Bubbly Dough Sensory Activities For Kids useful.
How to Display, Use, or Gift It
Once your Salt Dough Handprint Keepsake is complete, consider displaying it on a shelf, mantel, or in a frame. It’s also a wonderful gift idea for grandparents or other family members, especially during holidays or special occasions. You may also find Diy Rainbow Handprint Flower Frame Grandparents Day useful.
Frequently Asked Questions
1. How long will the keepsake last?
With proper care, your salt dough keepsake can last for many years.
2. Can I use food coloring instead of acrylic paint?
While food coloring can be used, it may not be as vibrant or permanent as acrylic paint.
3. What should I do if the dough is too sticky?
If the dough is too sticky, add a bit more flour until it reaches the desired consistency.
4. How can I prevent cracks in the dough?
Make sure to knead the dough well, and avoid adding too much flour while rolling it out, which can cause cracks during baking.
Conclusion
Making a Salt Dough Handprint Keepsake is a rewarding activity that helps you explore crafting with your children. For more tips on creating a wonderful salt dough mixture, check out The Best Salt Dough (for Ornaments and Crafting!). Enjoy crafting memories!
Print
Salt Dough Handprint Keepsake
- Total Time: 195 minutes
- Makes: 1 keepsake
Description
Create a memorable keepsake of your child’s handprint with this easy and affordable salt dough project.
Materials
- 2 cups all-purpose flour
- 1 cup salt
- 1 cup water
- Cookie cutters (optional for shapes)
- Rolling pin
- Acrylic paints (for decorating)
- Paintbrush (for applying paint)
- A straw (to make a hole for hanging, if desired)
- A baking sheet
Instructions
- Prepare the dough: In a large bowl, mix the flour and salt. Gradually add the water until a dough forms. Knead it for a few minutes until smooth.
- Roll out the dough: Use a rolling pin to flatten the dough to about 1/2 inch thick on a clean surface.
- Create handprints: Press your child’s hand firmly into the dough to make an impression. If you’re using cookie cutters, you can cut shapes around the handprint.
- Make a hole: If you would like to hang the keepsake, use a straw to create a small hole at the top.
- Bake: Place the dough on a baking sheet and bake it in the oven at 200°F for about 120-180 minutes or until it’s completely hardened. Check frequently to prevent burning.
- Cool and paint: Let it cool completely. Then, let your child paint and decorate their keepsake as they wish.
- Display: Once the paint is dry, your keepsake is ready to be displayed or gifted!
Notes
Encourage creativity with colors and designs.