


Colorful Rainbow Puppy Lantern with Ghost Glow Nightlight
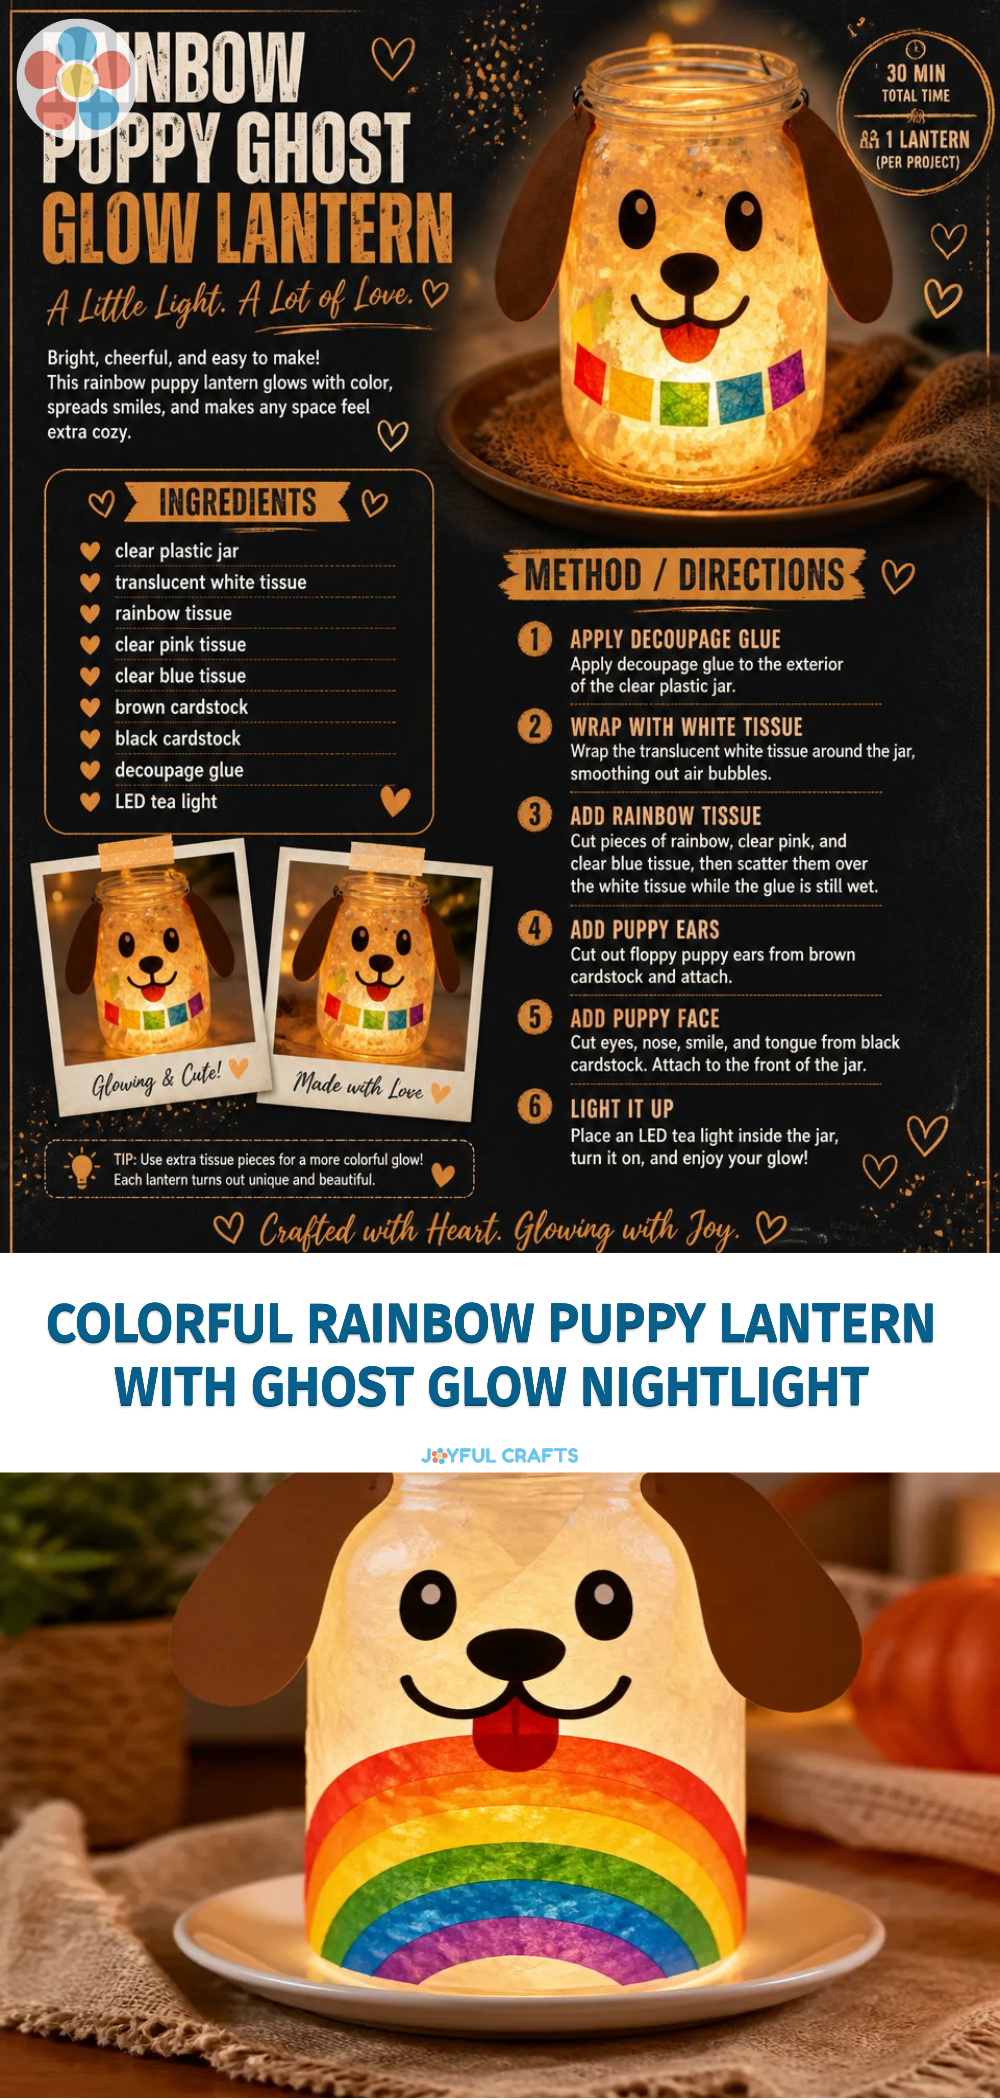
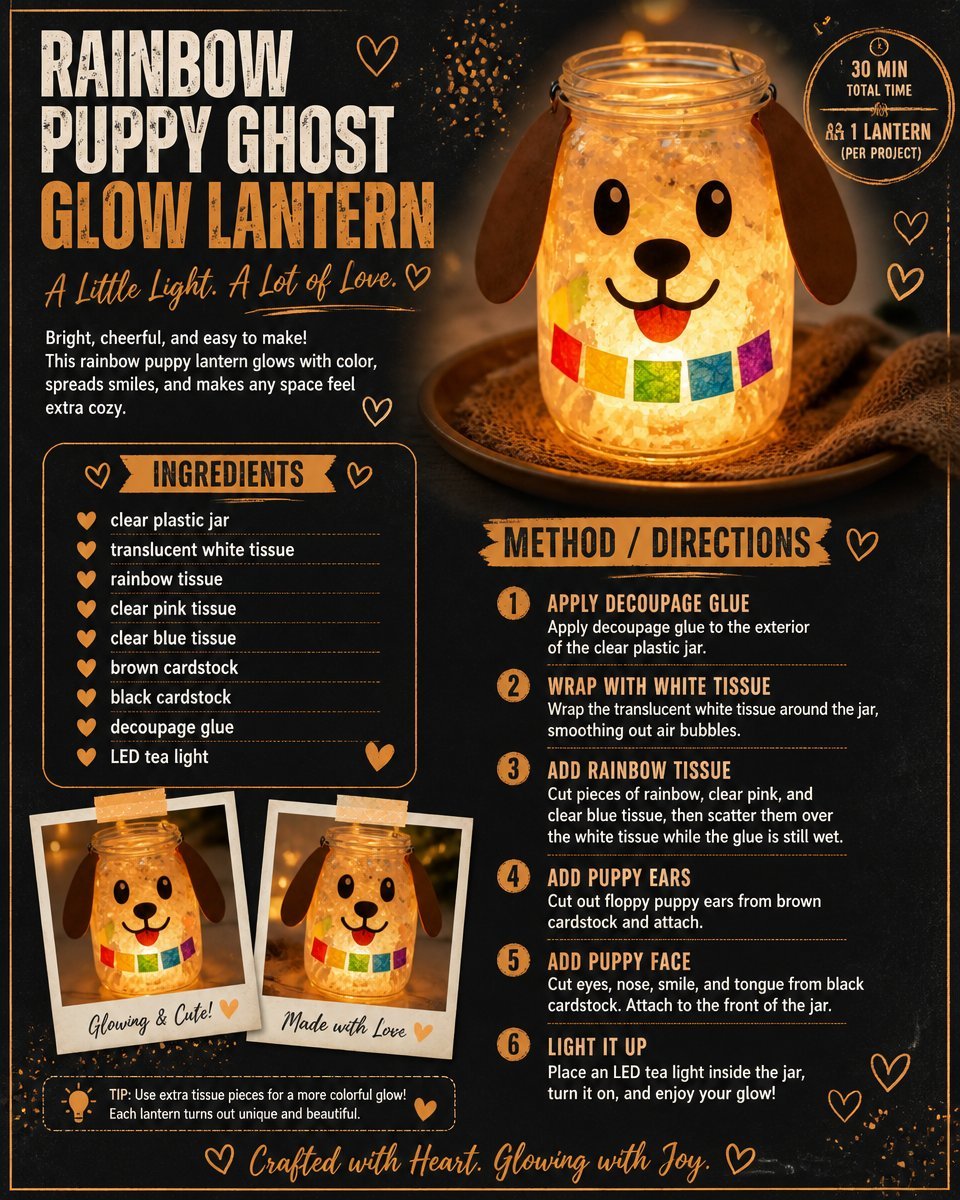
Creating a Colorful Rainbow Puppy Lantern with a natural ghost glow is not just a fun craft; it’s also a lovely way to brighten up a child’s room. This adorable lantern serves multiple purposes it can be a playful nightlight or a vibrant decoration during festive gatherings. Plus, engaging in this DIY project nurtures creativity and fine motor skills. Let’s dive into this delightful project! You may also find Clear Rainbow Ghost Shaker Suncatcher Craft For Kids useful.
Why You’ll Love This Project
- Fun and Interactive: Kids will love personalizing their lanterns, enhancing both their creativity and crafting skills.
- Skill Building: This project encourages fine motor skills through cutting, gluing, and crafting processes.
- Creative Display: The finished lantern serves as a charming decorative piece or nightlight, making any space feel cozy.
- Easy Materials: Most of the materials are common and easy to find, making this an affordable craft solution.
- Opportunity for Storytelling: Each lantern can have its own story, sparking imagination and creativity in children.
You may also find Colorful Rainbow Monster Pencil Holder For Kids useful.
Materials You’ll Need
- Colored paper (red, orange, yellow, green, blue, indigo, violet)
- A clear glass jar
- A battery-operated tealight
- Glue stick
- Scissors
- Black marker
- Paintbrush (optional for adding details)
How to Make Colorful Rainbow Puppy Lantern with Ghost Glow Nightlight
Prepare Your Space: Gather all materials and set up your crafting area to keep things tidy. You may also find Diy Glass Bottle Lanterns Spooky Ghost Lighting useful.
Cut the Colored Paper: Cut strips of colored paper. Each strip should measure about 1 inch wide. Use all the colors of the rainbow for a delightful effect!
Create the Puppy Face: On one piece of colored paper (like yellow or brown), draw a cute puppy face using the black marker. This face will be glued onto one side of the jar.
Attach the Rainbow Strips: Begin gluing the rainbow-colored strips around the jar, overlapping them slightly as you go. This creates a vibrant and colorful effect.
Add the Tealight: Place the battery-operated tealight inside the jar to complete the lantern. Make sure to position it in the center for an even glow.
Final Touches: If desired, paint or add additional decorations to make your lantern pop!

Helpful Tips
- Adult Supervision: If children are using scissors or glue, it’s best to have an adult supervise to ensure safety.
- Experiment with Patterns: Encourage kids to experiment with different patterns and colors for their lanterns for a more unique look.
- Using a Glow Bottle: If you’d like to explore more glowing crafts, consider making glow-in-the-dark bottles for extra ambiance.
Creative Variations
- Different Shapes: Instead of a puppy face, draw other fun animal faces to personalize the lantern.
- Seasonal Themes: Use holiday colors or decorations to make lanterns for different occasions like Halloween or Christmas.
- Larger Lanterns: Use bigger jars or even plastic containers for a larger family craft project!
Making It With Kids
This project is perfect for kids of all ages, but younger children might need help with cutting and attaching the lantern’s components. Pair up kids with adults for a collaborative crafting experience that fosters teamwork and conversation.
How to Display, Use, or Gift It
The Colorful Rainbow Puppy Lantern can be placed on a bedside table or a shelf as a decorative piece. It also makes for a wonderful, handmade gift for special occasions. The warm glow creates a comforting atmosphere for sleepovers or cozy nights at home.
Frequently Asked Questions
What type of glue works best?
Use a glue stick for adhering paper to the jar. For more sturdy attachments, consider a hot glue gun (with adult supervision).
Can I use real candles?
It’s safer to use a battery-operated tealight to avoid any fire hazards, especially if children are involved.
How can I clean the lantern?
Wipe the outside of the jar gently with a damp cloth to keep it clean without damaging any paper.
Is it possible to use less bright colors?
Absolutely! Customize the lantern with pastel colors or more muted tones to suit your style.
How can I store it when not in use?
Keep it in a safe spot, like a tote or a box, to prevent it from breaking or getting damaged.
Can I make this project without a jar?
If you don’t have a jar, you can use other clear containers like plastic bottles or even cardboard boxes with a translucent cover.
Conclusion
Crafting a Colorful Rainbow Puppy Lantern with ghostly glow is a delightful way to ignite creativity and brighten up any space. It not only adds charm to a room but also creates an inviting atmosphere for nighttime. For additional fun and themed items, check out resources for creative supplies like Prism Skull LED Lights. Happy crafting!
Print
Colorful Rainbow Puppy Lantern with Ghost Glow Nightlight
- Total Time: 15 minutes
- Makes: 1 lantern
Description
Create a vibrant Colorful Rainbow Puppy Lantern that serves as a charming nightlight and decoration, perfect for brightening up a child’s room.
Materials
- Colored paper (red, orange, yellow, green, blue, indigo, violet)
- A clear glass jar
- A battery-operated tealight
- Glue stick
- Scissors
- Black marker
- Paintbrush (optional for adding details)
Instructions
- Prepare Your Space: Gather all materials and set up your crafting area to keep things tidy.
- Cut the Colored Paper: Cut strips of colored paper, about 1 inch wide, using all the colors of the rainbow.
- Create the Puppy Face: Draw a cute puppy face on one piece of colored paper, then glue it onto one side of the jar.
- Attach the Rainbow Strips: Glue the rainbow-colored strips around the jar, overlapping them slightly.
- Add the Tealight: Place the battery-operated tealight inside the jar, centered for an even glow.
- Final Touches: Optionally paint or add more decorations to enhance your lantern.
Notes
Remember to supervise children when using scissors and glue. Experiment with patterns for unique designs.