


Rainbow First Day Photo Frame for Baby – Keepsake Gift
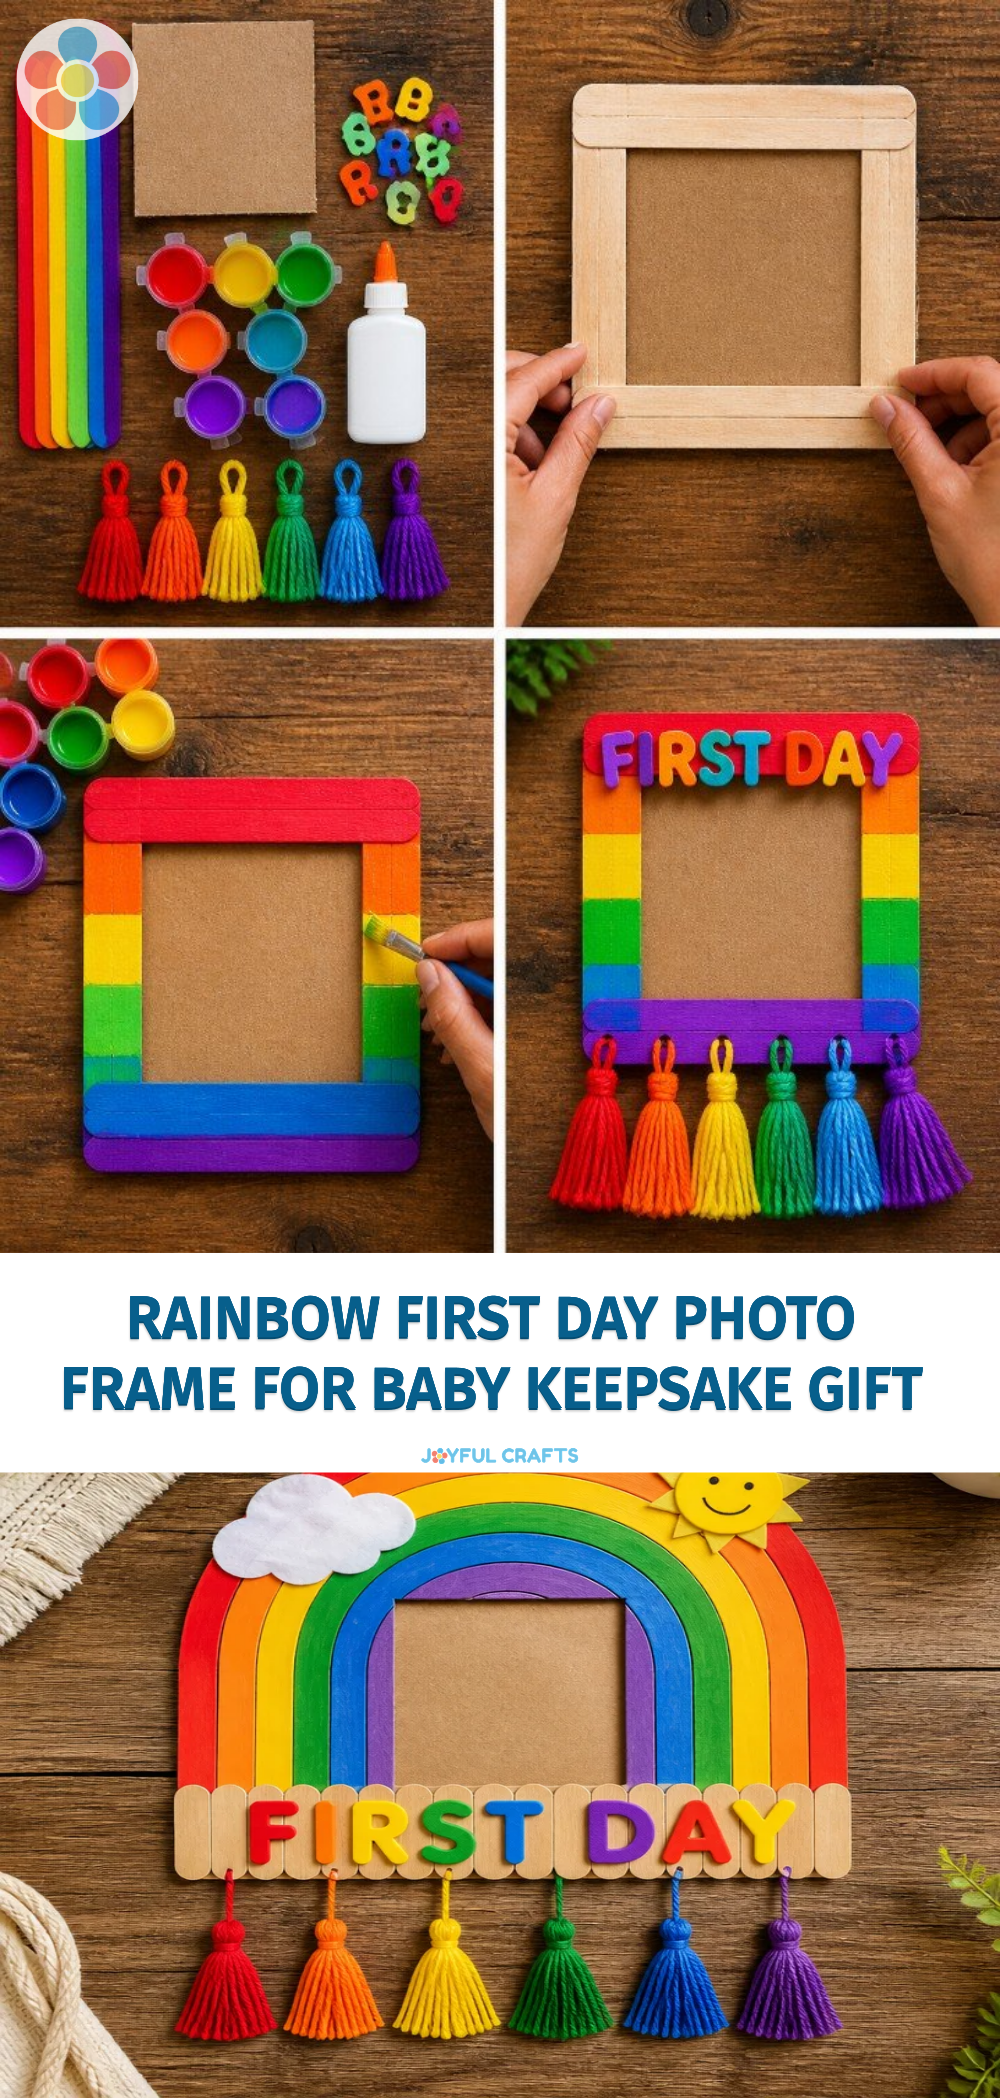
Creating a colorful and cheerful Rainbow First Day Photo Frame for your little one’s special day is a delightful project that not only captures memories but also adds a personal touch to your home decor. This craft is enjoyable for all ages and provides a sense of accomplishment as you creatively celebrate those first school moments. You may also find Colorful School Bus Photo Frame Craft For Kids useful.
Why You’ll Love This Project
- Memorable Keepsake: This photo frame serves as a beautiful reminder of your child’s milestones, perfect for showcasing their first day at school.
- Customizable Design: You can personalize the frame with your favorite colors and decorations, making it unique to your child’s personality.
- Easy to Make: This project is beginner-friendly, requiring just a few materials and simple steps.
- Fun Family Activity: It’s a wonderful opportunity to bond with your child. Plus, they can help with painting and decorating!
You may also find First Day Of School Rainbow Teacher Door Hanger useful.
Materials You’ll Need
To create your Rainbow First Day Photo Frame, gather the following materials: You may also find Clear Rainbow Ghost Shaker Suncatcher Craft For Kids useful.
- Wooden photo frame
- Acrylic paints in rainbow colors
- Paintbrush
- Mod Podge or similar sealer
- Glitter (optional)
- A photo of your child’s first day of school
How to Make Rainbow First Day Photo Frame for Baby – Keepsake Gift
Prepare the Frame: Start by removing the glass from the photo frame and cleaning it well. This will ensure that the paint adheres properly. You may also find Colorful Rainbow Monster Pencil Holder For Kids useful.
Paint the Base Color: Choose your favorite base color for the frame. Apply an even coat of paint using a brush and let it dry completely before proceeding to the next step.
Create the Rainbow: Once the base is dry, paint arcs of rainbow colors on the frame. Feel free to use a sponge to create a blended look or apply separate colors for defined arcs. Allow each color to dry before adding the next.
Add Glitter (Optional): If you want to add a touch of sparkle, sprinkle glitter on top of the wet paint. This will create a beautiful, shimmering effect.
Seal It: After the paint is completely dry, apply a layer of Mod Podge or similar sealer over the entire frame to protect your artwork. Let it dry according to the package instructions.
Insert Your Photo: Once everything is dry, place your favorite photo of your child’s first day of school into the frame.
Display Your Craft: Find a special place to showcase your new photo frame, perhaps on a shelf or on the wall where your family can enjoy it!

Helpful Tips
- If you’re crafting with little ones, consider using washable paints for an easier cleanup.
- Use a blow dryer on a low setting to speed up drying times between steps.
- For a more personal touch, let your child’s name or the date be part of the decoration! A simple name plate can be added using colorful paper.
Creative Variations
- Seasonal Themes: Change the colors for different seasons or holidays to keep the frame fresh throughout the year.
- Mix Media: Incorporate other materials like ribbons or stickers to enhance your design further.
- Frame Size: Experiment with different frame sizes to accommodate larger or smaller photos, creating a gallery of milestones!
Making It With Kids
This craft is perfect for kids who can safely use paint and help with decorating. If using any sharp tools, be sure to supervise them closely for safety. Encourage their creativity by allowing them to choose colors and decorations that inspire them.
How to Display, Use, or Gift It
This Rainbow First Day Photo Frame makes for a great conversation piece when displayed in your home. It also serves as a thoughtful gift for new parents or grandparents, celebrating their child’s milestones beautifully.

Frequently Asked Questions
Can I use spray paint instead of acrylic?
Yes, spray paint can give you a smooth finish, but be sure to work in a well-ventilated area.
What if I want to change the photo later?
Choose a frame without a backing so it’s easy to switch out photos for different occasions.
How can I make it more durable?
Using a weatherproof sealant will help protect against fading and wear over time.
Is this craft suitable for toddlers?
While toddlers can help paint, be sure to supervise closely and use non-toxic, washable materials.
Conclusion
Crafting a Rainbow First Day Photo Frame is a delightful way to celebrate your child’s milestones while encouraging creativity and bonding time. To find the perfect frame or other supplies to enhance your project, check out this great selection on Amazon! Happy crafting!
Print
Rainbow First Day Photo Frame for Baby – Keepsake Gift
- Total Time: 30 minutes
- Makes: 1 photo frame
Description
Create a colorful and personalized Rainbow Photo Frame for your child’s first day of school, serving as a memorable keepsake.
Materials
- Wooden photo frame
- Acrylic paints in rainbow colors
- Paintbrush
- Mod Podge or similar sealer
- Glitter (optional)
- A photo of your child’s first day of school
Instructions
- Prepare the frame by removing the glass and cleaning it well.
- Paint the base color using your favorite paint and let it dry completely.
- Create the rainbow by painting arcs of rainbow colors and allowing each color to dry.
- Add glitter on the wet paint for added sparkle, if desired.
- Seal your artwork with Mod Podge or similar sealer and let it dry.
- Insert your favorite photo into the frame.
- Display your new photo frame in a special place in your home.
Notes
Use washable paints for easier cleanup with kids. Use a blow dryer to speed up drying times.