

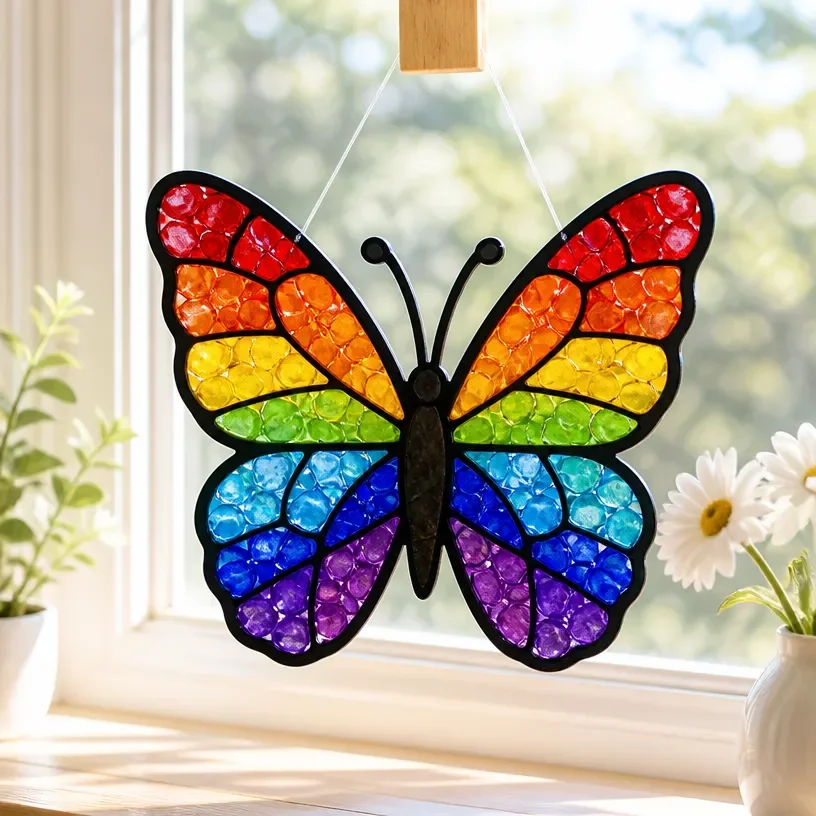
Rainbow Butterfly Teacher Appreciation Suncatcher
Creating a Rainbow Butterfly Teacher Appreciation Suncatcher is a delightful way to express gratitude to the special educators in our lives. This vibrant craft not only brightens up a window but also adds a personal touch that teachers will cherish. Working on this project is enjoyable for both kids and adults, fostering creativity and mindfulness while making a heartfelt gift. You may also find Melted Crayon Rainbow Butterfly Suncatcher For Kids useful.
Why You’ll Love This Project
- Creative Expression: Children can explore their artistic side by choosing different colors and designs for their butterflies.
- Meaningful Gift: This suncatcher serves as a wonderful appreciation gift for teachers, symbolizing the bright impact they have on their students’ lives.
- Simple and Fun: The project is easy to execute, making it perfect for family craft day or school activities.
- Year-Round Decor: Once completed, the suncatcher can be enjoyed throughout the year, catching the sunlight beautifully.
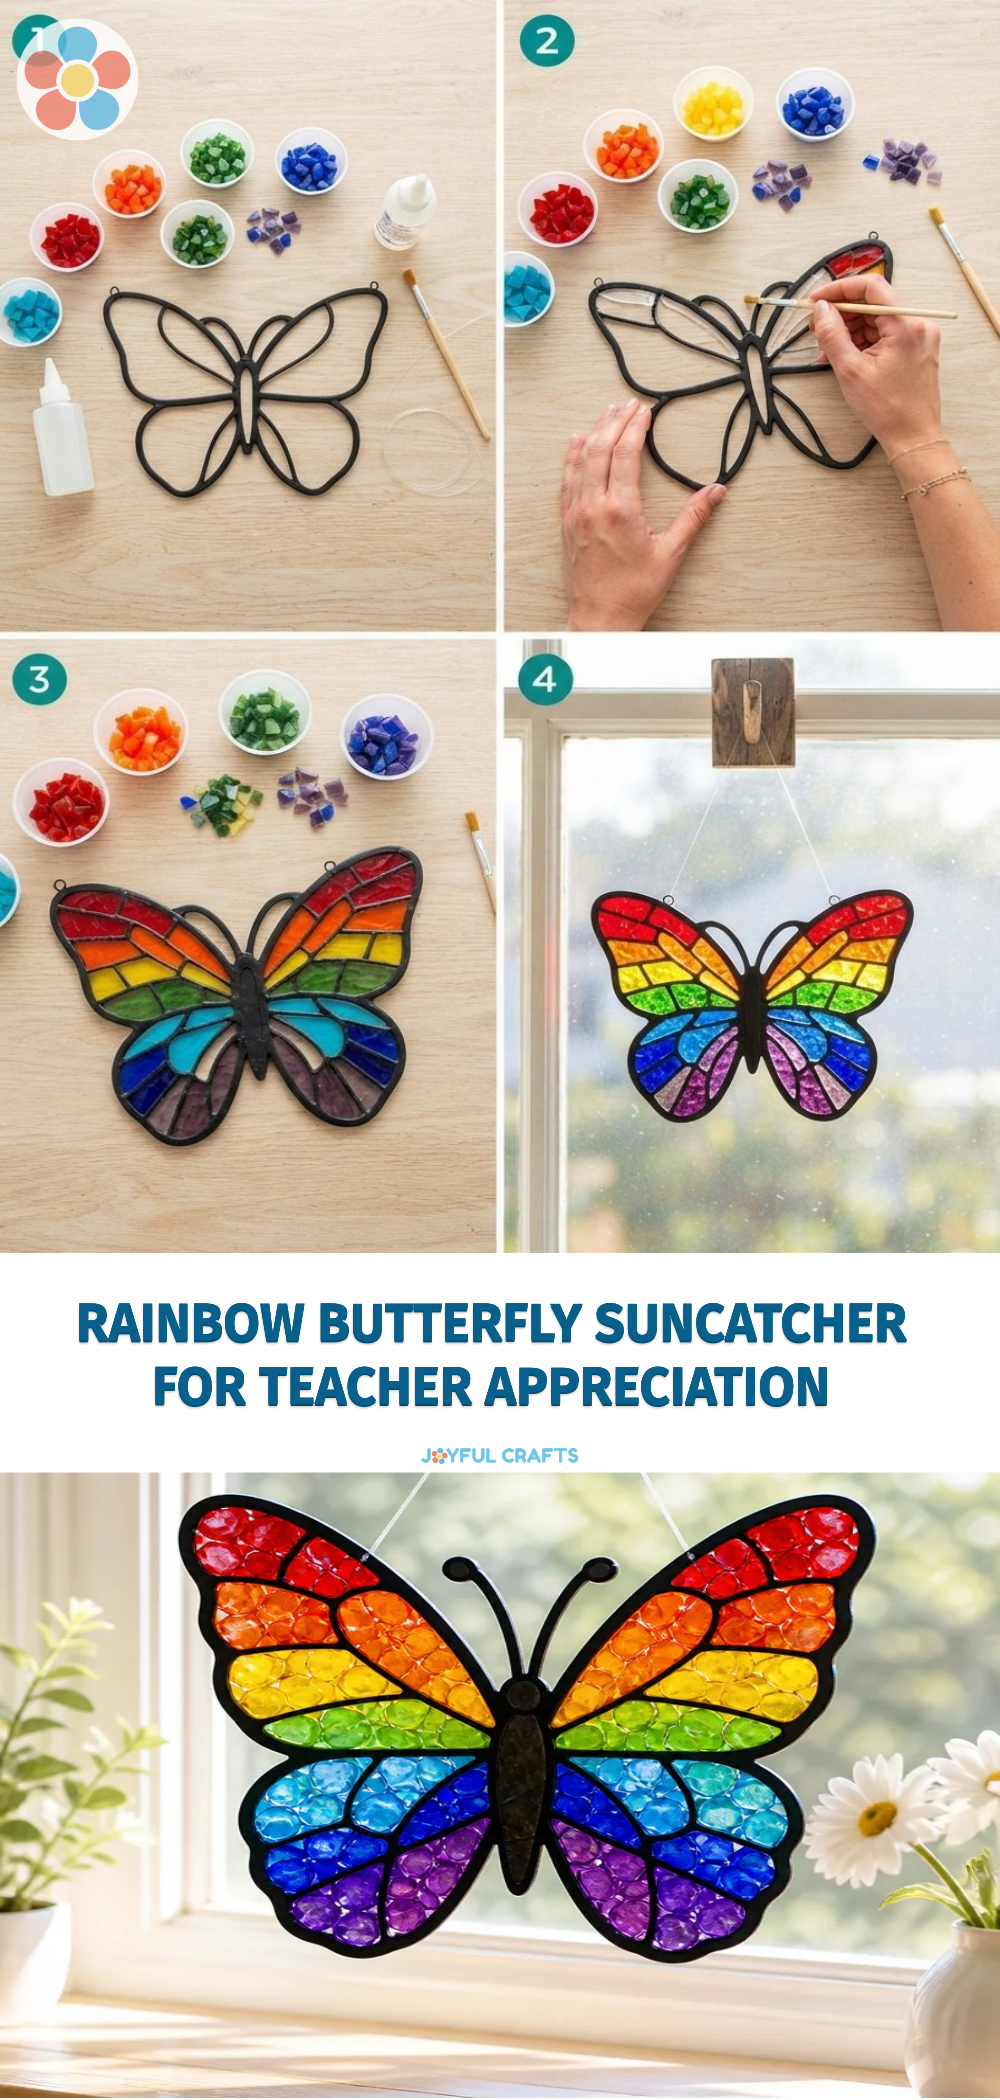
You may also find Melted Crayon Rainbow Butterfly Suncatcher useful.
Materials You’ll Need
- Transparent contact paper
- Colored tissue paper (in shades of the rainbow)
- Scissors
- A black marker or crayon
- Craft sticks (optional, for structure)
- String or ribbon (for hanging)
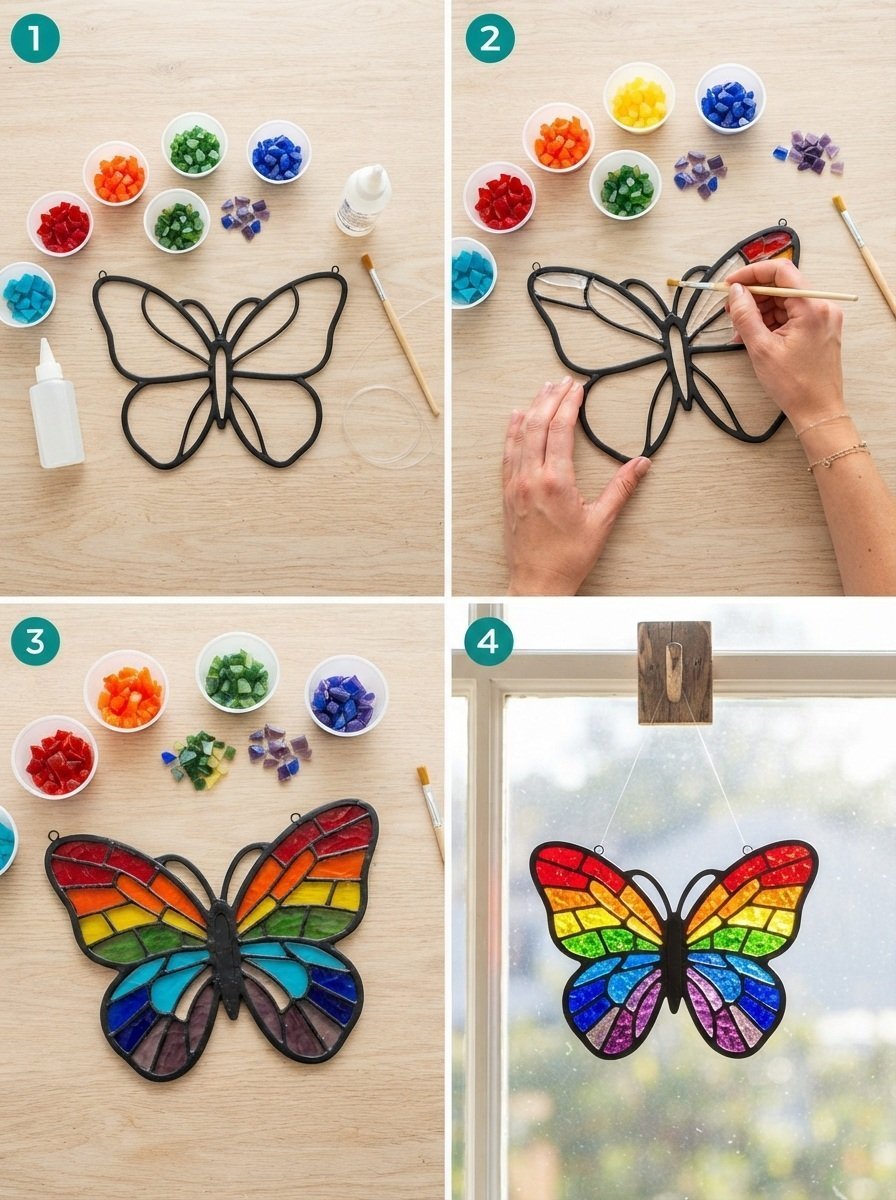
How to Make Rainbow Butterfly Teacher Appreciation Suncatcher
- Prepare Your Materials: Gather all your craft supplies and find a clean, flat workspace.
- Cut the Contact Paper: Cut two large pieces of your transparent contact paper. These will be the front and back of your butterfly.
- Create the Butterfly Shape: Using the black marker, draw a butterfly shape on one side of the contact paper. You can also find templates online to trace if desired.
- Tear the Tissue Paper: Tear your colored tissue paper into small pieces. Let the kids pick their favorite colors and help with tearing if needed.
- Fill the Butterfly: Place one piece of the contact paper (drawing side facing up) on the workspace and begin layering the tissue paper pieces inside the butterfly shape. Cover it completely with color.
- Seal your Butterfly: Once you’re happy with the arrangement, carefully place the second piece of contact paper over the top, sealing the colorful tissue paper inside.
- Cut Out the Shape: Use the scissors to cut out the butterfly shape, following the black outline you made earlier.
- Add String for Hanging: If using string or ribbon, punch a small hole at the top of the butterfly and tie it securely.
- Display: Hang your completed suncatcher in a sunny window for the best effect and enjoy the colorful reflections!

Helpful Tips
- To create a more structured suncatcher, you might consider placing craft sticks beneath the contact paper before sealing it. This will give your butterfly more stability.
- Make sure the edges of the contact paper are sealed well to prevent the tissue paper from falling out.
- Experiment with different colors and patterns why not try making a whole set of butterflies to decorate your home or classroom?
Creative Variations
- Theme Changes: Adapt the craft for different seasons or holidays by changing the colors of the tissue paper or adding themed decorations like glitter or stickers.
- Size Variation: Create smaller butterflies that can be clustered together for a more dynamic display, or go big for a statement piece.
- Patterns: Use a variety of shapes such as hearts or flowers instead of butterflies to personalize the piece even further.
Making It With Kids
This project is suitable for children, but as it involves cutting and potentially using scissors, adult supervision is recommended. Make it a fun bonding experience by sitting down together and crafting, discussing colors, and encouraging creative ideas! You may also find Clear Rainbow Ghost Shaker Suncatcher Craft For Kids useful.
How to Display, Use, or Gift It
Once completed, these suncatchers can be gift-wrapped and presented as thoughtful gifts for teacher appreciation day or any special occasion. They make charming decorations for classrooms or homes, bringing smiles and sunshine indoors.
Frequently Asked Questions
1. Can I use regular paper instead of tissue paper?
It’s best to use tissue paper, as it is lighter and allows more light to come through, enhancing the suncatcher effect.
2. How long does it take to make this suncatcher?
The entire process can be completed in about an hour, making it a fun craft for an afternoon at home or in the classroom.
3. What if I don’t have contact paper?
If contact paper isn’t available, you can also use laminated sheets, but they will require more time and steps to complete.
4. Is this project age-appropriate for all kids?
Older kids can manage the project’s steps independently, while younger children may need adult assistance, particularly with cutting and using scissors.
5. How do I clean the suncatcher?
To clean, simply use a damp cloth and gently wipe both sides to remove any dust that may accumulate over time.
6. Can I use this technique for other crafts?
Absolutely! This technique can be applied to various suncatcher designs such as flowers or even animals, like the rainbow crystal butterfly suncatcher craft.
Conclusion
Creating a Rainbow Butterfly Teacher Appreciation Suncatcher is a wonderful way to express gratitude. Not only is it easy enough for kids to join in, but it also becomes a cherished keepsake for any teacher. For more inspiration and supplies, check out the KY&BOSAM Butterfly Suncatcher available on Amazon. Happy crafting!
Print
Rainbow Butterfly Teacher Appreciation Suncatcher
- Total Time: 60 minutes
- Makes: 1 suncatcher
Description
A delightful craft to create a vibrant rainbow butterfly suncatcher, perfect for teacher appreciation.
Materials
- Transparent contact paper
- Colored tissue paper (in shades of the rainbow)
- Scissors
- A black marker or crayon
- Craft sticks (optional, for structure)
- String or ribbon (for hanging)
Instructions
- Prepare your materials by gathering all your craft supplies and finding a clean, flat workspace.
- Cut two large pieces of the transparent contact paper for the front and back of your butterfly.
- Create the butterfly shape by drawing on one side of the contact paper using the black marker.
- Tear your colored tissue paper into small pieces, letting kids pick their favorite colors.
- Fill the butterfly shape with the tissue paper pieces until completely covered.
- Seal the butterfly by placing the second piece of contact paper over the top.
- Cut out the butterfly shape following the black outline you made.
- Add string or ribbon by punching a small hole at the top and tying it secure.
- Display your completed suncatcher in a sunny window for colorful reflections.
Notes
Consider placing craft sticks beneath the contact paper for more stability.