

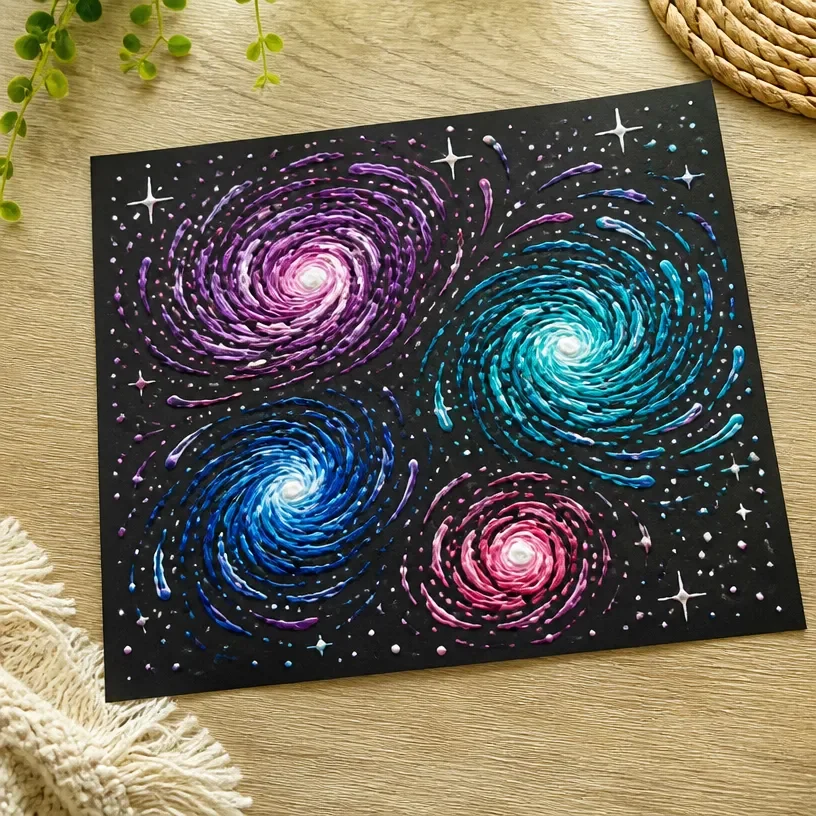
DIY Puffy Paint Galaxy Art Tutorial for Kids
Creating a beautiful galaxy art piece using puffy paint is an engaging and creative project for kids. Not only will they enjoy mixing colors and creating textures, but they’ll also learn about space, colors, and artistic expression. This project invites children to unleash their imaginations as they craft a stunning visual representation of the cosmos. You may also find 3D Raised Salt Painting Colorful Artwork For Kids useful.
Why You’ll Love This Project
- Sensory Experience: Working with puffy paint gives kids a unique tactile engagement that traditional painting doesn’t offer.
- Creative Freedom: Each child can experiment with their color choices and techniques, resulting in unique pieces of art.
- Learning Opportunity: While making galaxy art, children can discuss and learn about the stars, planets, and the universe.
- Easy Clean-Up: Using homemade puffy paint ensures a manageable workspace, with materials that are simple to clean up.

You may also find Diy Rainbow Tissue Paper Balloons For Kids useful.
Materials You’ll Need
- White cardstock or thick paper
- Puffy paint (made from glue and shaving cream)
- Food coloring (for coloring the paint)
- Plastic spatula or old paintbrush for spreading
- Star stickers or glitter (optional for added decoration)
How to Make DIY Puffy Paint Galaxy Art Tutorial for Kids
Prepare the Puffy Paint: In a bowl, mix equal parts of white school glue and shaving cream. Stir until it’s well combined. This creates the fluffy texture that will give your galaxy depth.
Add Color: Divide the fluffy paint into different bowls. Add a few drops of food coloring to each bowl to create a variety of colors like blue, purple, and pink colors you might find in a galaxy.
Create Your Background: Take your white cardstock and use the plastic spatula or an old paintbrush to spread a layer of the puffy paint across the paper. You can mix colors together as you go for a blended effect.
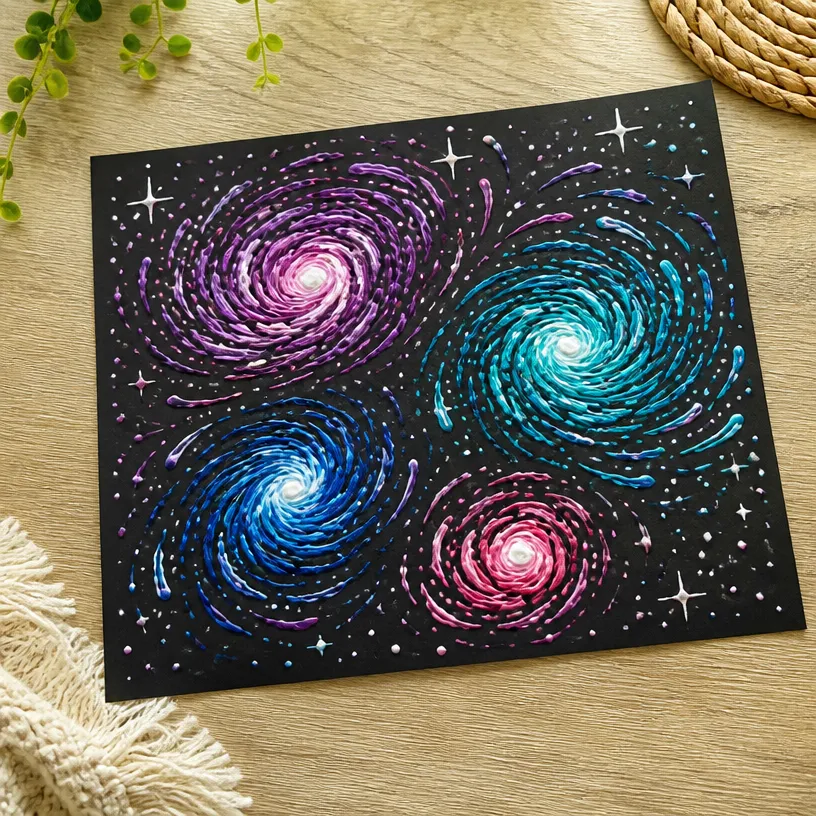
Add Details: Once the background is filled, take more paint and add swirls, dots, and other designs to create a more dynamic galaxy scene. Emphasize the areas you want as your stars or planets.
Finish with Stars: For an extra touch, sprinkle some glitter or stick on star stickers while the paint is still wet. This will give your art piece some sparkle!
Helpful Tips
- Avoid Overworking the Paint: Once you’ve applied the paint, try to leave it as is. Over-mixing can muddy the colors and detract from the galaxy effect.
- Drying Time: Let the puffy paint dry completely. This can take several hours, so it’s best to set the artwork aside and check back later.
- Test Before You Go Big: If you’re unsure about how colors look together, test them out on a scrap piece of paper first.
Creative Variations
- Add a Twist with Patterns: Encourage kids to create star patterns or swirls that represent different celestial bodies. Changing the shapes in their art can lead to exciting outcomes.
- Seasonal Themes: For Halloween, make a spooky galaxy using dark colors and eerie designs, while a summer theme could feature bright pastel colors.
- Textural Additions: Try incorporating other materials like cotton balls for clouds or foil for metallic stars.
Making It With Kids
Encourage your young artists to participate in every step, from mixing the puffy paint to applying it on paper. This project is suitable for older preschoolers upwards, but it’s always helpful to supervise younger children particularly when using scissors or handling the puffy paint mixture.
How to Display, Use, or Gift It
Once the masterpiece is dry, you can display the galaxy art proudly on the wall, or even give it as a personalized gift. Framing the art can particularly highlight this unique piece, making it a special present for family members or friends.

Frequently Asked Questions
1. Can I make puffy paint with things other than shaving cream?
Yes! While shaving cream works wonderfully, you can find many homemade puffy paint recipes online that use cornstarch or other substances.
2. Will the colors fade once the puffy paint dries?
Typically, the colors should stay vibrant, but they may alter slightly during the drying process. Encouraging students to pick colors that contrast well helps.
3. How long does it take for the puffy paint to dry?
Drying times can vary based on thickness, but expect it to take several hours to completely dry in a non-humid environment.
4. Can younger children participate in this craft?
Yes, but ensure that an adult supervises to help with any tricky steps or materials that may be messy!
5. Is there another fun DIY project involving paint?
You might also enjoy creating things like monster crafts for more fun with kid-friendly materials.
6. What’s a fun variation to try after this project?
Once you finish this, you could explore making pinwheel paintings that combine movement and splashes of color for a different artistic experience.
Conclusion
Creating your own puffy paint art is a delightful way to explore creativity with kids. They’ll enjoy every moment of the process. For more ideas on crafting with puffy paint, check out this insightful resource on the Homemade Puffy Paint Recipe with Shaving Cream. Happy crafting!
Print
DIY Puffy Paint Galaxy Art Tutorial for Kids
- Total Time: 195 minutes
- Makes: 1 artwork
Description
A fun and engaging DIY project for kids to create beautiful galaxy art using homemade puffy paint.
Materials
- White cardstock or thick paper
- Puffy paint (made from glue and shaving cream)
- Food coloring (for coloring the paint)
- Plastic spatula or old paintbrush for spreading
- Star stickers or glitter (optional for added decoration)
Instructions
- Prepare the Puffy Paint: In a bowl, mix equal parts of white school glue and shaving cream. Stir until it’s well combined.
- Add Color: Divide the fluffy paint into different bowls. Add a few drops of food coloring to each bowl.
- Create Your Background: Spread a layer of the puffy paint across the cardstock.
- Add Details: Use more paint to create swirls, dots, and designs for your dynamic galaxy.
- Finish with Stars: Sprinkle glitter or stick star stickers on while the paint is still wet.
Notes
Encourage kids to experiment with colors and shapes.