

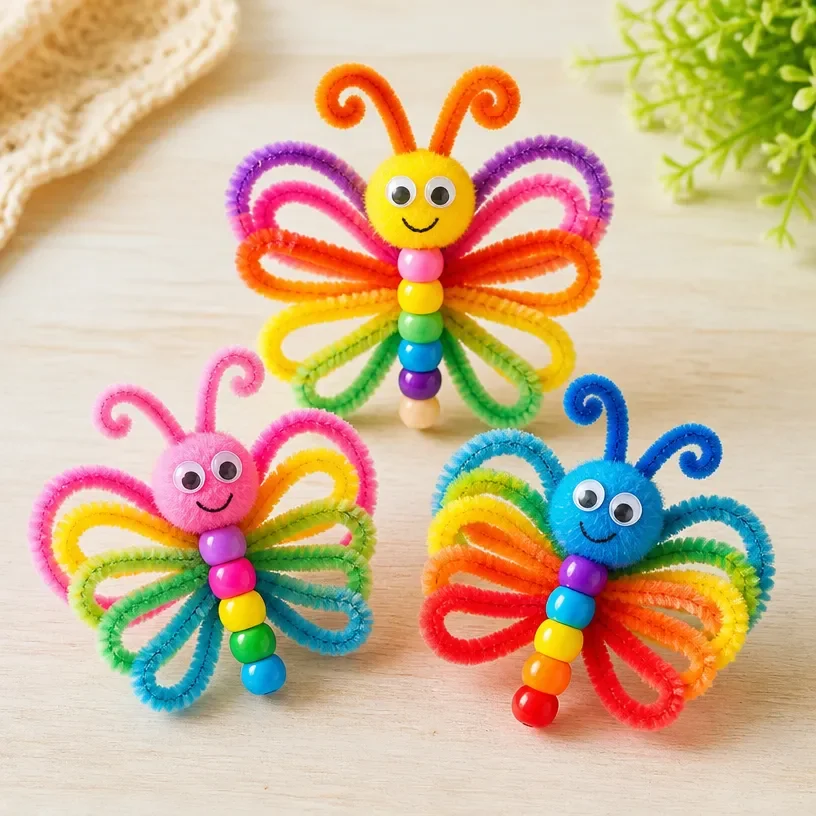
DIY Pipe Cleaner Butterflies: Easy Colorful Craft Tutorial
Creating beautiful and colorful pipe cleaner butterflies is a delightful activity that brings joy to children and adults alike. These charming crafts are not only fun to make but also serve as wonderful decorations or gifts. Plus, the process encourages creativity and fine motor skills, making it a beneficial project for kids. If you’re looking for an engaging craft to do together, this tutorial is perfect for you! You may also find Colorful School Bus Photo Frame Craft For Kids useful.
Why You’ll Love This Project
- Simple and Affordable: Pipe cleaners are inexpensive and easy to find, making this craft accessible for everyone.
- Endless Creativity: You can use various colors and sizes to create unique butterflies, allowing each artist’s personality to shine through.
- Great for All Ages: Whether you’re crafting with young children or older kids, this project is suitable for all skill levels.
- Perfect for Learning: While crafting, children can learn about colors, symmetry, and even a bit of biology about butterflies!
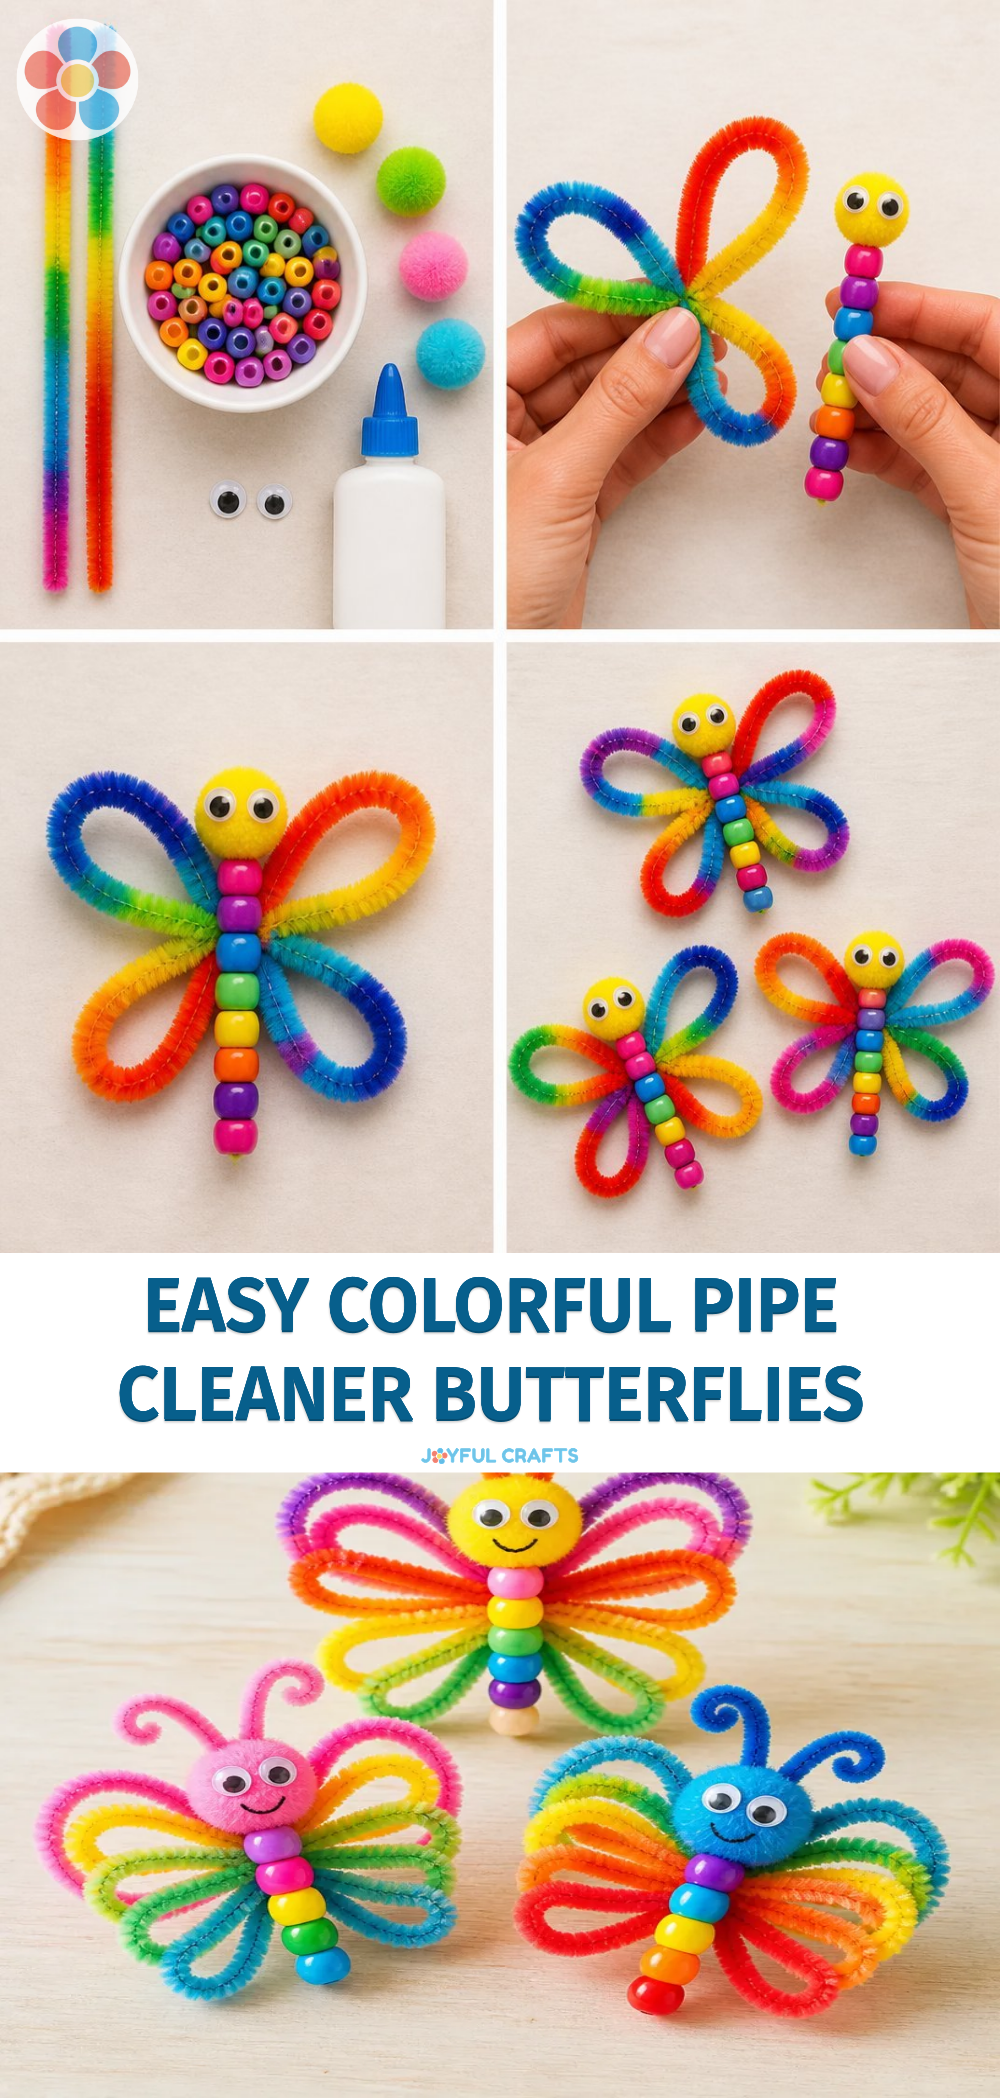
You may also find Diy Rainbow Popsicle Stick Flower Wheel Craft useful.
Materials You’ll Need
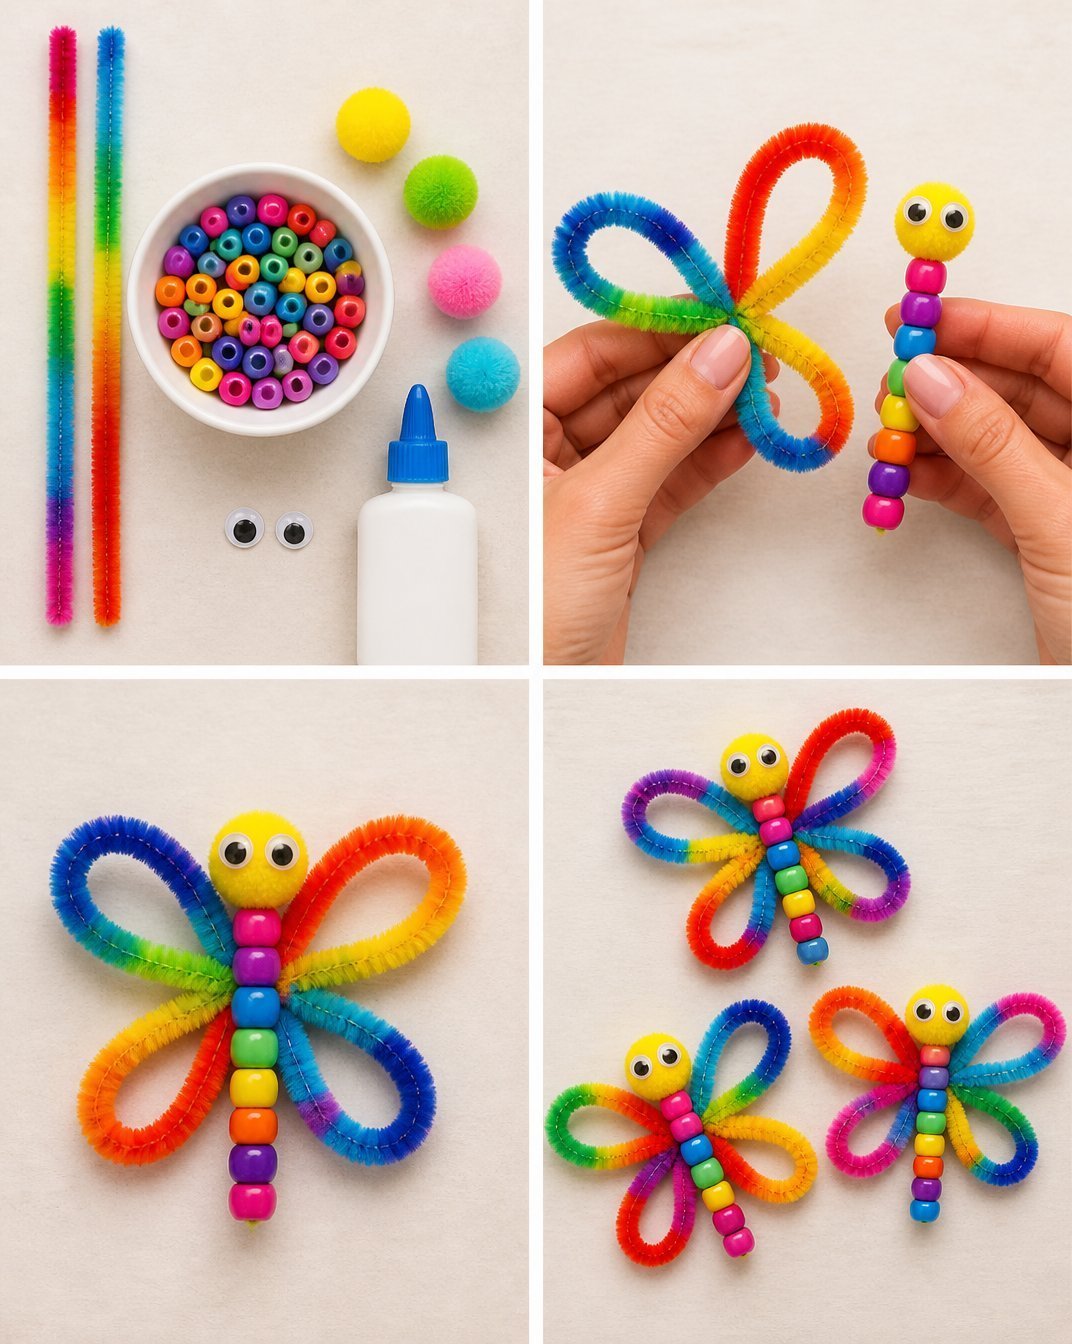
- Colorful pipe cleaners
- Googly eyes (optional)
- Scissors
- Glue (for attaching eyes)
How to Make DIY Pipe Cleaner Butterflies: Easy Colorful Craft Tutorial
Choose Your Colors: Select a few pipe cleaners in your favorite colors. You can mix and match to create vibrant butterflies.
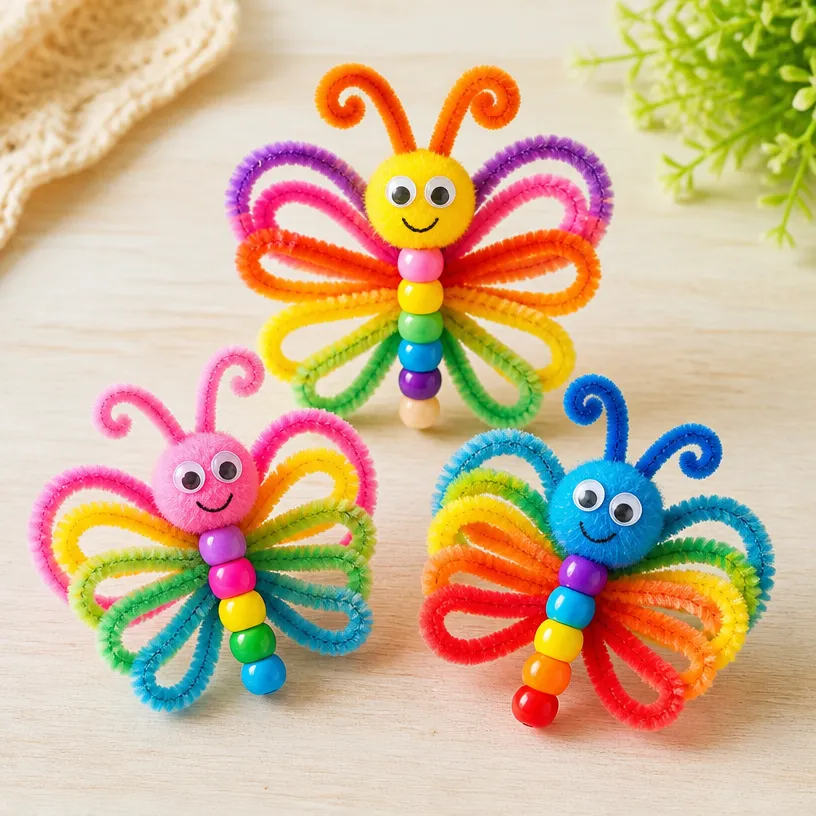
Create the Body: Take one pipe cleaner and fold it in half. Twist the two ends together to form the body of your butterfly.
Make the Wings: Use two additional pipe cleaners to create wings. Cut them to your desired length, usually about 6-8 inches.
Attach Wings: Position the wings on either side of the body. Twist them securely around the body pipe cleaner, ensuring they are evenly spaced.
Add Details: If you have googly eyes, use glue to attach them to the head of the butterfly. You can also twist smaller pieces of pipe cleaner to create antennae.
Final Touches: Bend the wings slightly to give them a flared shape and adjust the body as needed.
Helpful Tips
- Be sure to twist the pipe cleaners tightly to ensure they hold their shape during play or display.
- Encourage kids to experiment with different colors and patterns. For instance, using alternating colors can create a striped effect on the wings.
- If younger children are involved, it’s best for an adult to help with scissors and glue to keep everything safe.
Creative Variations
- Use sparkle pipe cleaners for a magical look, perfect for themed parties or fairy gardens.
- Add some glitter to the wings for extra flair, making them stand out even more.
- Create mini butterflies using shorter pipe cleaners for decorations on greeting cards or gift tags.
Making It With Kids
This project is perfect for cooperative play. Work alongside your children, helping them with challenging steps, like twisting and shaping the pipe cleaners. If your child prefers certain colors, let them choose their combinations for a more personalized creation!
How to Display, Use, or Gift It
Once finished, your colorful butterflies can be displayed on a shelf, hung from a ceiling with string, or attached to windows. They also make wonderful gifts for friends or family members who would appreciate a handmade touch.
Frequently Asked Questions
Can I use materials other than pipe cleaners?
Yes! While pipe cleaners are the best choice, you can experiment with paper, fabric, or cardboard.
What is the best way to store the butterflies?
Keep them in a dry, safe place, preferably in a box or on a display shelf away from direct sunlight to avoid fading.
How long does this craft take?
This project typically takes about 30 minutes, depending on how many butterflies you’re making.
Can I use this craft for a party?
Absolutely! These butterflies can be used as party favors, decorations, or even in a craft-making station at events.
What if I don’t have googly eyes?
You can simply use a small piece of paper or felt, cutting out small circles as an alternative.
Are there other related crafts I can try?
You might enjoy making a colorful witch flower bouquet or a rainbow monster pencil holder that incorporate similar techniques!
Conclusion
Crafting colorful pipe cleaner butterflies is a delightful way to spend time together and unleash creativity. By experimenting with different colors and designs, you and your kids can develop unique creations that can be proudly displayed. If you’re looking for more fun crafts, check out this adorable guide on pipe cleaner butterflies for additional tips and inspiration!
Print
DIY Pipe Cleaner Butterflies
- Total Time: 30 minutes
- Makes: Varies
Description
A delightful project to create colorful pipe cleaner butterflies, perfect for all ages and an engaging craft to encourage creativity.
Materials
- Colorful pipe cleaners
- Googly eyes (optional)
- Scissors
- Glue (for attaching eyes)
Instructions
- Choose your colors: Select a few pipe cleaners in your favorite colors.
- Create the body: Take one pipe cleaner and fold it in half, twisting the two ends together.
- Make the wings: Use two additional pipe cleaners to create wings, cutting them to your desired length.
- Attach wings: Position the wings on either side of the body and twist them securely around the body pipe cleaner.
- Add details: If using googly eyes, glue them to the head of the butterfly, and twist smaller pieces for antennae.
- Final touches: Bend the wings slightly for a flared shape and adjust the body as needed.
Notes
Encourage kids to experiment with different colors and patterns for unique butterfly designs. Always ensure adult supervision when using scissors and glue.