

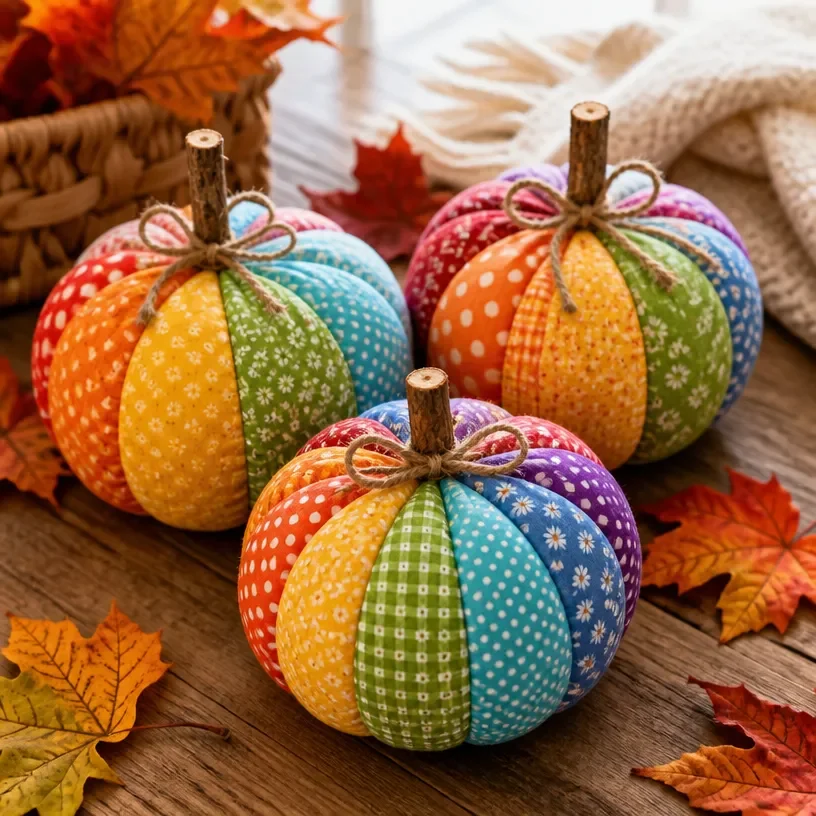
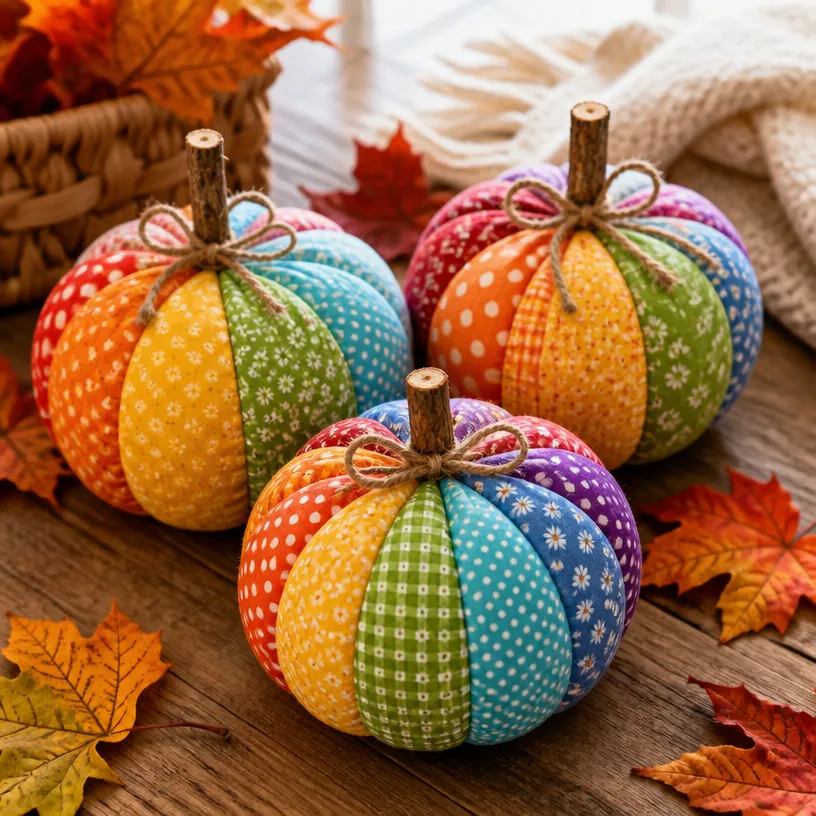
Colorful Patchwork Fabric Pumpkins in Rainbow Colors
Creating colorful patchwork fabric pumpkins is not only a delightful craft but a fantastic way to celebrate the changing seasons. This project is especially enjoyable because it brings a splash of color to your home decor while providing a fun activity for you and your family. Plus, it’s a perfect opportunity to upcycle leftover fabric scraps. If you love crafting with vibrant colors and patterns, you’re in for a treat! You may also find Colorful Rainbow Monster Pencil Holder For Kids useful.
Why You’ll Love This Project
- Creative Expression: These pumpkins allow for endless creativity, letting you mix and match fabrics for a unique look.
- Seasonal Decor: They make wonderful decorations for fall celebrations and can be displayed throughout autumn.
- Family-Friendly: This project is suitable for crafters of all ages, making it a great family activity.
- Upcycling Opportunity: You can use fabric scraps, which is not only economical but also eco-friendly.
- Gift Idea: Handcrafted pumpkins can be lovely gifts for friends and family during the season.
You may also find Colorful Rainbow Puppy Lantern Ghost Glow Nightlight useful.
Materials You’ll Need
- Various fabric scraps in rainbow colors
- Scissors
- Needle and thread (or a sewing machine)
- Polyester stuffing or a soft filler
- Fabric glue (optional for embellishments)
- A round object (like a small ball) to shape your pumpkin
- Ribbon or twine for stem decoration
How to Make Colorful Patchwork Fabric Pumpkins in Rainbow Colors
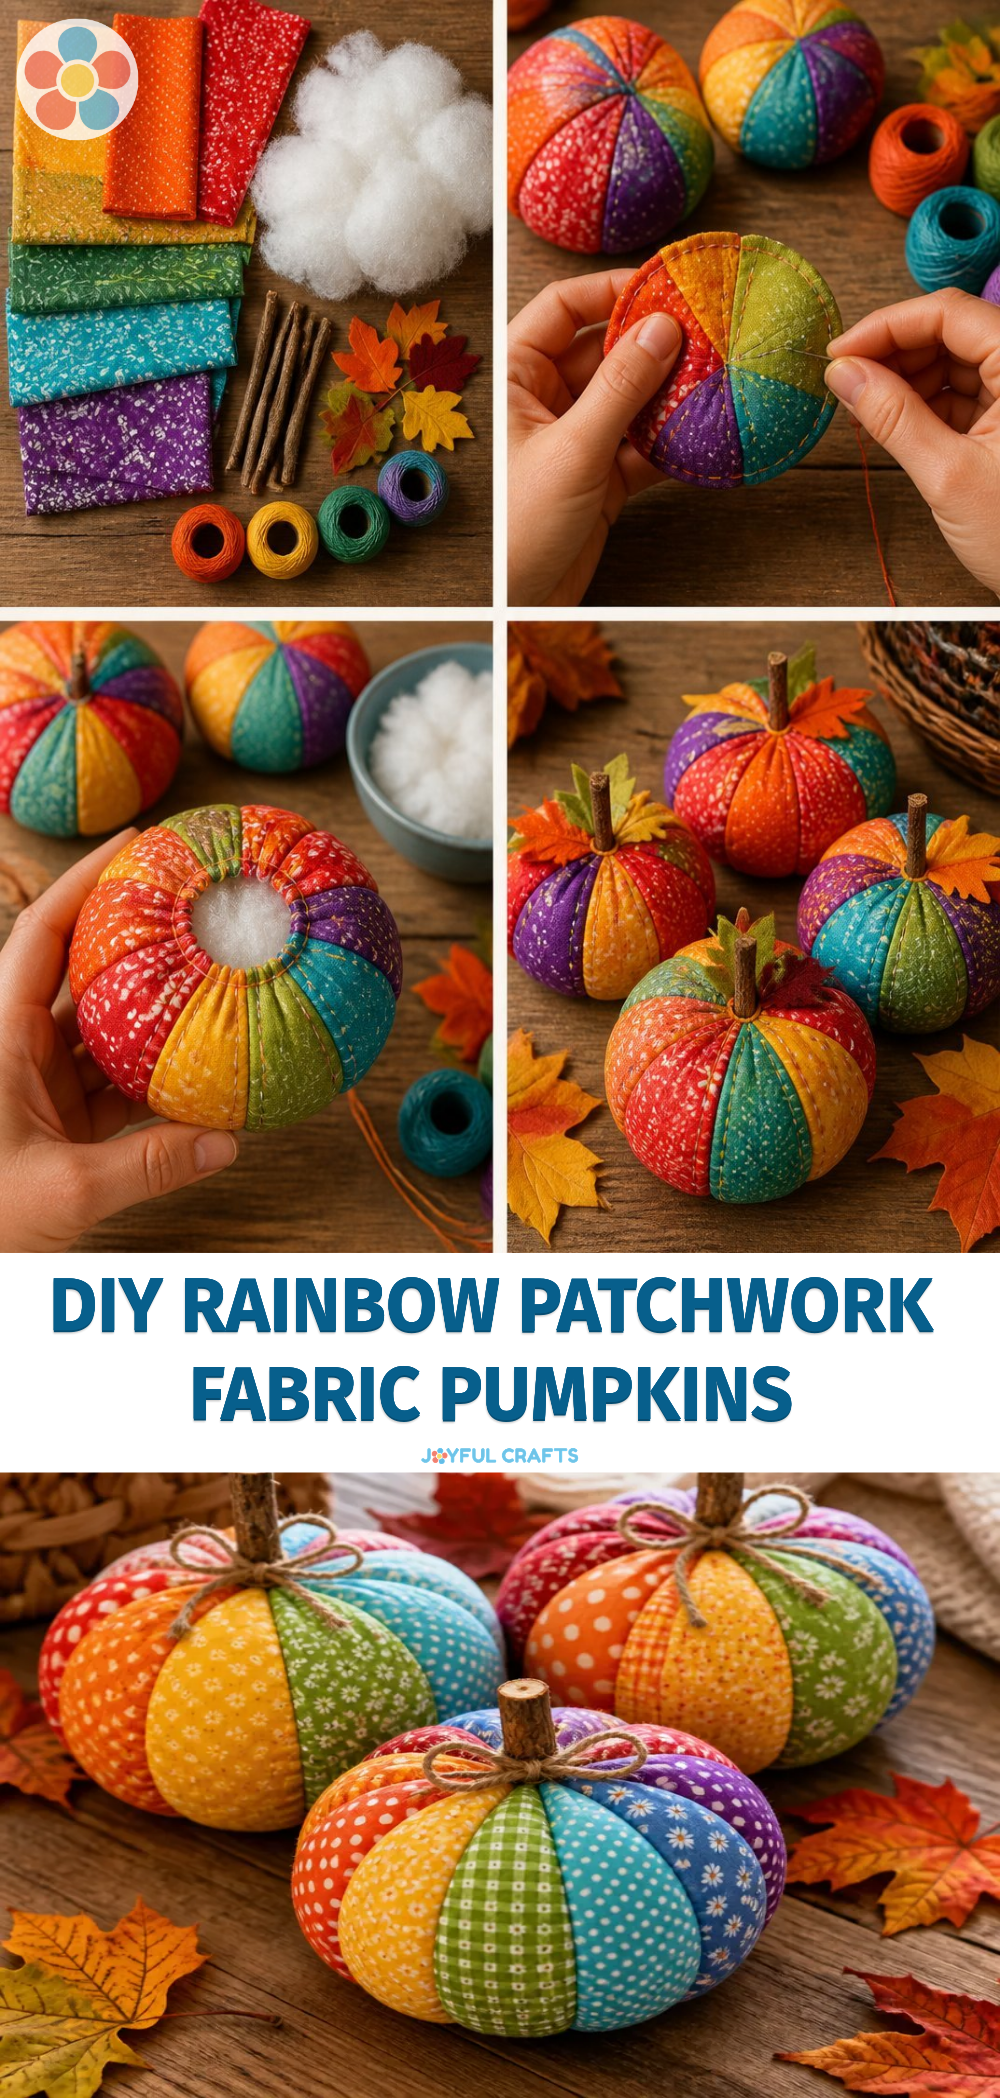
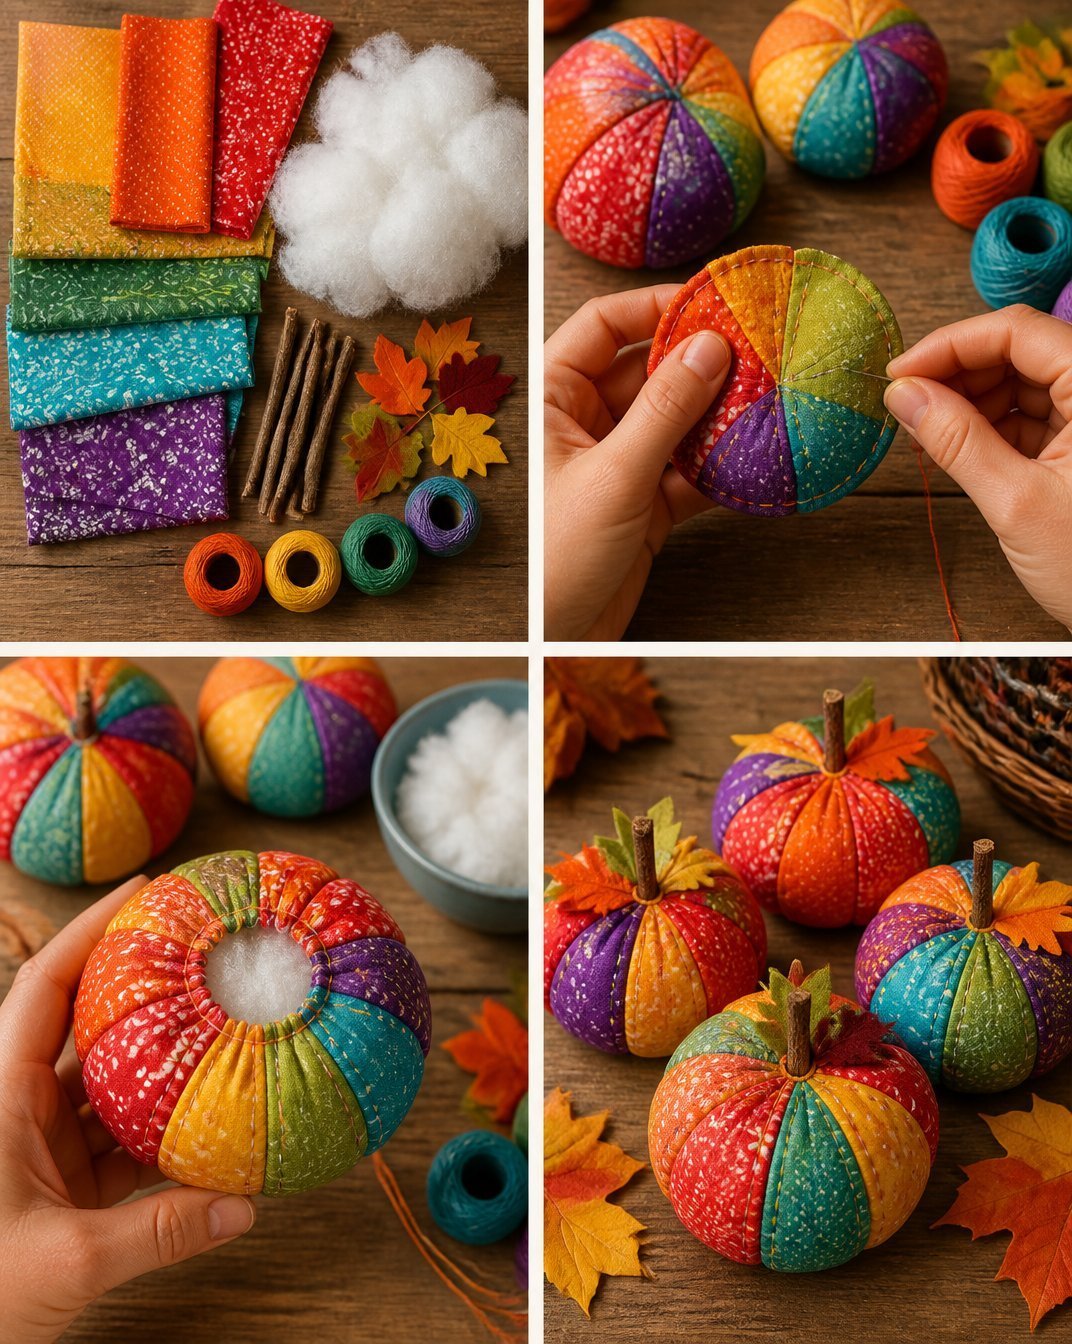
Prepare Fabric Pieces: Cut your fabric scraps into squares or rectangles, aiming for a mix of different colors and patterns that will form the pumpkin’s patchwork skin. You may also find Colorful Rainbow Tree Bubble Paint Artwork useful.
Shape the Base: Take a round object, like a small ball, and place fabric pieces around it. Secure them with a few stitches or fabric glue until the shape starts to hold. You may also find Rainbow Painted Rocks Colorful Flower Garden useful.
Stitch the Pumpkin: If you’re using a needle and thread, stitch around the edges of the fabric pieces to secure them. Be sure to leave a hole at the top for stuffing.
Fill the Pumpkin: Carefully remove the round object and stuff your pumpkin with polyester filling until it’s plush and rounded.
Finish the Top: Gather the fabric at the top and stitch it closed. You can add a decorative stem using twine or ribbon, tying it off securely.
Helpful Tips
- Fabric Choice: Choose fabrics with different textures to add visual interest to your pumpkins. Some may be smooth, while others could be felted or patterned.
- Assembly Aid: If managing the shape is difficult, you can start by creating a fabric sack and then fill it to shape your pumpkin.
- Mess-Free Crafting: Lay down a protective cloth or newspaper on your workspace to catch any glue or fabric scraps.
- Collaborative Crafting: If crafting with children, consider pre-cutting the fabric to make the process smoother and more enjoyable.
Creative Variations
- Theme Pumpkins: Create a set of pumpkins based on specific themes, such as Halloween ghosts or fall leaves, using appropriate colors and decorations.
- Size Adjustments: Experiment with different sizes; make mini pumpkins for table settings and large ones as centerpieces.
- Seasonal Upgrades: While the rainbow colors are vibrant, you could also make monochromatic designs for a more subdued fall decor.
Making It With Kids
This project is easily enjoyable with children. Ensure adult supervision when using scissors, and guide them through sewing if necessary. Working together not only strengthens skills but also helps create memories that will last a lifetime.
How to Display, Use, or Gift It
These colorful pumpkins look great on mantles, dining tables, or as part of seasonal displays. They can also be gifted as charming accents or unique handmade gifts for family and friends.
Frequently Asked Questions
1. How do I make sure my stuffing doesn’t come out?
Be sure to stitch securely when closing the top of the pumpkin. You might also consider using a snug fabric for the outer layer.
2. Can I use fabric other than cotton?
Absolutely! Any fabric that holds its shape after being st■ works well, such as felt, canvas, or even old t-shirts.
3. What if I don’t have a sewing machine?
You can hand stitch the fabric pieces together. It might take longer, but it’s a great way to engage with the project.
4. Can I add decorations to my pumpkins?
Yes, feel free to embellish with beads, buttons, or additional fabric shapes to give your pumpkins more personality.
Conclusion
Creating colorful patchwork fabric pumpkins can be a joyful activity full of creativity and fun. If you’re looking for more inspiration in your crafting journey, you might explore the Rainbow Falls patchwork quilt for your next project, perfect for adding warmth and color to any space. Happy crafting!
Print
Colorful Patchwork Fabric Pumpkins in Rainbow Colors
- Total Time: 30 minutes
- Makes: 4 pumpkins
Description
Create beautiful patchwork fabric pumpkins to celebrate fall with this family-friendly craft using colorful fabric scraps.
Materials
- Various fabric scraps in rainbow colors
- Scissors
- Needle and thread (or a sewing machine)
- Polyester stuffing or a soft filler
- Fabric glue (optional for embellishments)
- A round object (like a small ball) to shape your pumpkin
- Ribbon or twine for stem decoration
Instructions
- Prepare fabric pieces by cutting them into squares or rectangles, aiming for a mix of different colors and patterns.
- Shape the base by placing fabric pieces around a round object and securing them.
- Stitch around the edges of the fabric to secure them, leaving a hole at the top.
- Fill the pumpkin with polyester stuffing until plush and rounded.
- Finish the top by gathering the fabric and stitching it closed, adding a decorative stem with twine or ribbon.
Notes
Choose fabrics with different textures for added visual interest. Pre-cutting fabric can help children craft more easily.