

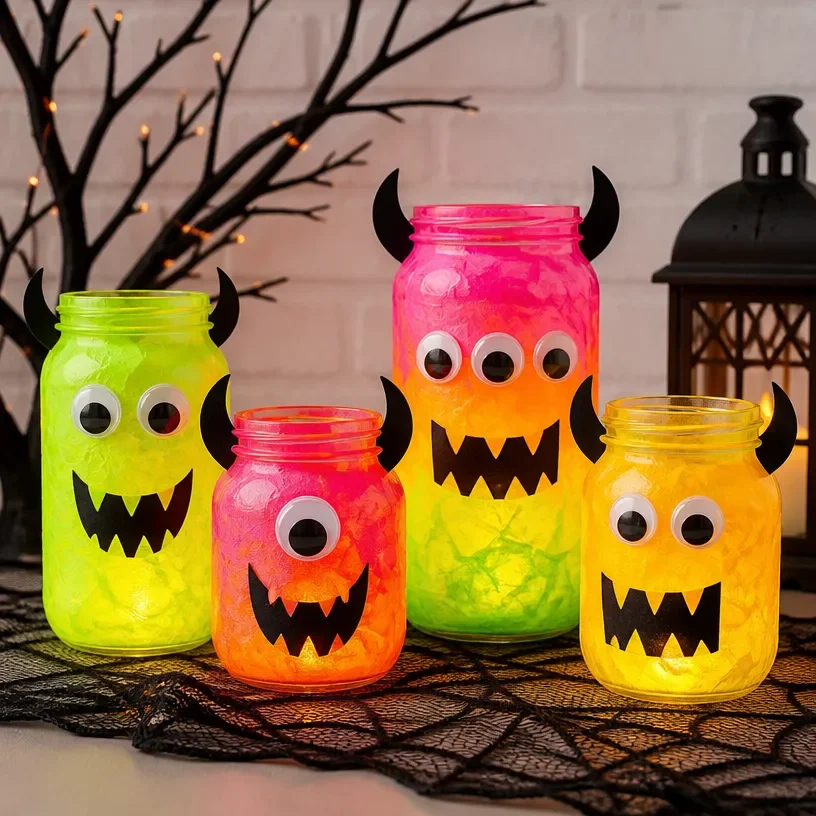
Colorful Neon Monster Lanterns in Rainbow Hues for Halloween
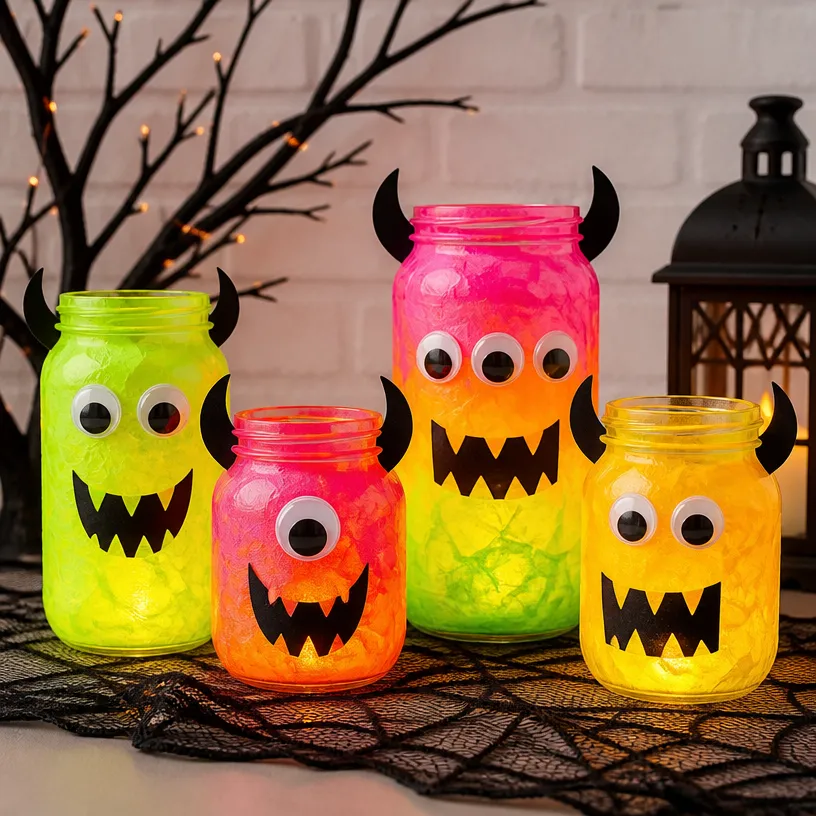
Get ready to embrace the festive spirit with a delightful craft: Colorful Neon Monster Lanterns! These vibrant lanterns add a spooky yet playful touch to your Halloween decorations, making them perfect for kids and families to enjoy together. They are not only fun to create, but they also light up your home with a burst of color and creativity. You may also find Rainbow Cupcake Liner Monster Wreath Halloween useful.
Why You’ll Love This Project
- Creative Expression: Your kids can unleash their artistic flair by decorating their own lanterns.
- Fun and Functional: These lanterns can serve as eye-catching decorations or fun light sources for trick-or-treaters.
- Easy to Make: This project uses simple materials and steps, making it suitable for crafters of all ages.
- Encourages Teamwork: Crafting these lanterns together promotes bonding and teamwork among family members.
- Endless Variations: You can personalize your lanterns with different colors and designs, ensuring no two are alike.
You may also find Rainbow Monster Pencil Holders Diy Craft For Kids useful.
Materials You’ll Need
- Neon-colored construction paper
- Scissors
- Glue or tape
- Battery-operated tea lights
- Markers or glitter for decoration
- A pencil for tracing
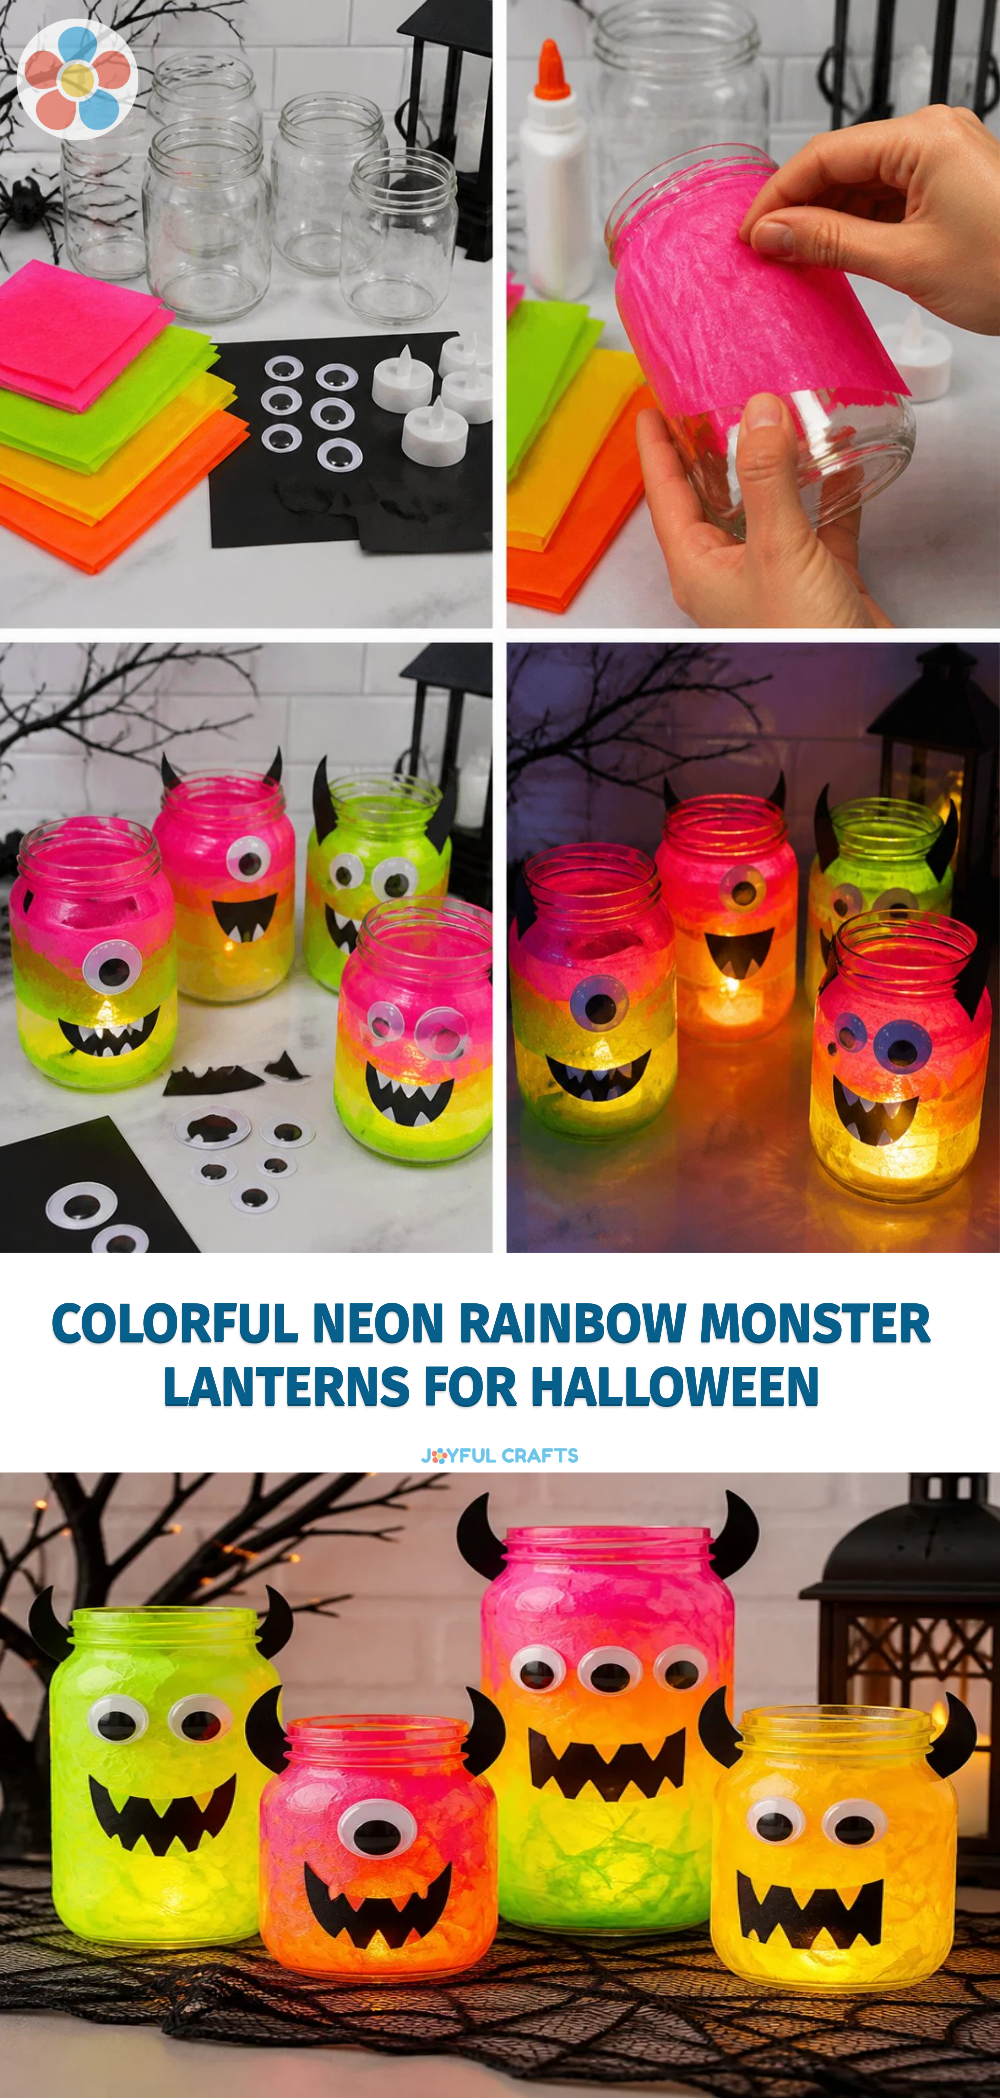
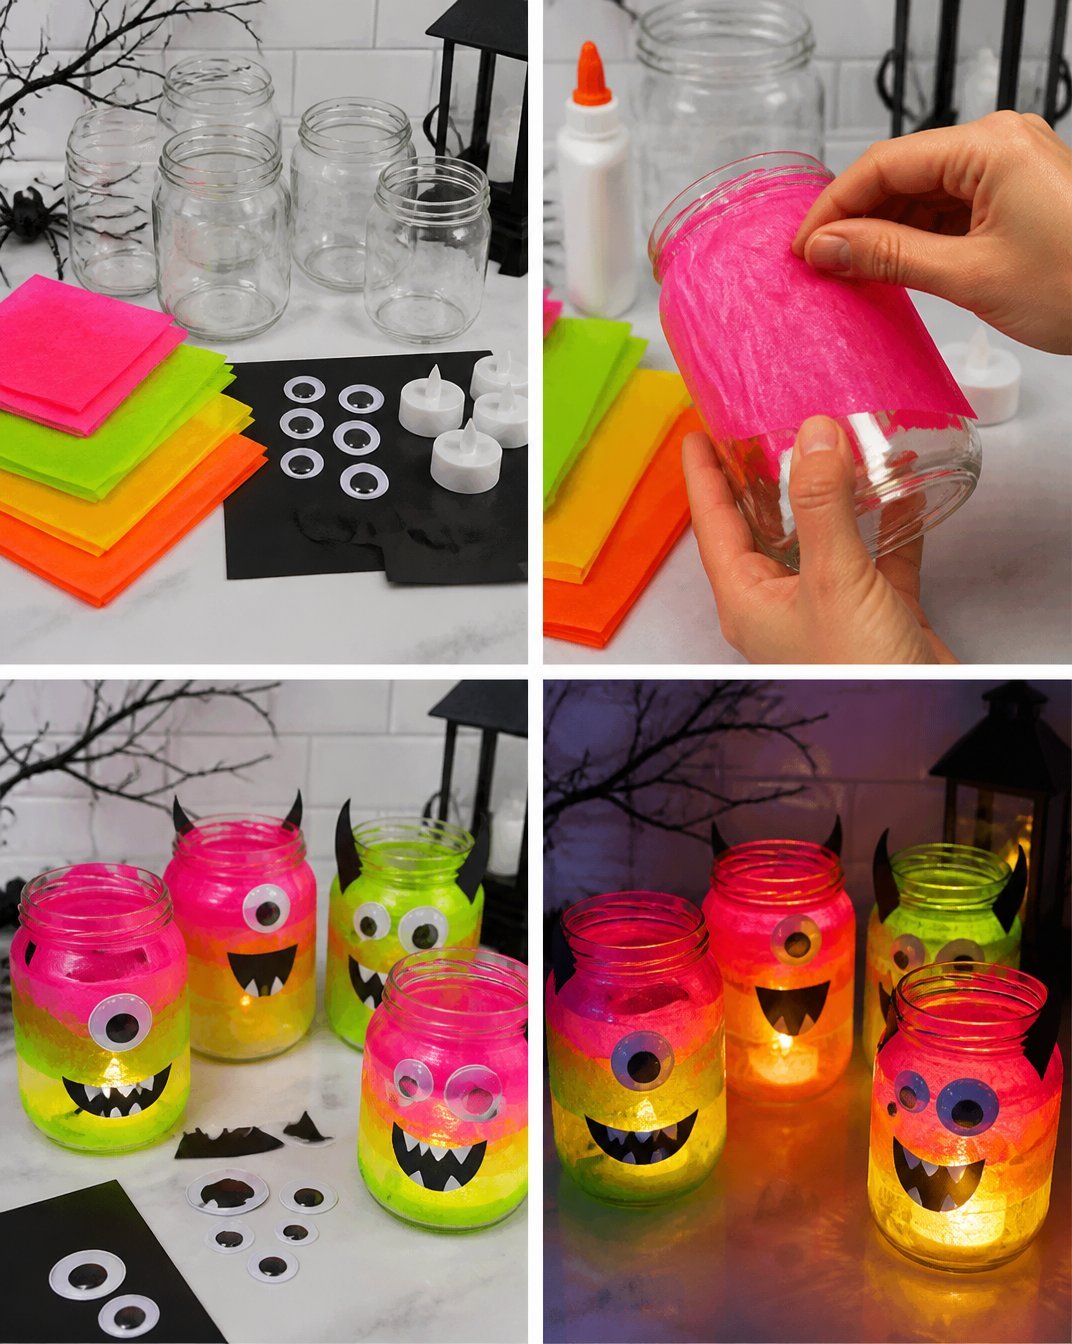
How to Make Colorful Neon Monster Lanterns in Rainbow Hues for Halloween
- Prepare Your Materials: Gather all your supplies in a clean, spacious working area to keep things organized.
- Cut the Lantern Shape: Using the neon construction paper, cut out shapes for your lanterns. You could make simple rectangles or get creative with monster faces.
- Decorate Your Lanterns: Let your kids add their personal touch with markers or glitter. They can create monster features like eyes, teeth, and other spooky elements. For more fun monster ideas, check out this rainbow monster pencil holder project!
- Assemble the Lanterns: Once decorated, fold the edges of your cuts to form a candle holder shape and secure with glue or tape.
- Insert the Tea Light: Carefully place a battery-operated tea light inside each lantern. These are safe for kids and will illuminate your creations beautifully.
- Display Your Lanterns: Find a lovely spot in your home or outside to showcase your colorful creations.
Helpful Tips
- Safety First: Make sure to supervise younger children while using scissors or applying glue.
- Plan Your Designs: Sketch potential designs on paper before cutting the construction paper to minimize mistakes.
- Choose Bright Colors: Opt for vibrant neon colors to make your lanterns glow even brighter against the night sky.
- Avoid Mess: Work on a covered surface to prevent glue or glitter from sticking to your table.
Creative Variations
- Theme It Up: Change the colors or shapes of your lanterns to match different holiday themes, like pumpkins for Halloween or stars for a winter wonderland.
- Add Texture: Use fabrics or stickers for added depth and interest to the lanterns.
- Ghostly Glow: Incorporate white or translucent materials for a ghost lantern, adding an ethereal touch.
Making It With Kids
Crafting with children is a wonderful way to make memories. Encourage kids to express their creativity by allowing them to choose their own colors and designs. If using scissors, supervise closely to ensure safety. Additionally, let them help with gluing and assembling the lanterns, making the experience interactive and fun. You may also find 3D Raised Salt Painting Colorful Artwork For Kids useful.
How to Display, Use, or Gift It
Once complete, these lanterns can light up entryways, adorn your Halloween party, or make fantastic gifts for friends and family. Consider creating a mini lantern display on your dining table or porch to spread Halloween cheer. They are sure to impress trick-or-treaters visiting your home!
Frequently Asked Questions
Can I use regular candles instead of battery-operated tea lights?
It’s safer to use battery-operated tea lights, especially for children’s crafts.
How long does it take to make these lanterns?
The entire process can take about 1-2 hours, depending on the complexity of your designs.
Can we use materials other than construction paper?
Yes! Feel free to experiment with old magazines, fabric scraps, or even recycled plastic bottles.
What age is this craft suitable for?
This craft is perfect for kids of all ages, but adult supervision is recommended for younger crafters, especially when cutting.
Conclusion
Creating Colorful Neon Monster Lanterns is not only a delightful activity, but it also offers families a chance to bond over artistic creativity. For additional inspiration and resources for your crafting journey, be sure to visit Emerging Embroidery Designs – Urban Threads. Dive into this exciting craft and brighten up your Halloween festivities!
Print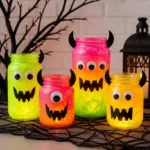
Colorful Neon Monster Lanterns in Rainbow Hues for Halloween
- Total Time: 75 minutes
- Makes: 4 lanterns
Description
Create vibrant and spooky Neon Monster Lanterns for Halloween. Perfect for kids and family bonding.
Materials
- Neon-colored construction paper
- Scissors
- Glue or tape
- Battery-operated tea lights
- Markers or glitter for decoration
- A pencil for tracing
Instructions
- Prepare your materials: Gather all your supplies in a clean, spacious working area to keep things organized.
- Cut the lantern shape: Using the neon construction paper, cut out shapes for your lanterns.
- Decorate your lanterns: Let your kids add their personal touch with markers or glitter.
- Assemble the lanterns: Once decorated, fold the edges of your cuts to form a candle holder shape and secure with glue or tape.
- Insert the tea light: Carefully place a battery-operated tea light inside each lantern.
- Display your lanterns: Find a lovely spot in your home or outside to showcase your colorful creations.
Notes
Supervise younger children when using scissors or glue. Plan your designs to minimize mistakes.