

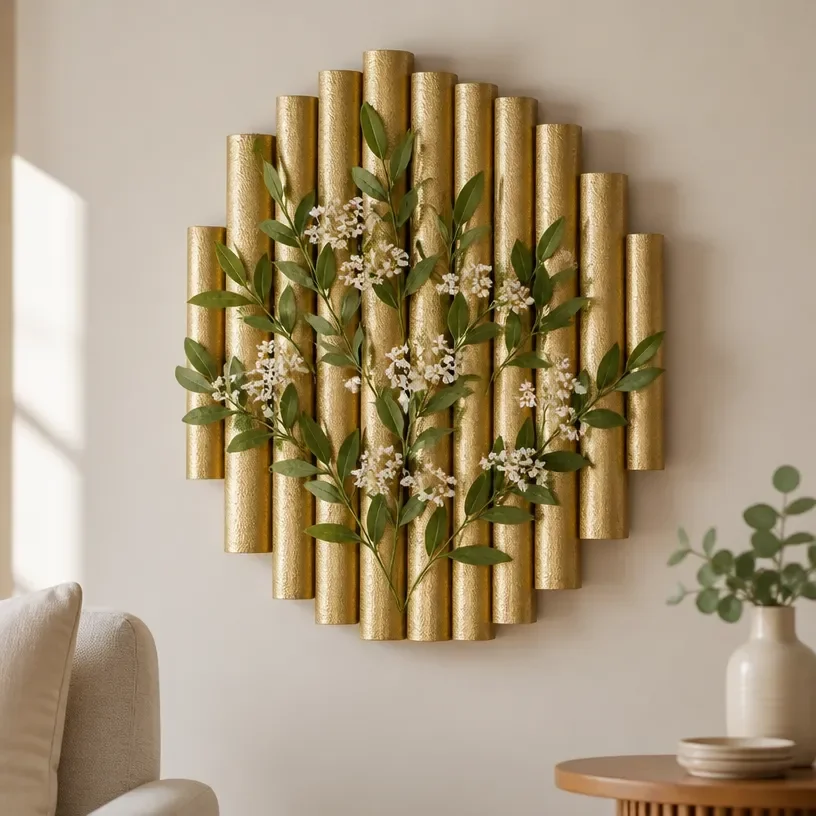
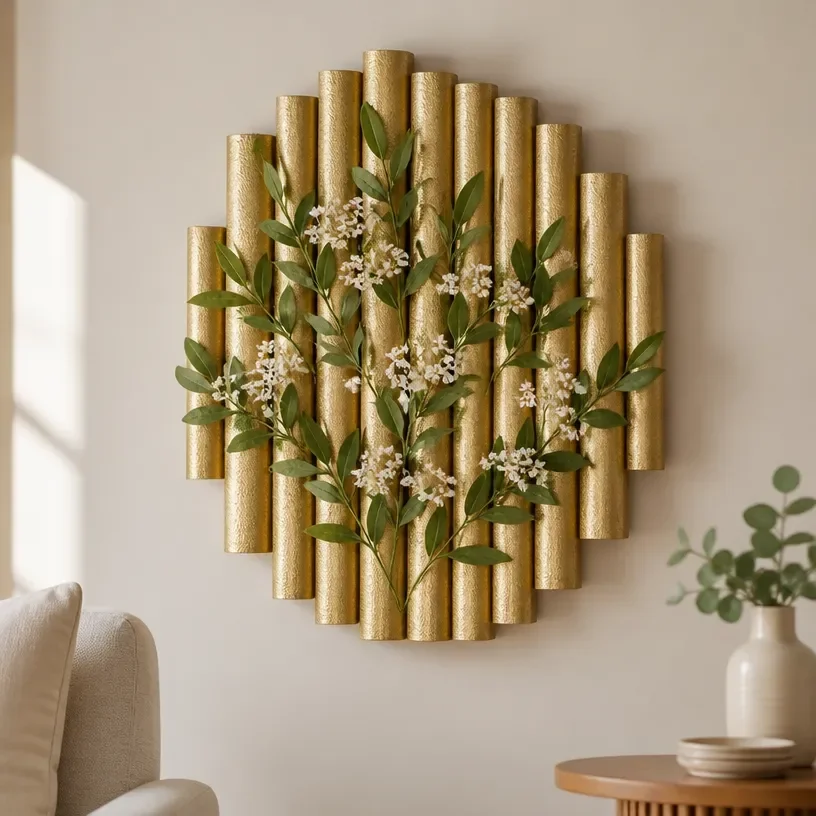
DIY Cardboard Roll Wall Decor for Living Room
Creating your own wall decor is not only a fun project but also a great way to personalize your living space! This DIY Cardboard Roll Wall Decor is an affordable craft that transforms ordinary materials into beautiful art that will brighten up any room. Plus, it’s an enjoyable activity to do with family and friends. Let’s explore why this project is so exciting. You may also find Diy Cardboard And Yarn Fish Decor useful.
Why You’ll Love This Project
- Affordability: Using cardboard rolls, often discarded from wrapping paper or paper towels, makes this project budget-friendly.
- Creative Expression: You can customize the colors and patterns to match your home decor or seasonal themes.
- Simple Instructions: The steps are easy to follow, making it suitable for crafters of all experience levels.
- Eco-Friendly: Repurposing materials supports sustainability by reducing waste.
- Personal Touch: This decor can reflect your personality and style, making it a unique addition to your living area.

You may also find Colorful Apple Themed Classroom Frame For Teachers useful.
Materials You’ll Need
- Cardboard rolls (from paper towels or wrapping paper)
- Scissors
- Craft paint in your preferred colors
- Paintbrushes
- Glue (hot glue or strong craft glue)
- Decorative elements (like ribbon, glitter, or stickers)
How to Make DIY Cardboard Roll Wall Decor for Living Room
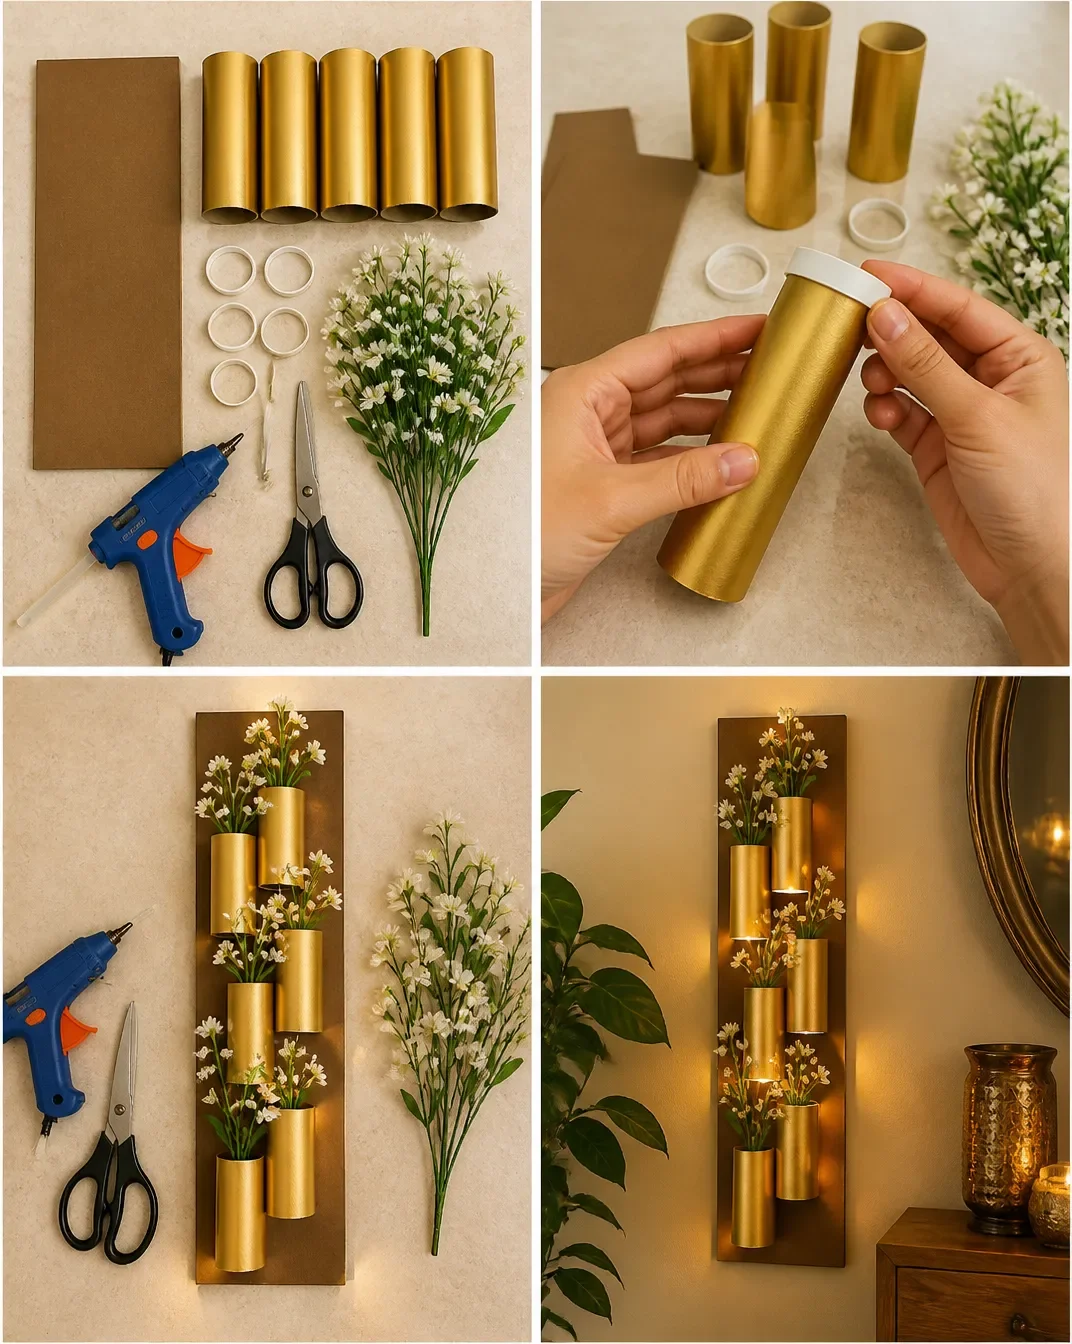
Prepare the Cardboard Rolls: Cut the cardboard rolls into various sizes to create a visually interesting arrangement. You might want to cut some into thick rings and others into thinner strips. You may also find Diy Acorn Kitten Family Rainbow Decor useful.
Paint: Use paintbrushes to color each piece as desired. You can choose complementary colors or go for a vibrant rainbow effect. Let the paint dry completely. You may also find Diy Alphabet Window Garland For Kids useful.
Arrange the Pieces: Before gluing, lay out your pieces on a flat surface to decide on the best arrangement for your decor. Consider mixing different sizes for more visual appeal.
Glue the Pieces Together: Once you’re happy with the arrangement, start gluing the pieces together. Begin with the larger pieces and build up to the smaller ones. Make sure to allow time for the glue to set.
Display Your Creation: After assembling and allowing everything to dry thoroughly, find a special place on your wall to hang your new decor. This could be above a couch, in a hallway, or even as a focal piece in a children’s room.
Helpful Tips
- Use a Variety of Colors: To make your decor pop, choose colors that contrast with your wall color.
- Layering: For added depth, try layering different sizes of cardboard rolls. This technique can create a 3D effect that stands out on your wall.
- Get Creative: Feel free to add additional elements like glitter, washi tape, or fabric to personalize your decor even further.
- Child-Friendly: If crafting with kids, ensure that adult supervision is provided when using scissors or hot glue.
Creative Variations
- Seasonal Themes: Change the colors or decorative elements to reflect different seasons or holidays. For example, use gold and red for Christmas or pastels for spring.
- Inspirational Quotes: Add positive phrases or quotes written on small pieces of cardboard to enhance the aesthetic.
- Size Variation: Experiment with making larger or smaller pieces to create a collage-like effect on your wall.
Making It With Kids
When crafting with children, let them pick their favorite colors and suggest patterns. To avoid any accidents with scissors, you can pre-cut the cardboard rolls, allowing kids to focus on painting and designing. Adult supervision is essential, especially when using glue guns or any sharp tools.
How to Display, Use, or Gift It
Once your cardboard roll decor is complete, display it proudly in your living room or consider giving it as a thoughtful gift to friends or family. It makes a wonderful personalized present for housewarming parties or holidays.
Frequently Asked Questions
1. Can I use any type of cardboard?
Yes, any cardboard roll will work, but thinner rolls like those from toilet paper are easier to cut and manipulate.
2. How long does it take for the glue to dry?
Depending on the glue used, drying times can vary. Hot glue typically sets quickly, while craft glue may need a few hours.
3. What if I don’t have paint?
You can also use colored paper or fabric to cover the cardboard rolls. Simply glue them on for a unique look.
4. Can this project be adapted for outdoor use?
While the cardboard itself isn’t waterproof, you could seal it with a water-resistant spray if you intend to place it outside.
5. How can I hang it on the wall?
You can attach a picture hook or adhesive mounting strips on the back of your decor for easy hanging.
6. Is this safe for young children to help with?
Absolutely! Just ensure that adult supervision is present for any cutting or use of glue guns.
Conclusion
Creating your own cardboard roll wall decor is a delightful way to personalize your living space while having fun with family. For more innovative DIY ideas, check out this DIY Butcher Paper Roll Holder IKEA Hack for additional crafting inspiration! Happy crafting!
Print
DIY Cardboard Roll Wall Decor for Living Room
- Total Time: 30 minutes
- Makes: 1 wall decor piece
Description
Create your own wall decor using cardboard rolls for a personalized touch in your living space.
Materials
- Cardboard rolls (from paper towels or wrapping paper)
- Scissors
- Craft paint in your preferred colors
- Paintbrushes
- Glue (hot glue or strong craft glue)
- Decorative elements (like ribbon, glitter, or stickers)
Instructions
- Prepare the cardboard rolls: Cut them into various sizes for an interesting arrangement.
- Paint: Use paintbrushes to color each piece and allow the paint to dry completely.
- Arrange the pieces: Lay them out on a flat surface to decide on the best layout.
- Glue the pieces together: Start with the larger pieces and build up to the smaller ones, allowing time for the glue to set.
- Display your creation: Hang your new decor on a wall in your living room, above a couch, or in a hallway.
Notes
For a pop of color, contrast with your wall color, and use layering techniques for depth. Ensure adult supervision when crafting with children.