

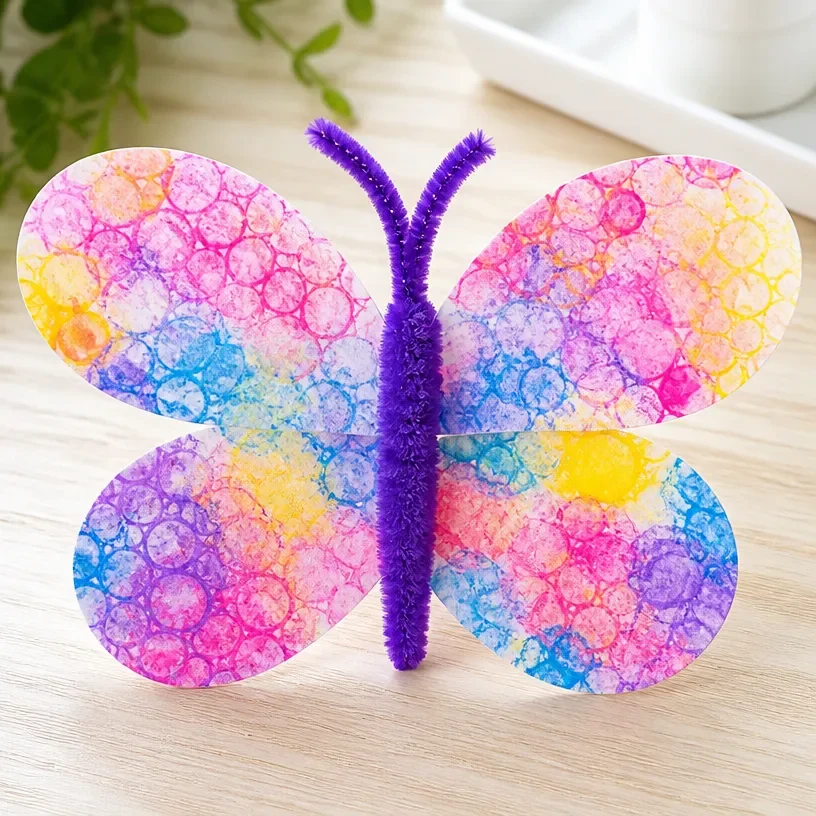
DIY Bubble Print Butterfly Wings Craft for Kids
Have you ever thought about how beautiful and colorful butterflies are? Now you can create your very own butterfly wings using a fun and easy bubble print technique! This craft is not only a delightful activity for kids but also an engaging way to explore colors and creativity. Plus, it can be a lovely decoration for their rooms or a playful addition to costumes. If you’re looking for more exciting crafts, you might enjoy making a rainbow monster pencil holder that adds another layer of creativity to your craft time.
Why You’ll Love This Project
- Colorful and Fun: The bubble print technique produces beautiful, vibrant colors that kids love.
- Easy to Make: With simple materials and instructions, this project is perfect even for beginners.
- Creative Exploration: Kids can customize their butterfly wings with their favorite colors and patterns.
- Interactive Learning: This craft encourages kids to experiment and develop their fine motor skills.
- Versatile Use: The finished wings can be used for dress-up, decorations, or even a fun school project.
You may also find Clear Rainbow Ghost Shaker Suncatcher Craft For Kids useful.
Materials You’ll Need
To create your DIY bubble print butterfly wings, gather the following materials: You may also find Colorful School Bus Photo Frame Craft For Kids useful.
- White paper or cardstock
- Liquid watercolors or food coloring
- Bubble solution (you can make your own or buy it)
- A shallow dish or tray
- Straw (for blowing bubbles)
- Scissors
- Optional: glitter, markers, or stickers for decorating
How to Make DIY Bubble Print Butterfly Wings Craft for Kids
Follow these simple steps to make your butterfly wings: You may also find Cupcake Liner Sunflower Wreath Craft For Kids useful.
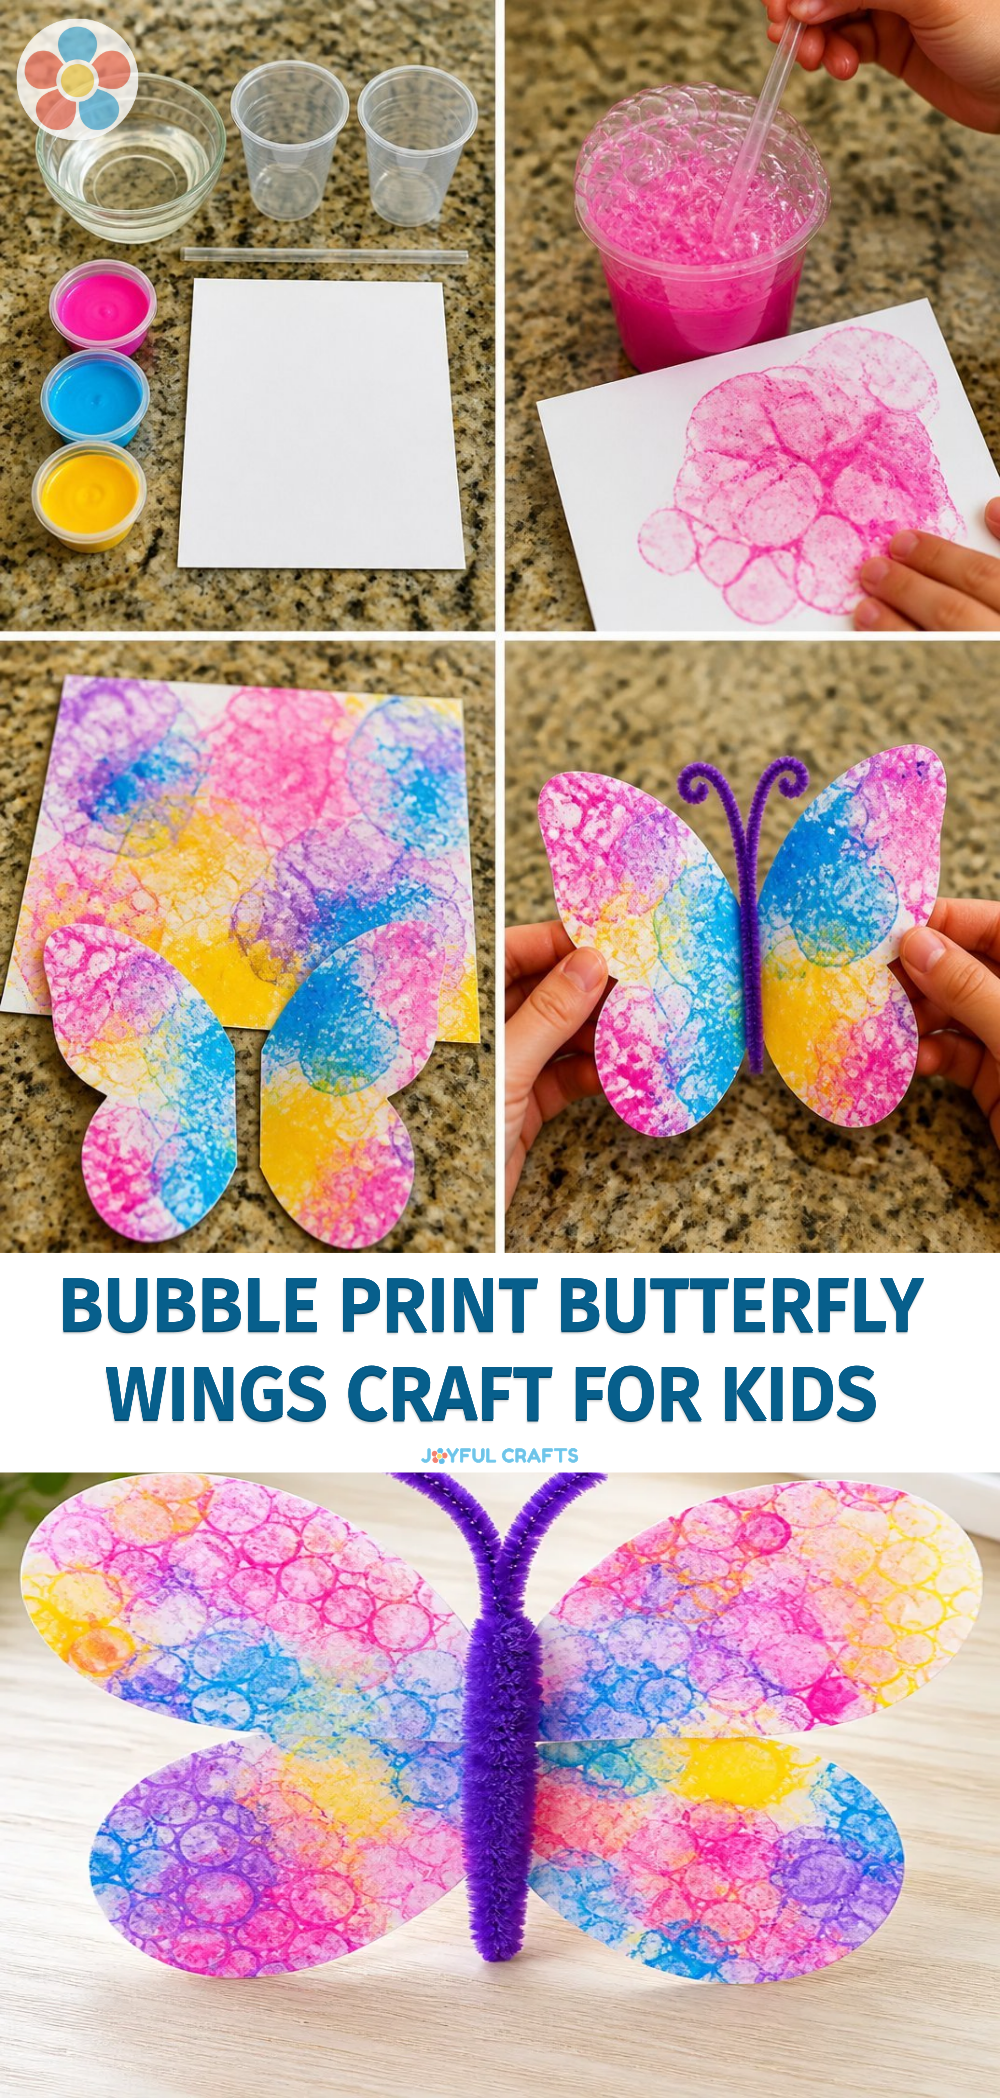
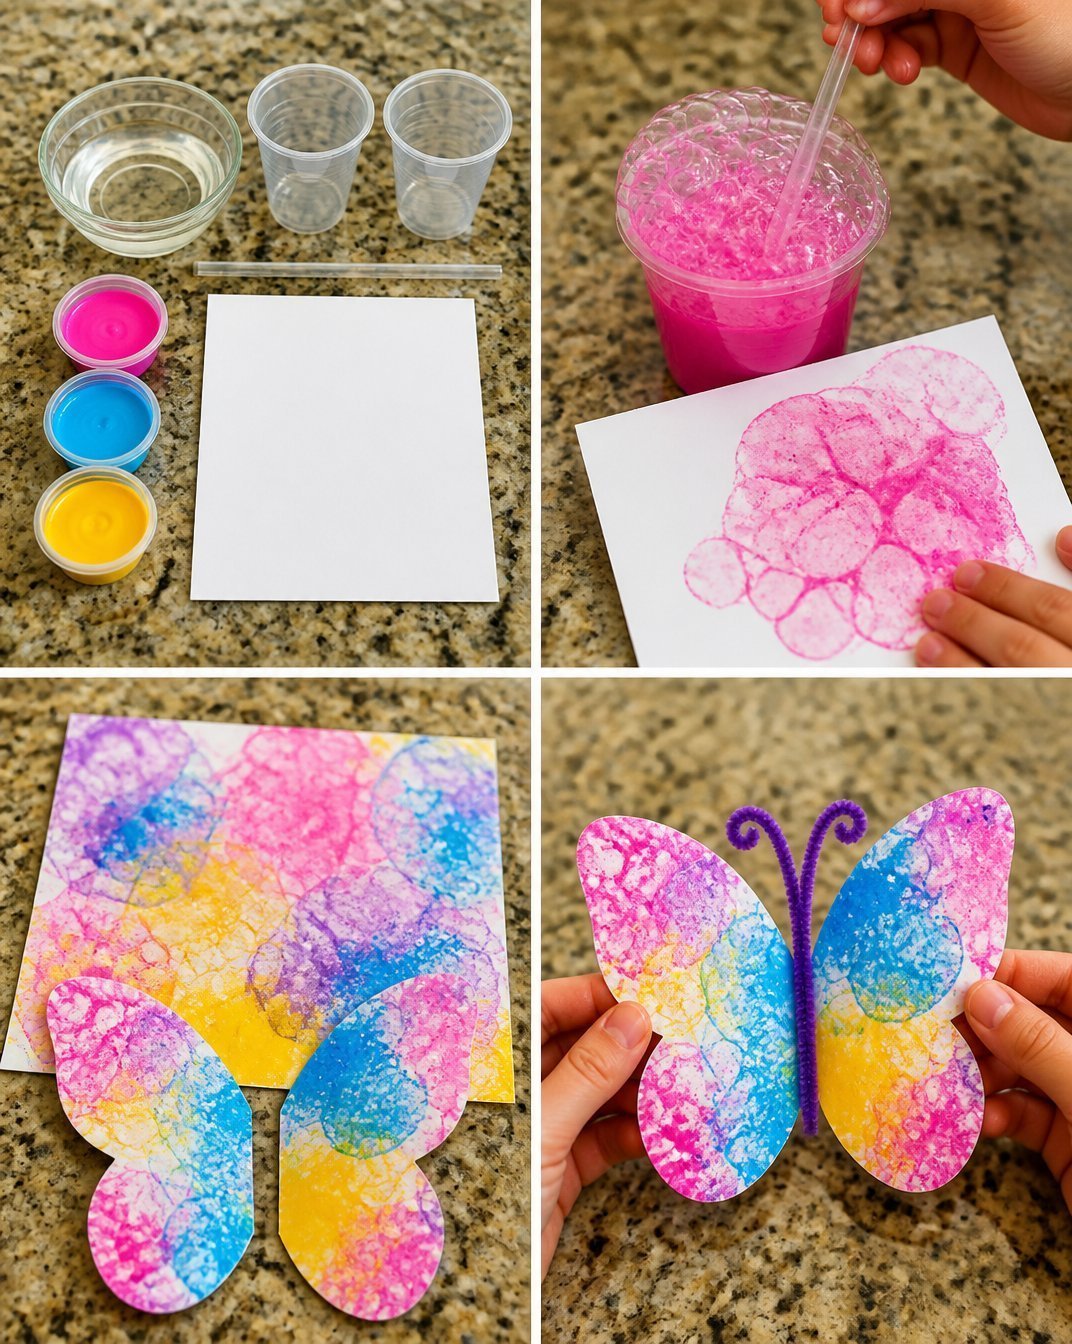
Prepare Your Bubble Solution: If you’re making your own, mix dish soap and water in a bowl. Add a splash of color, whether it’s liquid watercolor or food coloring.
Create Bubbles: Dip the straw into the bubble solution. Blow gently into the straw to create bubbles. Keep blowing until the bubbles flow over the sides of the dish.
Print Your Wings: Take a piece of white paper or cardstock and carefully place it over the bubbles, ensuring it covers the bubble area. Press down gently to capture the prints on the paper.
Remove and Dry: Carefully lift the paper from the bubble tray. Set it aside to dry completely.
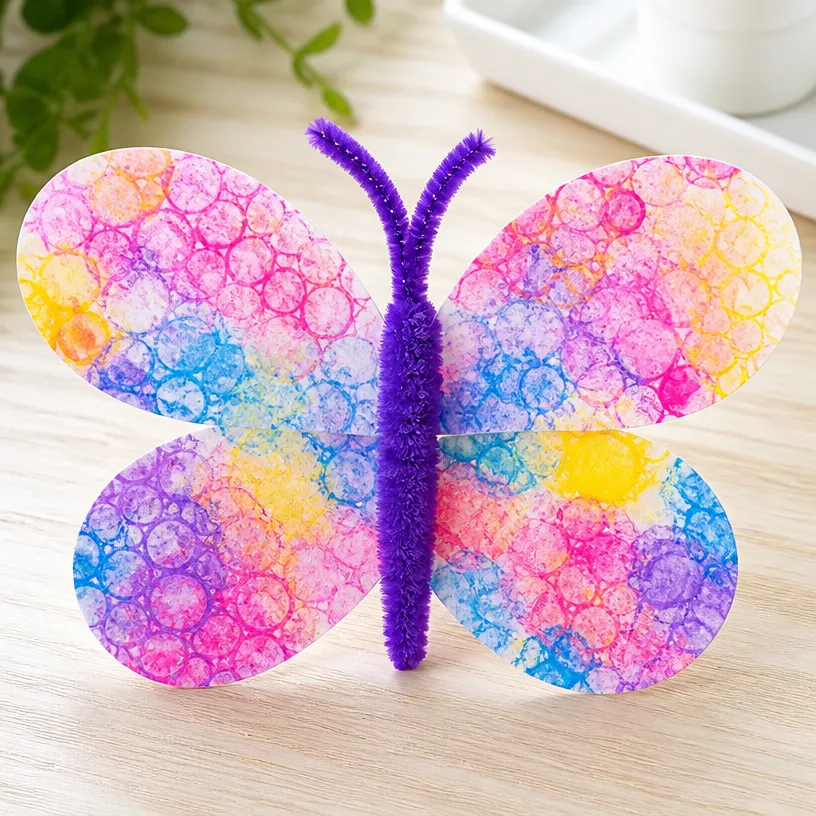
Cut Out the Wings: Once dry, use scissors to cut out butterfly wing shapes from your printed paper. You can draw a template if you like!
Decorate: Personalize your butterfly wings with glitter, markers, or stickers to give them your unique flair!
Helpful Tips
- Adjusting Colors: Experiment with different colors by mixing more watercolors or food coloring into the bubble solution.
- Bubble Volume: The number of bubbles will depend on how much soap you use, so feel free to adjust it for bigger or smaller bubbles.
- Drying Time: Make sure to let the wings dry completely to avoid any smudging when you cut them out.
Creative Variations
- Different Shapes: Instead of butterfly wings, try creating other shapes like flowers or hearts using the same technique.
- Seasonal Themes: Adapt the colors to match the seasons autumn oranges and browns, winter whites, or bright spring hues.
- Mixed Media: Combine your bubble prints with other materials, such as colorful tissue paper or ribbons, to enhance your design.
Making It With Kids
While this craft is perfect for children, adult supervision is recommended, especially when using scissors or any small parts. This project provides a wonderful opportunity to bond with kids, encouraging their creativity while enjoying a messy, fun art activity!
How to Display, Use, or Gift It
Once you’ve created your butterfly wings, you can easily display them by hanging them on walls, attaching them to a string to create a mobile, or using them for imaginative play. They also make lovely gifts for friends or family members!
Frequently Asked Questions
1. How do I make more vibrant bubble prints?
To achieve more vibrant prints, use liquid watercolors over food coloring, or add more color to your bubble solution as needed.
2. Can I use regular paint instead of liquid watercolors?
Regular paint may not create the same bubbly effect, but it can work if diluted with water.
3. What if I don’t have a straw?
You can use a small plastic or paper cup to create bubbles instead. Simply dip and blow!
4. How long do the wings take to dry?
Allow at least 30 minutes to an hour for the wings to dry completely, depending on the thickness of paint applied.
Conclusion
Making DIY bubble print butterfly wings is a perfect way to let kids express their creativity while having fun. Once the craft day is over, you might want to explore more creative ideas like crafting butterfly-inspired art by visiting this resource on bubble art butterflies. Enjoy crafting!
Print
DIY Bubble Print Butterfly Wings Craft for Kids
- Total Time: 15 minutes
- Makes: 1 set of butterfly wings
Description
Create colorful butterfly wings using a fun and easy bubble print technique, perfect for kids to explore their creativity.
Materials
- White paper or cardstock
- Liquid watercolors or food coloring
- Bubble solution
- A shallow dish or tray
- Straw
- Scissors
- Optional: glitter, markers, or stickers
Instructions
- Prepare your bubble solution by mixing dish soap and water, adding color as desired.
- Create bubbles using the straw in the solution.
- Print your wings by placing paper over the bubbles and pressing down.
- Remove the paper and let it dry completely.
- Cut out the butterfly wing shapes from the dried paper.
- Decorate your wings with glitter, markers, or stickers.
Notes
Adult supervision is recommended when using scissors or small parts. Adjust colors and bubble volumes as needed for best results.