

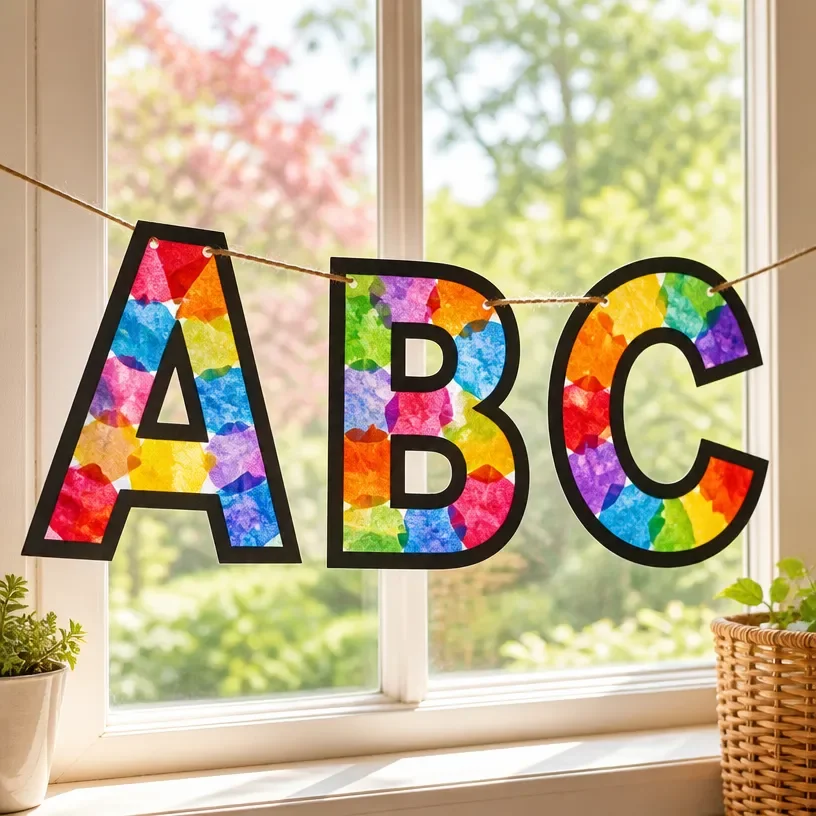
Bright Colorful Alphabet Window Garland – ABC Banner for Kids
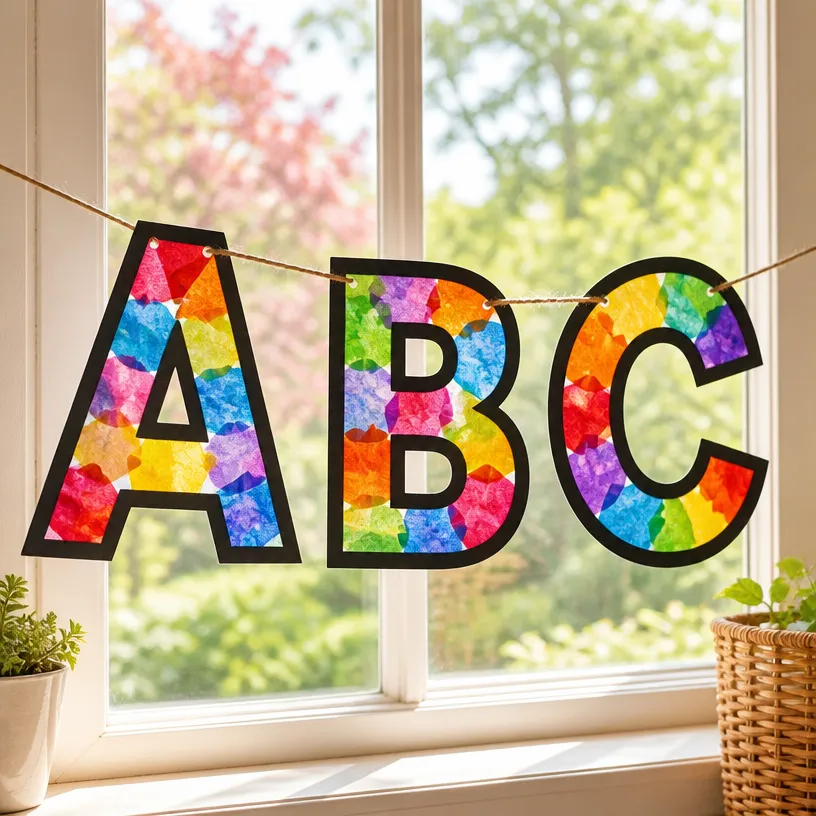
Creating a bright and colorful alphabet window garland is a delightful way to decorate your space while teaching kids their ABCs! This project is not only visually engaging but also a great way to encourage creativity and learning in a fun atmosphere. Whether you’re preparing for a birthday, back-to-school season, or just to liven up a room, this garland will bring a cheerful touch to your decor. Plus, kids love hanging their colorful creations in windows and doorways! You may also find Bright Colorful Alphabet Garland For Kids useful.
Why You’ll Love This Project
- Fun Learning Tool: This garland helps children learn and recognize the alphabet in a playful manner.
- Easy to Customize: Children can choose their colors and designs, making it unique to their personality.
- Simple and Affordable: The materials are easy to find, and the steps are straightforward, making this project accessible for all skill levels.
- Versatile Decoration: Use it for various occasions, from classroom decorations to party banners.
You may also find Colorful Alphabet Window Garland For Kids useful.
Materials You’ll Need
To create your Bright Colorful Alphabet Window Garland, gather the following supplies: You may also find 3D Raised Salt Painting Colorful Artwork For Kids useful.
- Colorful card stock or paper
- Scissors
- String or twine
- Hole punch
- Markers or crayons
- Glue (optional)
This selection of materials provides all you need for a fun crafting experience. For additional creative ideas, consider adding different embellishments like stickers or glitter. You may also find Colorful Rainbow Monster Pencil Holder For Kids useful.
How to Make Bright Colorful Alphabet Window Garland – ABC Banner for Kids
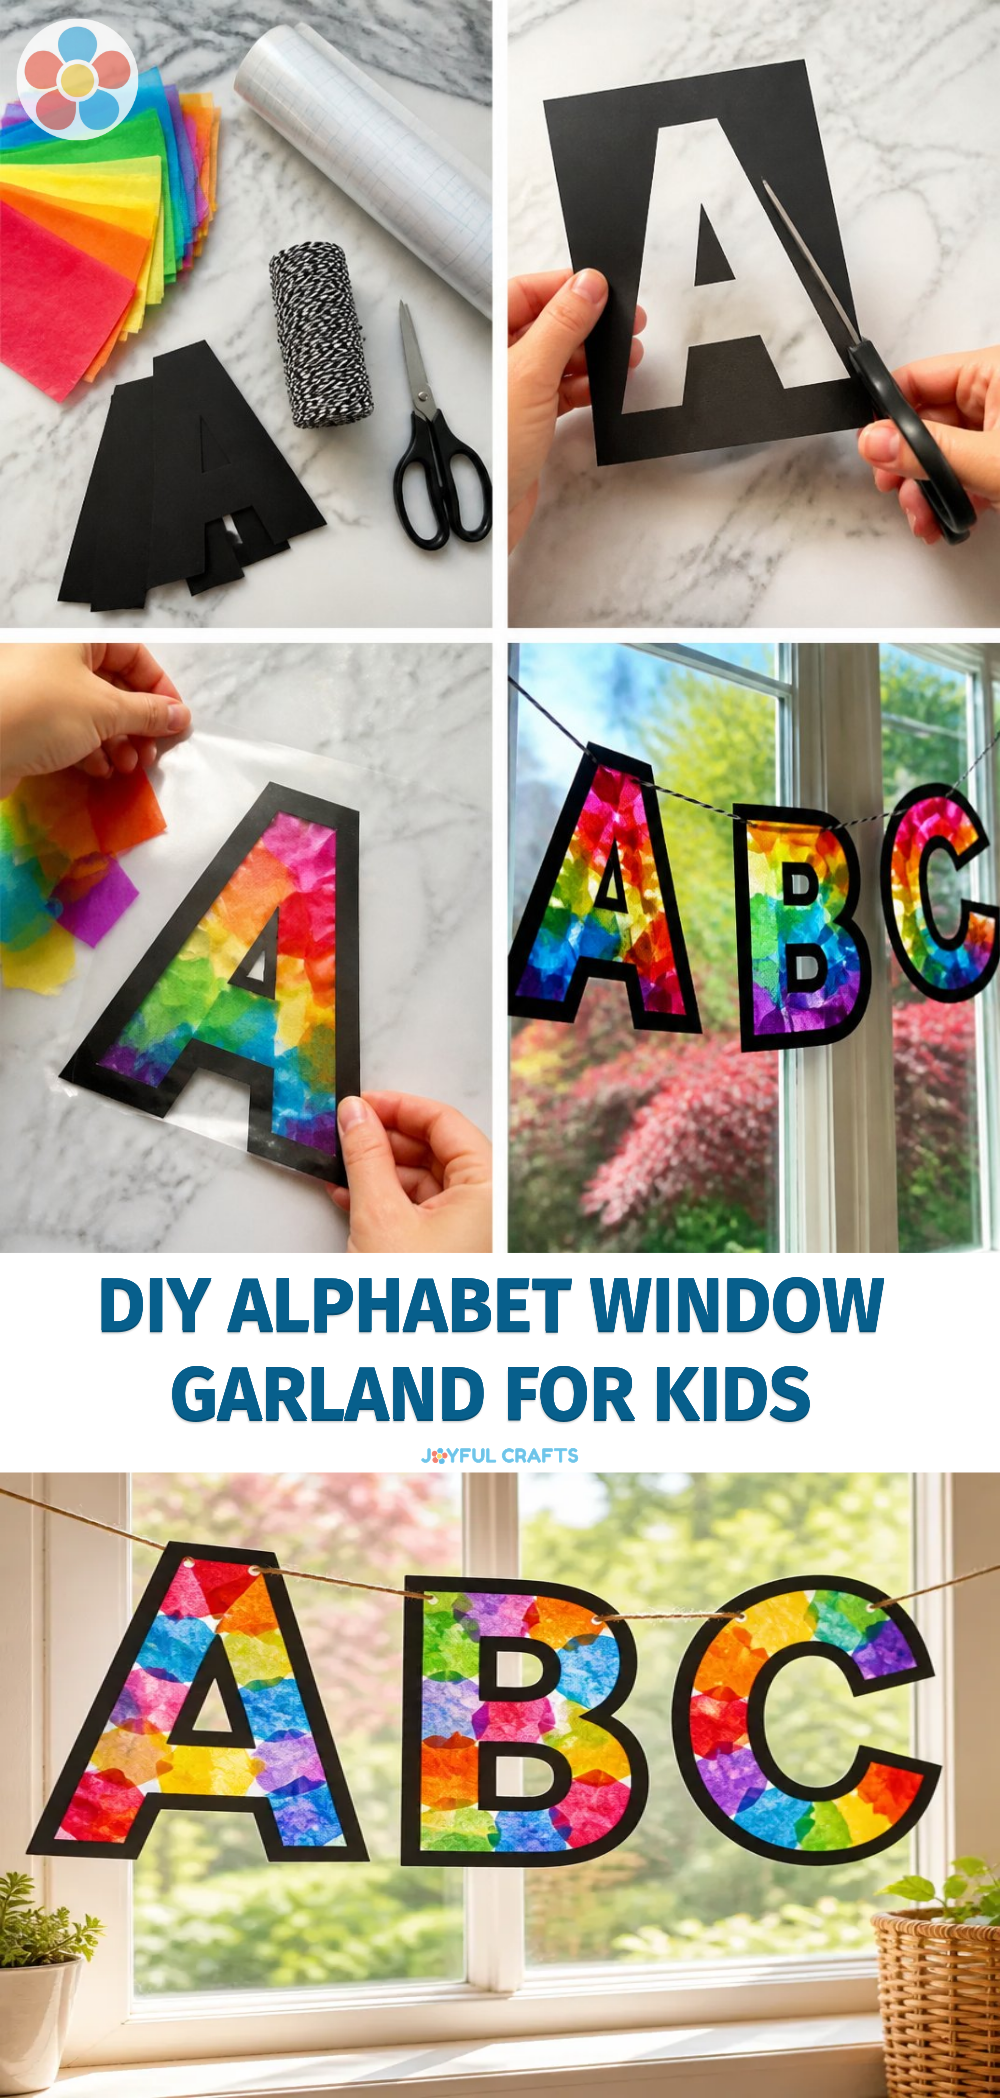
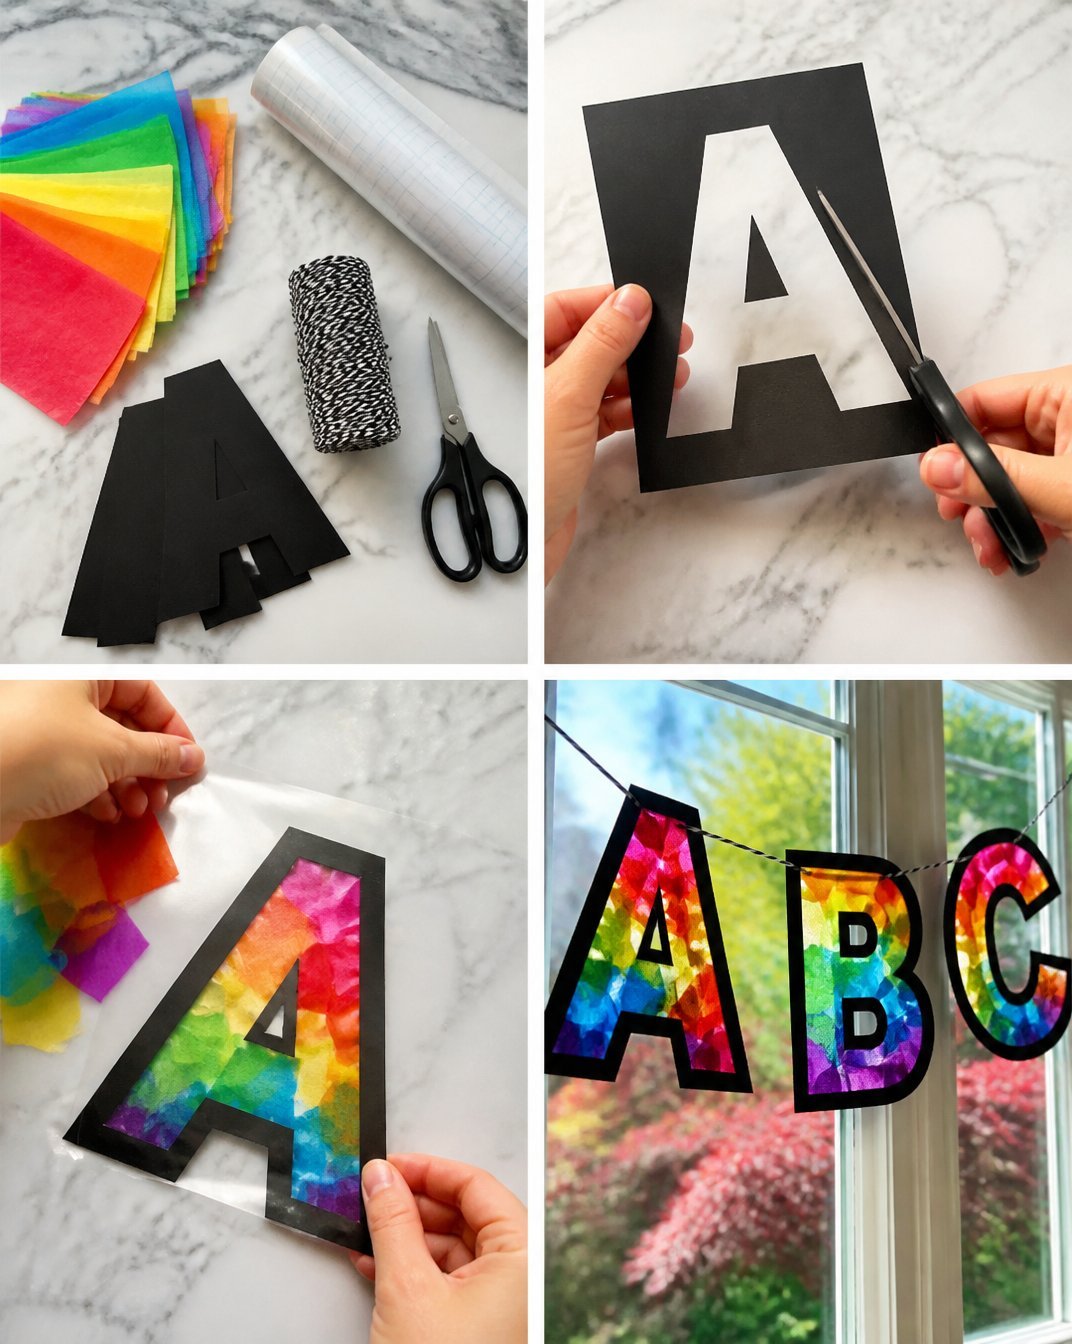
- Prepare the Letters: Start by cutting out large letters of the alphabet from colorful card stock. Each letter should be around 6-8 inches tall for visibility.
- Decorate: Let the kids use markers and crayons to decorate each letter. Encourage them to draw designs or patterns that they enjoy.
- Punch Holes: Punch a hole in the top corners of each letter, ensuring you leave enough space for the string.
- String the Letters: Cut a length of string or twine long enough to reach across your desired display area. Thread each letter onto the string, spacing them evenly.
- Hang Your Garland: Finally, find a perfect spot to hang your colorful garland! Windows, doorways, and even classroom walls are great choices.
Helpful Tips
- Work on a Clean Surface: Ensure your crafting area is clean to avoid unnecessary mess.
- Use Different Fonts: Encourage kids to experiment with different styles of writing or fonts for a more dynamic look.
- Create Seasonal Themes: To keep the banner fresh, consider making themed garlands for holidays such as Halloween or Christmas, recycling the letters but changing the colors and decorations.
- Consider Outdoor Display: If you’re using non-weatherproof materials, hang the garland inside or under awnings for protection.
Creative Variations
To personalize your alphabet garland even further, consider these ideas:
- Mix patterns in every letter using scrapbook paper.
- Create a smaller or larger version to fit specific spaces.
- Add seasonal decorations (like leaves for autumn or flowers for spring) to each letter.
Making It With Kids
Involving kids in this craft is a wonderful way to foster creativity. Supervise younger children while using scissors and a hole punch. Let them choose the letter colors and designs while you assist with the assembly.
How to Display, Use, or Gift It
Your completed alphabet garland can be hung in various locations, like classroom walls or kids’ bedrooms. It can also make a lovely gift for friends or family, particularly tied with a ribbon or nestled in a thoughtful card.
Frequently Asked Questions
1. What kind of paper is best to use?
Using card stock is preferable because it’s sturdier than regular paper and will hold up better when hung.
2. How can I make the letters more durable?
Consider laminating the letters for extra protection, especially if they will be used for outdoor displays.
3. Can I create this garland for a specific theme?
Absolutely! You can choose colors and decorations based on your theme, such as pastel colors for a spring celebration or vibrant colors for a birthday party.
4. What if I can’t draw well?
You can use stencils or printed templates from online resources to create uniform letters.
5. How long does the garland typically last?
The longevity depends on materials used. Card stock can last for months if properly stored and displayed away from moisture.
6. Are there any alternatives to using string?
Yes! Use a dowel, ribbon, or even a clothesline for a different visual effect.
Conclusion
Making a Bright Colorful Alphabet Window Garland is a joyful activity that brings creativity into learning. Enhance your back-to-school decorations or celebrate special occasions with this cheerful, handmade project. If you’re looking for additional supplies and inspiration, check out these welcome back to school decorations to complement your setup!
Print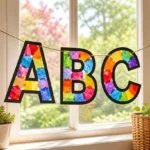
Bright Colorful Alphabet Window Garland – ABC Banner for Kids
- Total Time: 15 minutes
- Makes: 1 garland
Description
Create a bright and colorful alphabet window garland that helps kids learn their ABCs while adding a cheerful touch to your decor.
Materials
- Colorful card stock or paper
- Scissors
- String or twine
- Hole punch
- Markers or crayons
- Glue (optional)
Instructions
- Prepare the letters: Cut out large letters of the alphabet from colorful card stock, about 6-8 inches tall.
- Decorate each letter with markers and crayons, encouraging kids to draw designs they enjoy.
- Punch holes in the top corners of each letter, leaving enough space for the string.
- String the letters onto a length of string or twine, spacing them evenly.
- Hang your garland in a perfect spot like windows, doorways, or classroom walls.
Notes
Involve children during the crafting process and ensure supervision when using scissors and hole punches.