

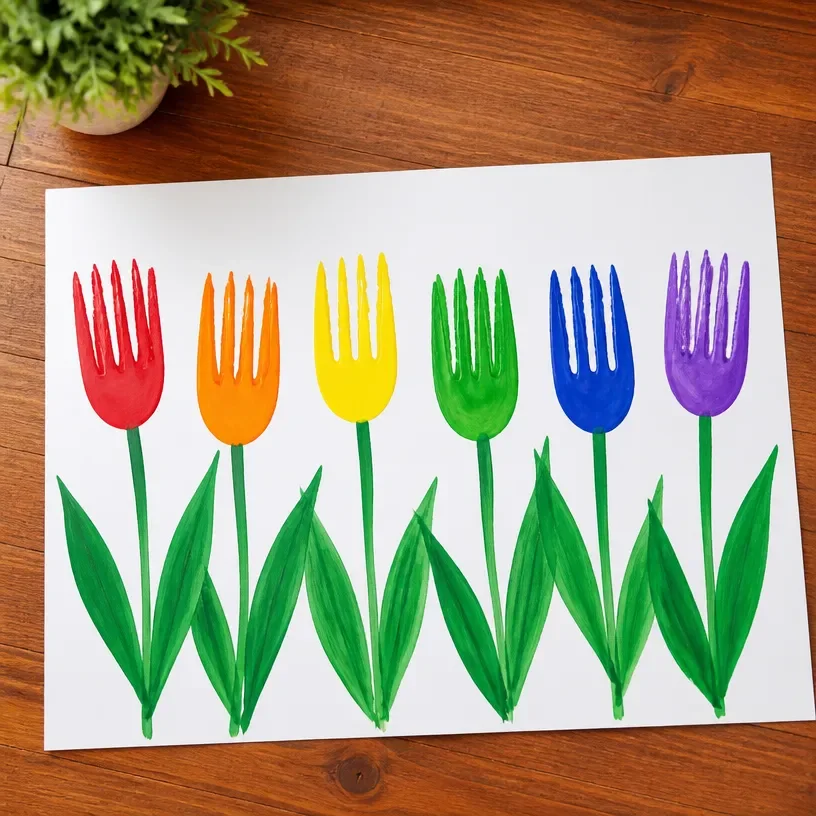
Rainbow Tulip Garden with Fork-Painted Blooms
Creating a colorful rainbow tulip garden using fork painting is a delightful craft project that the whole family can enjoy. Not only does it brighten up any space, but it also offers a fun opportunity to explore creativity while working with colors and textures. You may also find Rainbow Cupcake Liner Butterfly Garden Craft useful.
Why You’ll Love This Project
- Easy and Engaging: This project is perfect for crafters of all ages, making it an enjoyable experience for both kids and adults.
- Sensory Fun: Fork painting allows for different textures and patterns, encouraging tactile exploration and creativity.
- Colorful Display: The finished tulips can be used as decorations around your home or in the garden, adding vibrant beauty to your space.
- Educational Benefits: This activity can teach children about colors and flower shapes in an interactive way.
- Affordable Materials: Most supplies you will need for this project are inexpensive and commonly found at home.
You may also find Rainbow Flower Garden Stakes Recycled Bottles useful.
Materials You’ll Need
- Heavyweight paper or cardstock
- Washable paints in various colors (red, yellow, blue, green, purple)
- Plastic forks
- Scissors
- Optional: markers or colored pencils for details
- Clear sealant spray (for outdoor use)
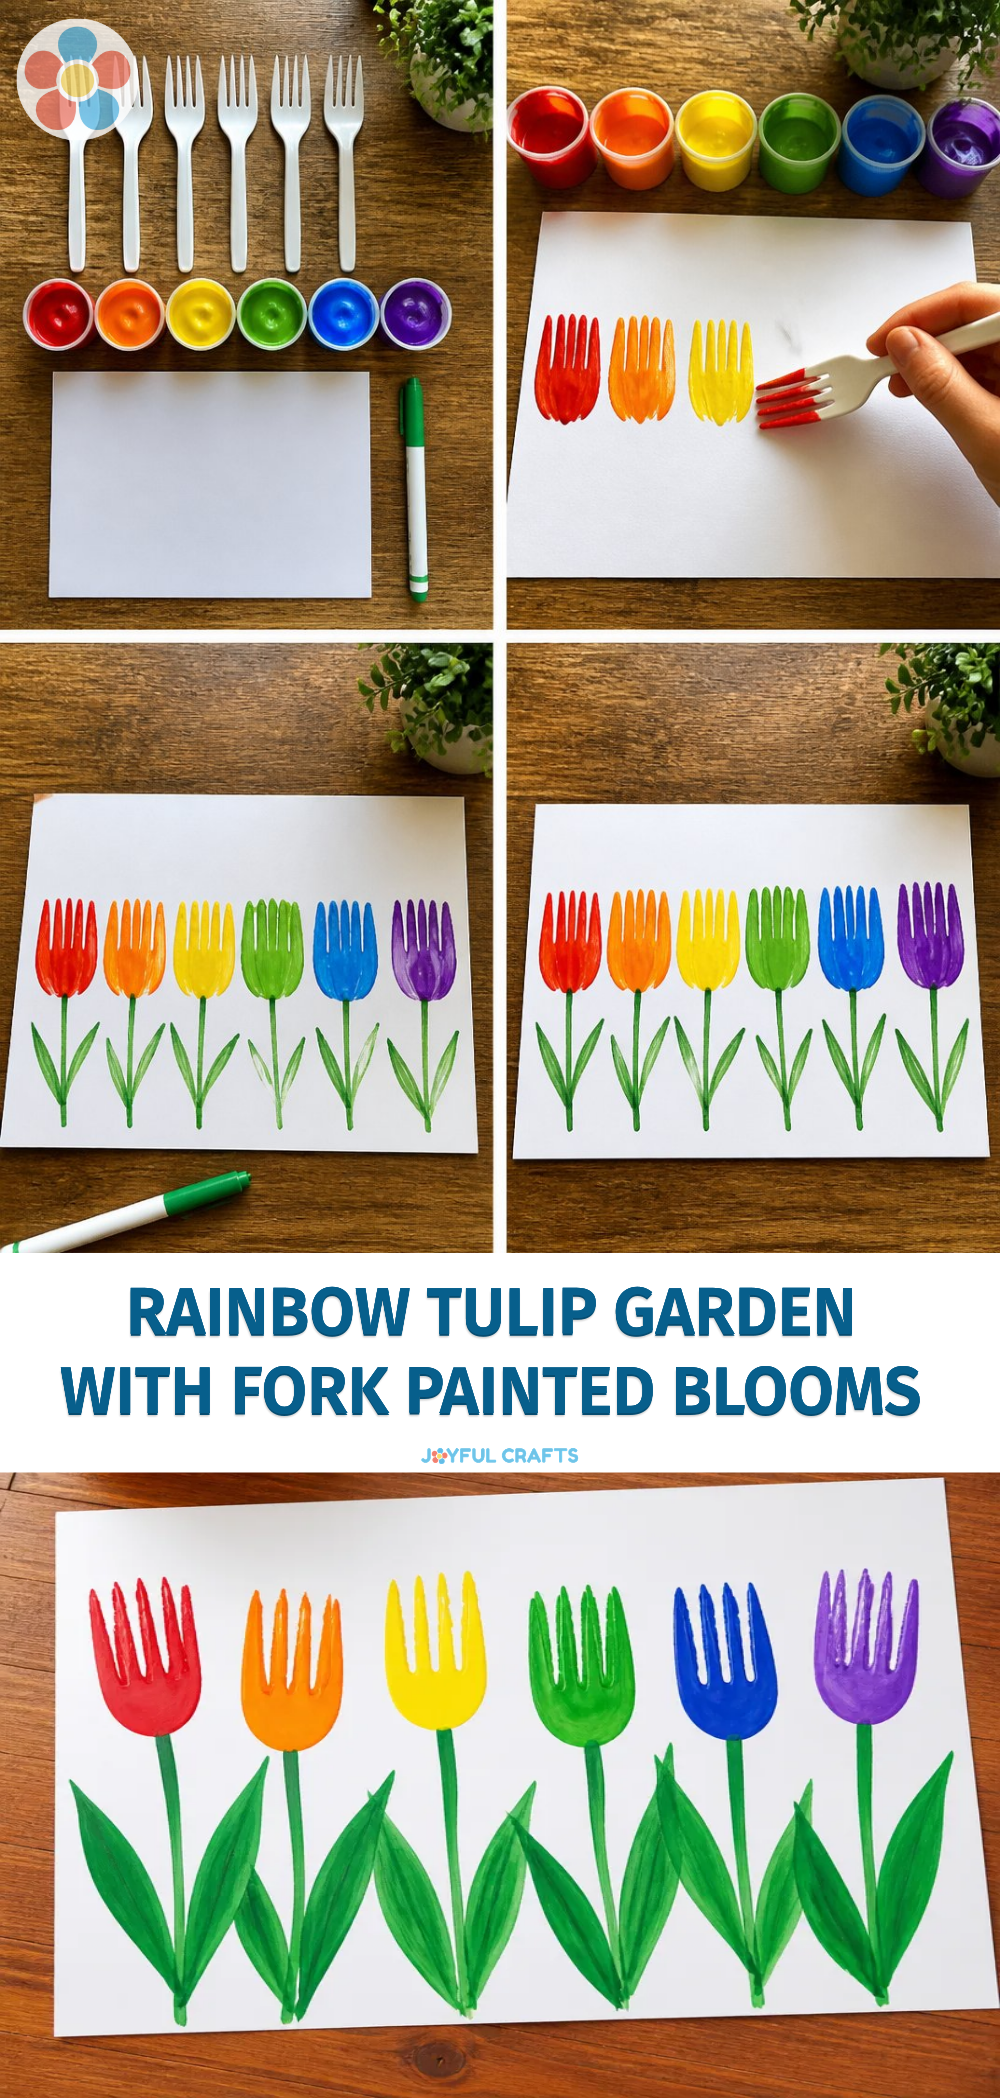
How to Make Rainbow Tulip Garden with Fork-Painted Blooms
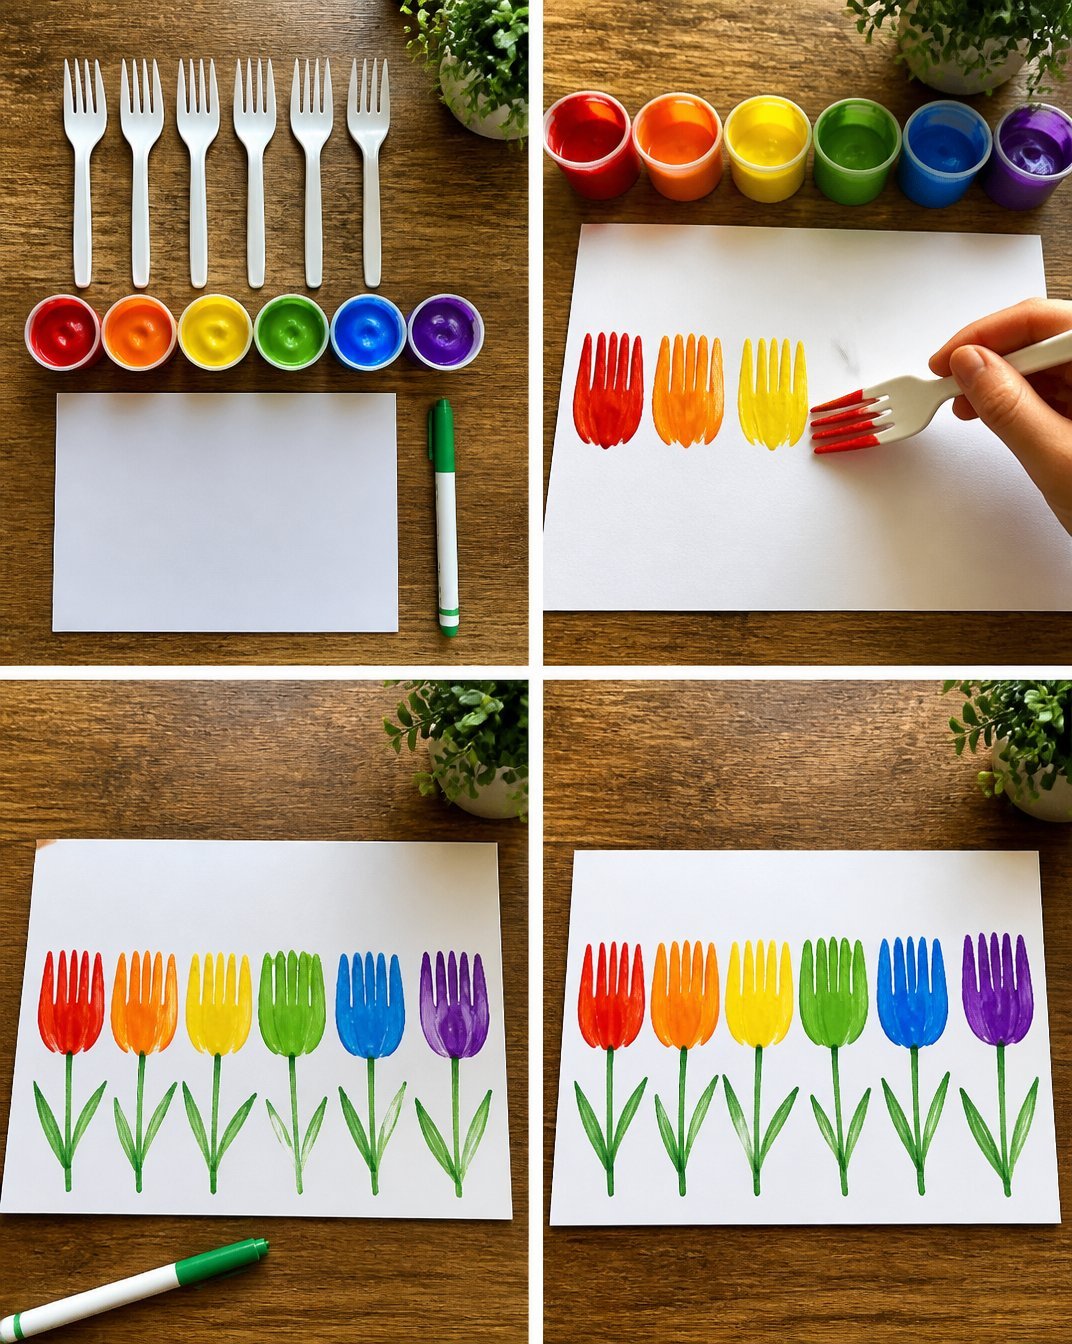
Prepare the Paper: Start by selecting your heavyweight paper or cardstock. This will be the base for your tulips. Cut it into various shapes for the flowers and leaves if desired. You may also find Rainbow Painted Rocks Colorful Flower Garden useful.
Choose Your Colors: Pour your washable paints onto a plate or palette, arranging them in a rainbow order for easy access. This makes the painting process even more fun! You may also find Clear Rainbow Ghost Shaker Suncatcher Craft For Kids useful.
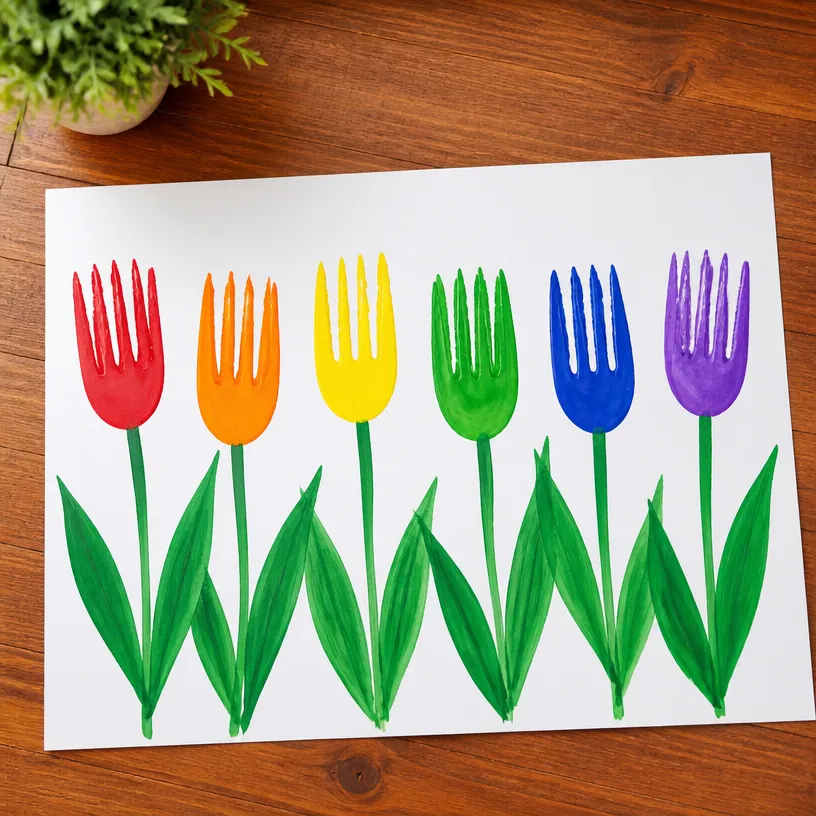
Fork Painting: Dip the back prongs of a plastic fork into the chosen paint color, and press it down onto the paper to create the tulip shape. For each bloom, try using different colors to form a pattern. You can also experiment by layering colors or creating mixed shades.
Create Stems and Leaves: Use green paint and the fork to create leaves and stems under each flower by painting lines or leaf shapes.
Drying Time: Allow the painted paper to dry completely. If you’re planning to display your tulips outside, consider applying a clear sealant spray once the paint is dry.
Display Your Garden: Cut out the tulip shapes once everything is dry. You can attach them to a garden stake or simply display them in pots around your home or garden.
Helpful Tips
- Mess Management: To minimize mess, cover your workspace with newspaper or a plastic tablecloth. This makes cleanup much easier after your crafting session.
- Work in Batches: If crafting with kids, consider setting up multiple stations with different colors and supplies to keep them engaged.
- Drying: Depending on the paint used, drying times can vary. If using thicker coatings of paint, it may take longer to dry. Always check before handling!
- Use Different Forks: Experiment with different types of utensils, like spoons or even paintbrushes, for additional patterns.
Creative Variations
- Different Shapes: Instead of just tulips, you can create other flowers like daisies or sunflowers using the fork painting technique.
- Color Mixing: Encourage kids to mix their paint on the fork to create new colors, allowing them to see how secondary colors are formed.
- Seasonal Themes: Adapt this craft to fit with different seasons by selecting color schemes that reflect seasonal blooms.
Making It With Kids
This project is ideal for crafting with children, allowing them to express themselves freely. Always supervise younger children, especially when using scissors for cutting out the flower shapes. Ensure that the paints used are non-toxic, and set clear boundaries about where they can paint.
How to Display, Use, or Gift It
Once your tulips are ready, they can be proudly displayed in your garden, window boxes, or even given as thoughtful gifts to friends and family. You can also create a beautiful centerpiece for a dining table by placing the flowers in a vase or tying them together in a bouquet.
Frequently Asked Questions
1. What type of paint works best for this project?
Washable paints are ideal for this project, especially when working with kids, as they are easy to clean and non-toxic.
2. Can I use this technique on fabric?
Yes! You can use fabric paint instead of regular paint if you want to create designs on fabric items.
3. How do I create a more 3D effect?
You can layer multiple painted forks by overlapping their prints to create depth in the flower petals.
4. What if the paint smudges?
If you notice any smudging, quickly dab the area with a paper towel to absorb the excess paint before it dries.
5. Can I use other utensils for different patterns?
Absolutely! Experimenting with kitchen utensils can lead to unique and interesting designs.
6. How do I care for outdoor displays?
When using painted items outside, giving them a clear sealant will help protect the paint from rain and sun.
Conclusion
Creating a rainbow tulip garden using fork-painted blooms is a fun and engaging craft that promotes creativity and educational learning. If you’re interested in expanding your gardening knowledge, consider checking out this resource on top tips on how to use tulips for flower farmers. Enjoy your crafting!
Print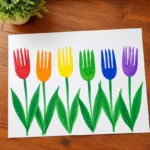
Rainbow Tulip Garden with Fork-Painted Blooms
- Total Time: 1 hour
- Makes: Multiple tulips
Description
A delightful craft project that uses fork painting to create colorful tulip flowers, perfect for decorating your home or garden.
Materials
- Heavyweight paper or cardstock
- Washable paints in various colors (red, yellow, blue, green, purple)
- Plastic forks
- Scissors
- Optional: markers or colored pencils for details
- Clear sealant spray (for outdoor use)
Instructions
- Prepare the Paper: Start by selecting your heavyweight paper or cardstock. Cut it into various shapes for the flowers and leaves if desired.
- Choose Your Colors: Pour your washable paints onto a plate or palette, arranging them in rainbow order.
- Fork Painting: Dip the back prongs of a plastic fork into the chosen paint color, and press it down onto the paper to create the tulip shape.
- Create Stems and Leaves: Use green paint and the fork to create leaves and stems under each flower.
- Drying Time: Allow the painted paper to dry completely.
- Display Your Garden: Cut out the tulip shapes once everything is dry and attach them to garden stakes or display them in pots.
Notes
Consider covering your workspace to minimize mess. Experiment with different materials for unique designs.