


Rainbow Ocean Painting with Bubble Wrap for Kids
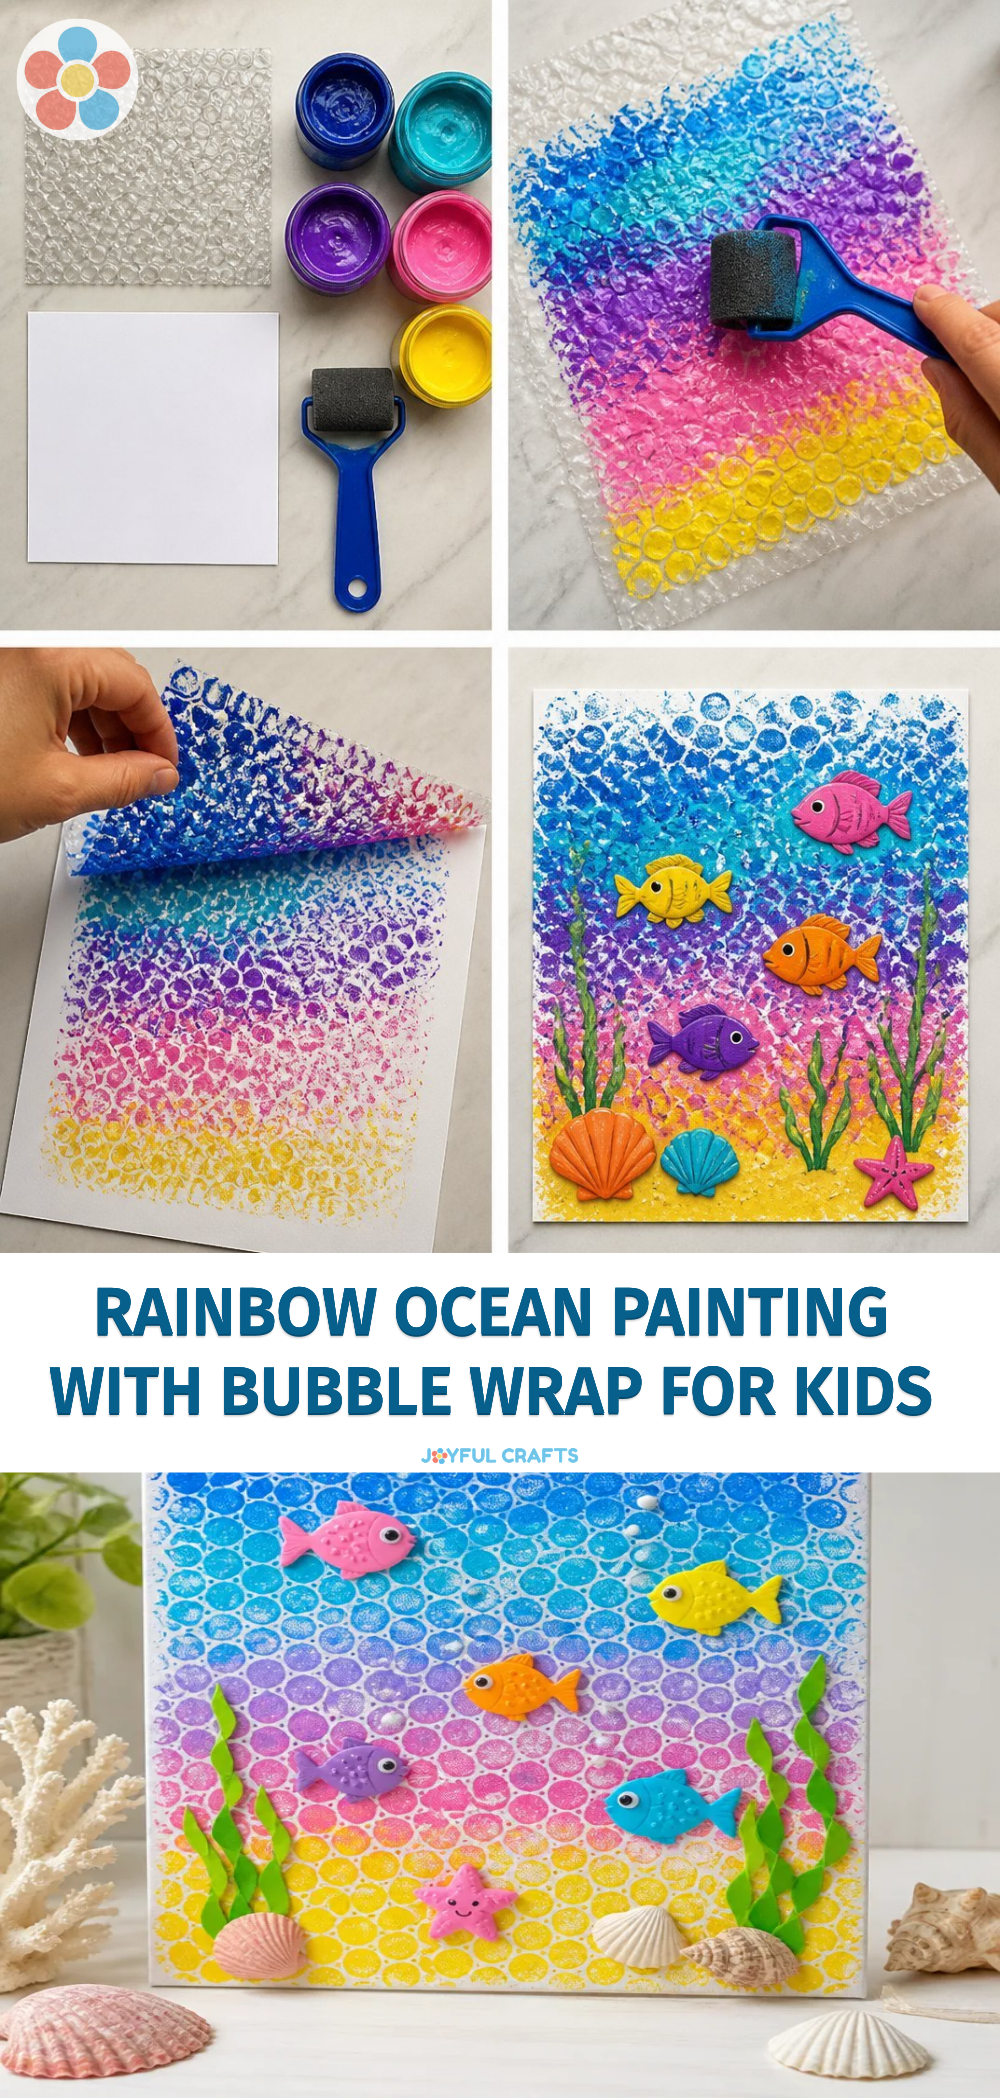
Engaging in crafts is a wonderful way for kids to express their creativity, and the Rainbow Ocean Painting with Bubble Wrap is no exception! This colorful project combines painting and bubble wrap for a delightful and tactile artwork experience. It’s simple enough for young artists and can lead to a vibrant masterpiece that showcases their colorful imagination. You may also find Clear Rainbow Ghost Shaker Suncatcher Craft For Kids useful.
Why You’ll Love This Project
- Sensory Fun: Kids get to explore texture with bubble wrap, making the painting experience lively.
- Easy Cleanup: Using bubble wrap can make for less mess compared to traditional painting methods.
- Creative Expression: Each child can create a unique ocean scene filled with their chosen colors, making this a great expression of individuality.
- Great for All Ages: Suitable for little ones and older kids alike, it allows everyone to participate at their skill level.
- Quick Result: The painting dries fairly quickly, and kids can see their finished artwork in no time.
You may also find Colorful Rainbow Monster Pencil Holder For Kids useful.
Materials You’ll Need
- Bubble wrap
- Paint (blue and green for the ocean, plus any other colors for creativity)
- Paintbrushes
- White paper
- A shallow tray or plate for paint
- Scissors (if needed, for cutting the bubble wrap)
How to Make Rainbow Ocean Painting with Bubble Wrap for Kids
Prepare Your Workspace: Lay out your materials and cover the surface with newspaper or a disposable tablecloth to catch any paint spills. You may also find Diy Rainbow Tissue Paper Balloons For Kids useful.
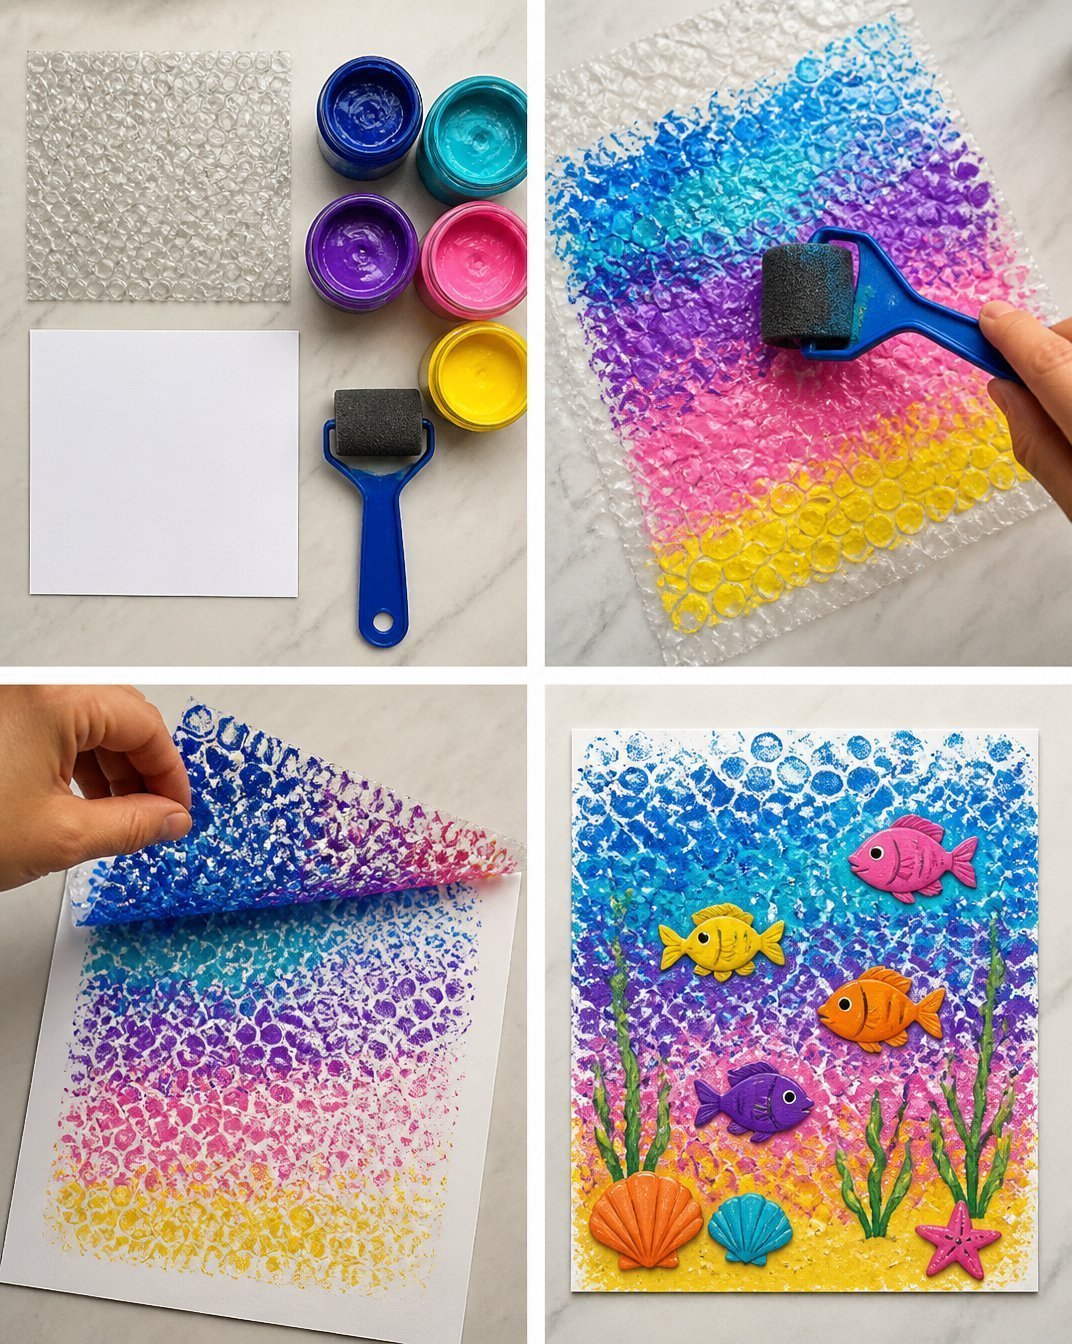
Paint the Bubble Wrap: Pour some blue and green paint onto the shallow tray. Use the paintbrush to cover the bubble wrap exclusively with these colors. You may also find Melted Crayon Rainbow Butterfly Suncatcher For Kids useful.
Press and Print: After painting the bubble wrap, press it firmly onto the white paper. The bubbles will create beautiful patterns that resemble waves.
Create More Texture: Repeat the painting and pressing process with other colors if desired perhaps a sunny yellow or bright orange for a sunset effect.
Let it Dry: Carefully lift the bubble wrap off the paper and set your artwork aside to dry completely.

Helpful Tips
- Experiment with Various Sizes: You can use different sizes of bubble wrap to create varying textures and sizes of ocean waves.
- Decorative Additions: After the paint has dried, consider adding stickers or drawings of sea creatures to enhance the ocean theme.
- Keep it Simple: If working with younger children, using less paint will reduce mess and make it easier to control the amount of color used.
Creative Variations
- Color Mixing: Encourage kids to blend colors on the bubble wrap before printing to see the new shades they can create.
- Seasonal Themes: Adapt the colors to reflect different seasons, such as fall-themed hues or winter blues.
- Display Ideas: Once dried, consider framing the artwork or making cards for family and friends to elevate the project further.
Making It With Kids
This craft is perfect for kids to do with minimal adult assistance, but it’s a good idea to supervise during the cutting of bubble wrap and the painting stage. Ensure they understand to keep the paint to the designated area to minimize mess, but allow enough freedom for creativity to flourish.
How to Display, Use, or Gift It
Once dried, these vibrant ocean paintings can become beautiful displays in the home or wonderful gifts for parents and friends. Moreover, they could be transformed into bookmarks or greeting cards for a personal touch!
Frequently Asked Questions
Can I use any type of paint for this project?
Yes, any non-toxic paint will work well, but tempera or acrylic paints are particularly good choices for their vibrancy.
What should I do if I run out of bubble wrap?
If bubble wrap isn’t available, consider using kitchen sponges or even crumpled plastic wrap to achieve a similar effect.
How can I make this craft more educational?
Discuss ocean life or colors as you create together, incorporating science and art into this fun project.
Is this craft suitable for a large group?
Absolutely! This project works well for groups, just prepare enough supplies and space for everyone to work comfortably.
What should I do if the paint doesn’t bubble as expected?
Make sure you’re applying enough paint to each bubble before pressing down. You can also try varying the pressure when stamping for different effects.
Can younger children participate in this craft?
Yes! Younger children can enjoy bubble wrap painting, but they may need help with the pressing and cutting steps.
Conclusion
This creative craft combines art and fun in a way that kids will love. It also lays the groundwork for various artistic activities, such as using bubble wrap in other art projects. Indulging in such hands-on art helps to develop fine motor skills and encourages imaginative play! Enjoy crafting together!
Print
Rainbow Ocean Painting with Bubble Wrap for Kids
- Total Time: 40 minutes
- Makes: 1 artwork
Description
Engage kids in a colorful and tactile painting project using bubble wrap to create vibrant ocean scenes.
Materials
- Bubble wrap
- Paint (blue, green, and other colors)
- Paintbrushes
- White paper
- A shallow tray or plate for paint
- Scissors (if needed)
Instructions
- Prepare your workspace by laying out materials and covering the surface with newspaper.
- Pour blue and green paint onto the shallow tray.
- Cover the bubble wrap with blue and green paint using the paintbrush.
- Press the painted bubble wrap onto the white paper to create patterns.
- Repeat the painting and pressing process with other colors if desired.
- Carefully lift the bubble wrap off and set the artwork aside to dry completely.
Notes
Experiment with different sizes of bubble wrap for varied textures. Consider adding stickers for an ocean theme after the paint dries.