


DIY Rainbow Fall Door Hanger With Beaded Leaves
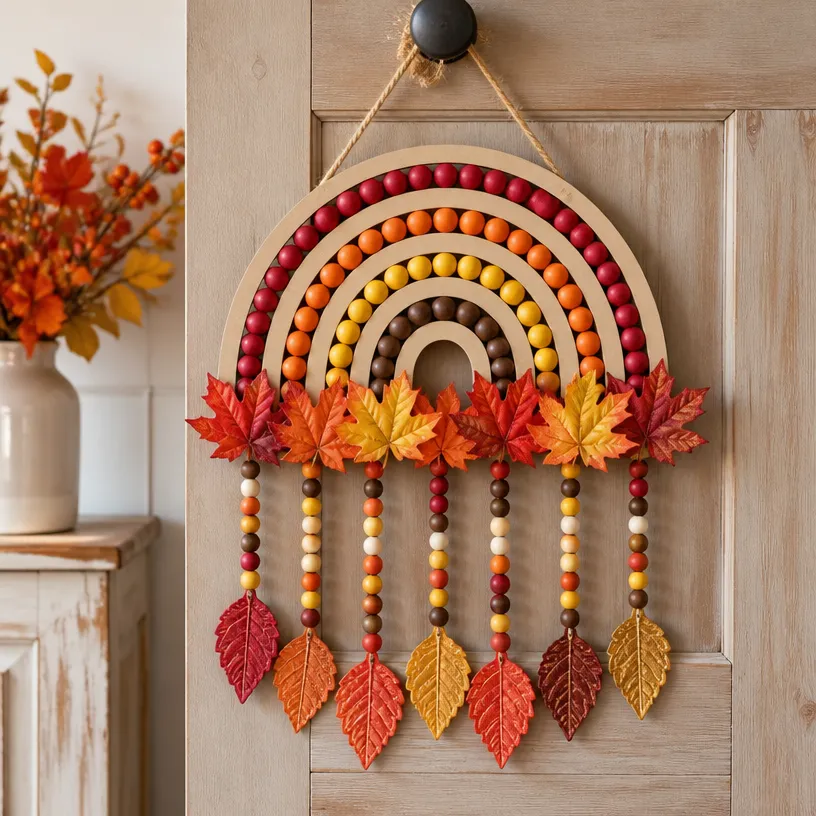
Creating a welcome autumn display doesn’t have to be complicated or expensive. This DIY Rainbow Fall Door Hanger with Beaded Leaves combines colorful autumn vibes with a playful touch. Whether you’re crafting alone or with family, this project is both simple and rewarding, making it perfect for everyone involved. You may also find First Day Of School Rainbow Teacher Door Hanger useful.
Why You’ll Love This Project
- Festive Touch: It brightens your home entrance with cheerful colors, celebrating the fall season.
- Customizable: You have the freedom to choose your favorite colors and beads, making each piece unique!
- Fun Activity: Great for crafting with kids or friends, encouraging creativity and collaboration.
- Affordable: Uses readily available materials that won’t stretch your budget.
- Versatile Display: Perfect for hanging on doors or walls, making it a vibrant addition to any space.

You may also find Diy Glowing Rainbow Sensory Bottles useful.
Materials You’ll Need
- Craft foam sheets in various colors (red, orange, yellow, green, blue, purple)
- Wooden dowel or sturdy stick
- Beads (in various colors)
- String or twine
- Scissors
- Hot glue gun and glue sticks
- Paint (optional, for the dowel)
How to Make DIY Rainbow Fall Door Hanger With Beaded Leaves
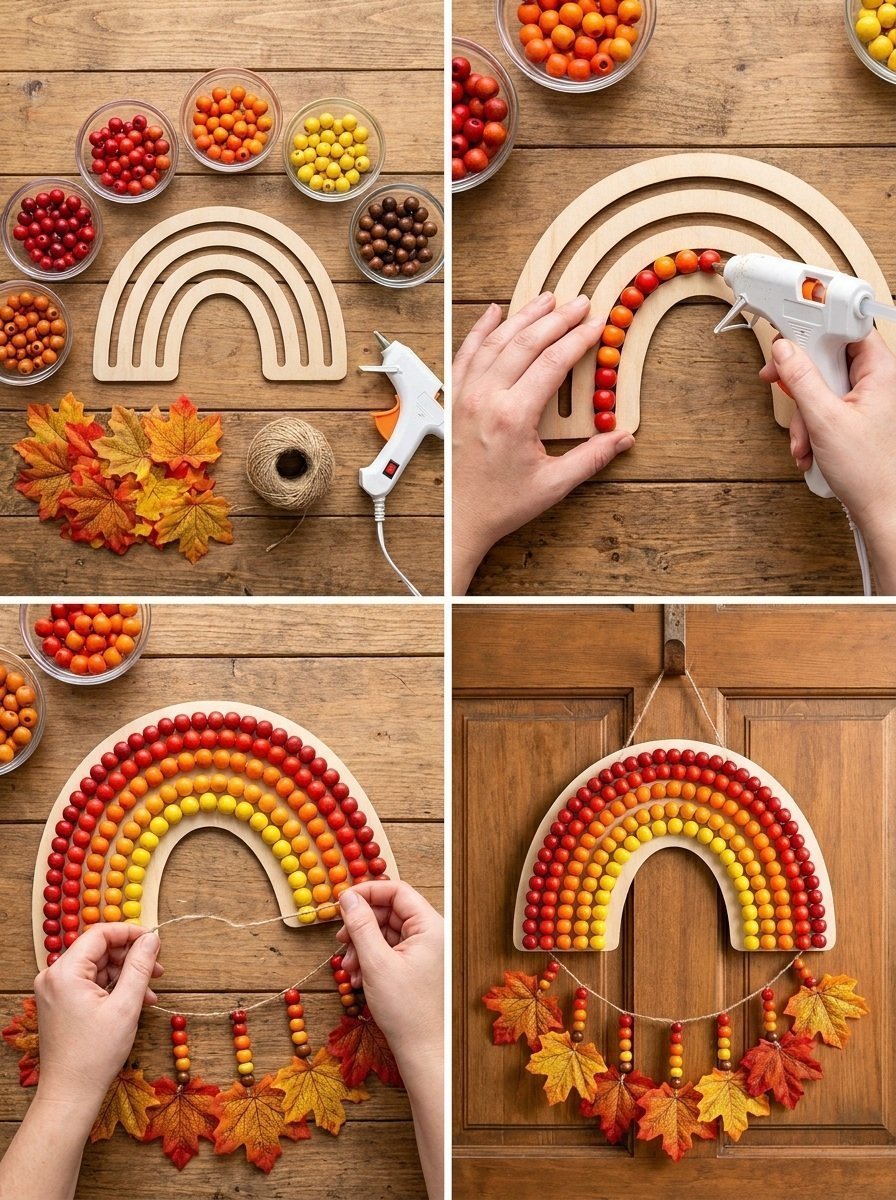
- Prepare the Dowel: If desired, paint the wooden dowel to add a pop of color. Allow it to dry completely.
- Cut Foam Leaves: Cut leaf shapes out of the craft foam sheets. You can create different sizes and colors for variety.
- String the Beads: Take a piece of string or twine and tie one end. Begin to thread on your chosen beads. This will add a fun textural element to your door hanger.
- Attach Leaves: Use the hot glue gun to attach the foam leaves at different intervals along the beaded string.
- Secure to the Dowel: Once the leaves are attached, tie the other end of the string to the dowel. Ensure it’s secure so it can hold the weight of your project.
- Hang and Enjoy: Finally, decide where you’d like to display your door hanger, and attach some extra string or twine to the top of the dowel for hanging.
Helpful Tips
- Glue Application: When using the hot glue gun, be cautious around children and ensure you supervise them closely.
- Choose Materials Wisely: Consider using weather-resistant materials if you plan to place your hanger outdoors for extended periods.
- Add Personal Touches: Use paint or markers to draw designs on the foam leaves or the beads for added personality.
Creative Variations
- Seasonal Themes: Swap the colors of the foam sheets for holiday themes, such as reds and greens for Christmas or pastels for spring.
- Size Adjustments: Make larger or smaller versions of the hanger to suit your display area.
- Different Shapes: Instead of leaves, try using other shapes like pumpkins or acorns for an autumn twist.
Making It With Kids
This project is excellent for engaging children in crafting! While the younger ones can help with color selection and gluing foam leaves, older kids can manage the cutting and stringing of beads. Always supervise carefully when using scissors and a hot glue gun. You may also find Diy Rainbow Handprint Flower Frame Grandparents Day useful.
How to Display, Use, or Gift It
This vibrant door hanger can be a delightful greeting for guests at your home. It also makes a thoughtful gift for neighbors or friends who love decorating for the fall season. You may also find Diy Rainbow Popsicle Stick Flower Wheel Craft useful.
Frequently Asked Questions
Can I use materials other than foam?
Yes, you can use felt or even fabric for a softer texture, but make sure it’s sturdy enough to hold the shape.
What if I don’t have a wooden dowel?
You can use any sturdy stick or even a coat hanger as an alternative.
How do I store it after fall?
Store it in a cool and dry place, preferably in a flat position to avoid bending.
Can I use this project for other seasons?
Absolutely! Just change the colors and shapes according to the season you’re celebrating.
Do I need any special tools?
The craft requires basic tools like scissors and a hot glue gun, which are common in most households.
How long will this craft last?
If made with quality materials, it can last for multiple seasons, especially if kept indoors.
Conclusion
With this DIY Rainbow Fall Door Hanger, you’ll be able to usher in the autumn season with color and creativity. Enjoy the crafting process, and don’t forget to check out these wonderful 43+ DIY Fall Wreath Ideas for even more autumn inspiration!
Print
DIY Rainbow Fall Door Hanger With Beaded Leaves
- Total Time: 15 minutes
- Makes: 1 door hanger
Description
A colorful and customizable door hanger perfect for celebrating the fall season with beaded leaves.
Materials
- Craft foam sheets in various colors (red, orange, yellow, green, blue, purple)
- Wooden dowel or sturdy stick
- Beads (in various colors)
- String or twine
- Scissors
- Hot glue gun and glue sticks
- Paint (optional, for the dowel)
Instructions
- Prepare the dowel: If desired, paint the wooden dowel and allow it to dry completely.
- Cut leaf shapes out of the craft foam sheets in different sizes and colors.
- String the beads by tying one end of the string, then threading on the chosen beads.
- Attach the foam leaves at different intervals along the beaded string using a hot glue gun.
- Secure one end of the string to the dowel and make sure it can hold the weight of the project.
- Hang the door hanger by attaching extra string or twine to the top of the dowel.
Notes
Use weather-resistant materials if displaying outdoors, and supervise children closely when using scissors and hot glue.