
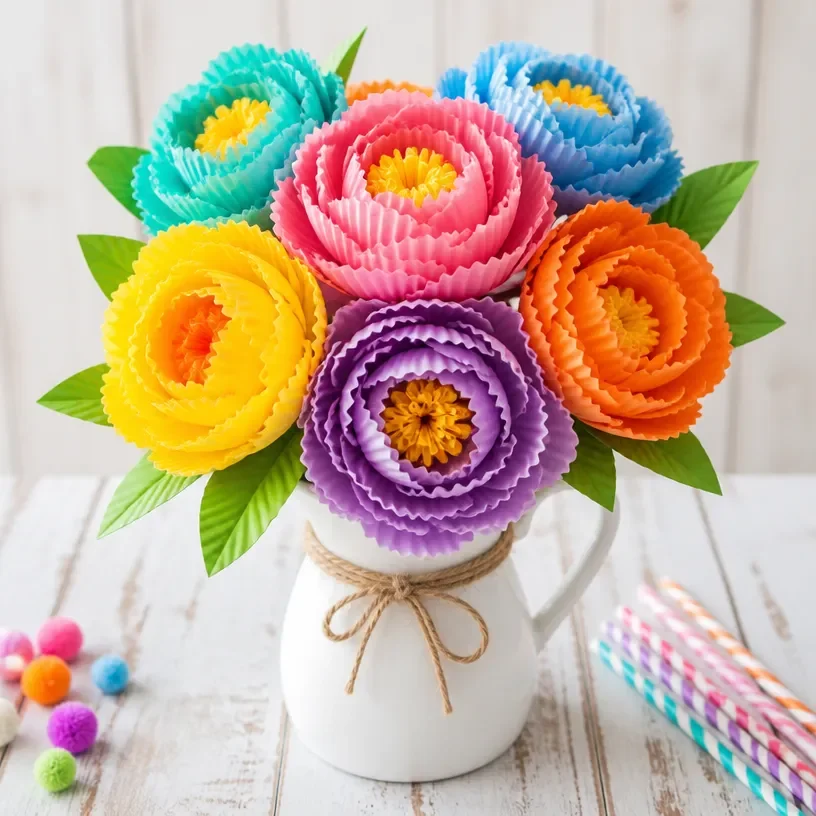
Colorful Peony Bouquet with Rainbow Cupcake Liners
Creating a colorful peony bouquet using rainbow cupcake liners is a delightful and simple craft that can brighten any space. This project not only adds a splash of color to your home but also provides a fun opportunity for creativity and imagination. Whether you’re making it with your kids or as a personal project, it’s an enjoyable way to spend some time crafting something beautiful. You may also find Colorful Cupcake Liner Flower Bouquet useful.
Why You’ll Love This Project
- Easy Assembly: The steps are straightforward, making it a perfect project for beginners.
- Customizable Colors: You can personalize your bouquet with different colors and patterns of cupcake liners to match your home decor.
- Fun for All Ages: This project is great for kids and adults alike, fostering creativity while enjoying quality time together.
- No Messy Cleanup: Since we’re working with cupcake liners, there’s no need for paint or glue, making cleanup a breeze.
- Great Gift Idea: Finished bouquets can be a lovely gift for friends and family, showcasing your handmade touch.
You may also find Colorful Cupcake Liner Witch Flower Bouquet Craft useful.
Materials You’ll Need
- Rainbow cupcake liners
- Floral wire
- Scissors
- Green floral tape or green ribbon
- A vase or decorative container
How to Make Colorful Peony Bouquet with Rainbow Cupcake Liners
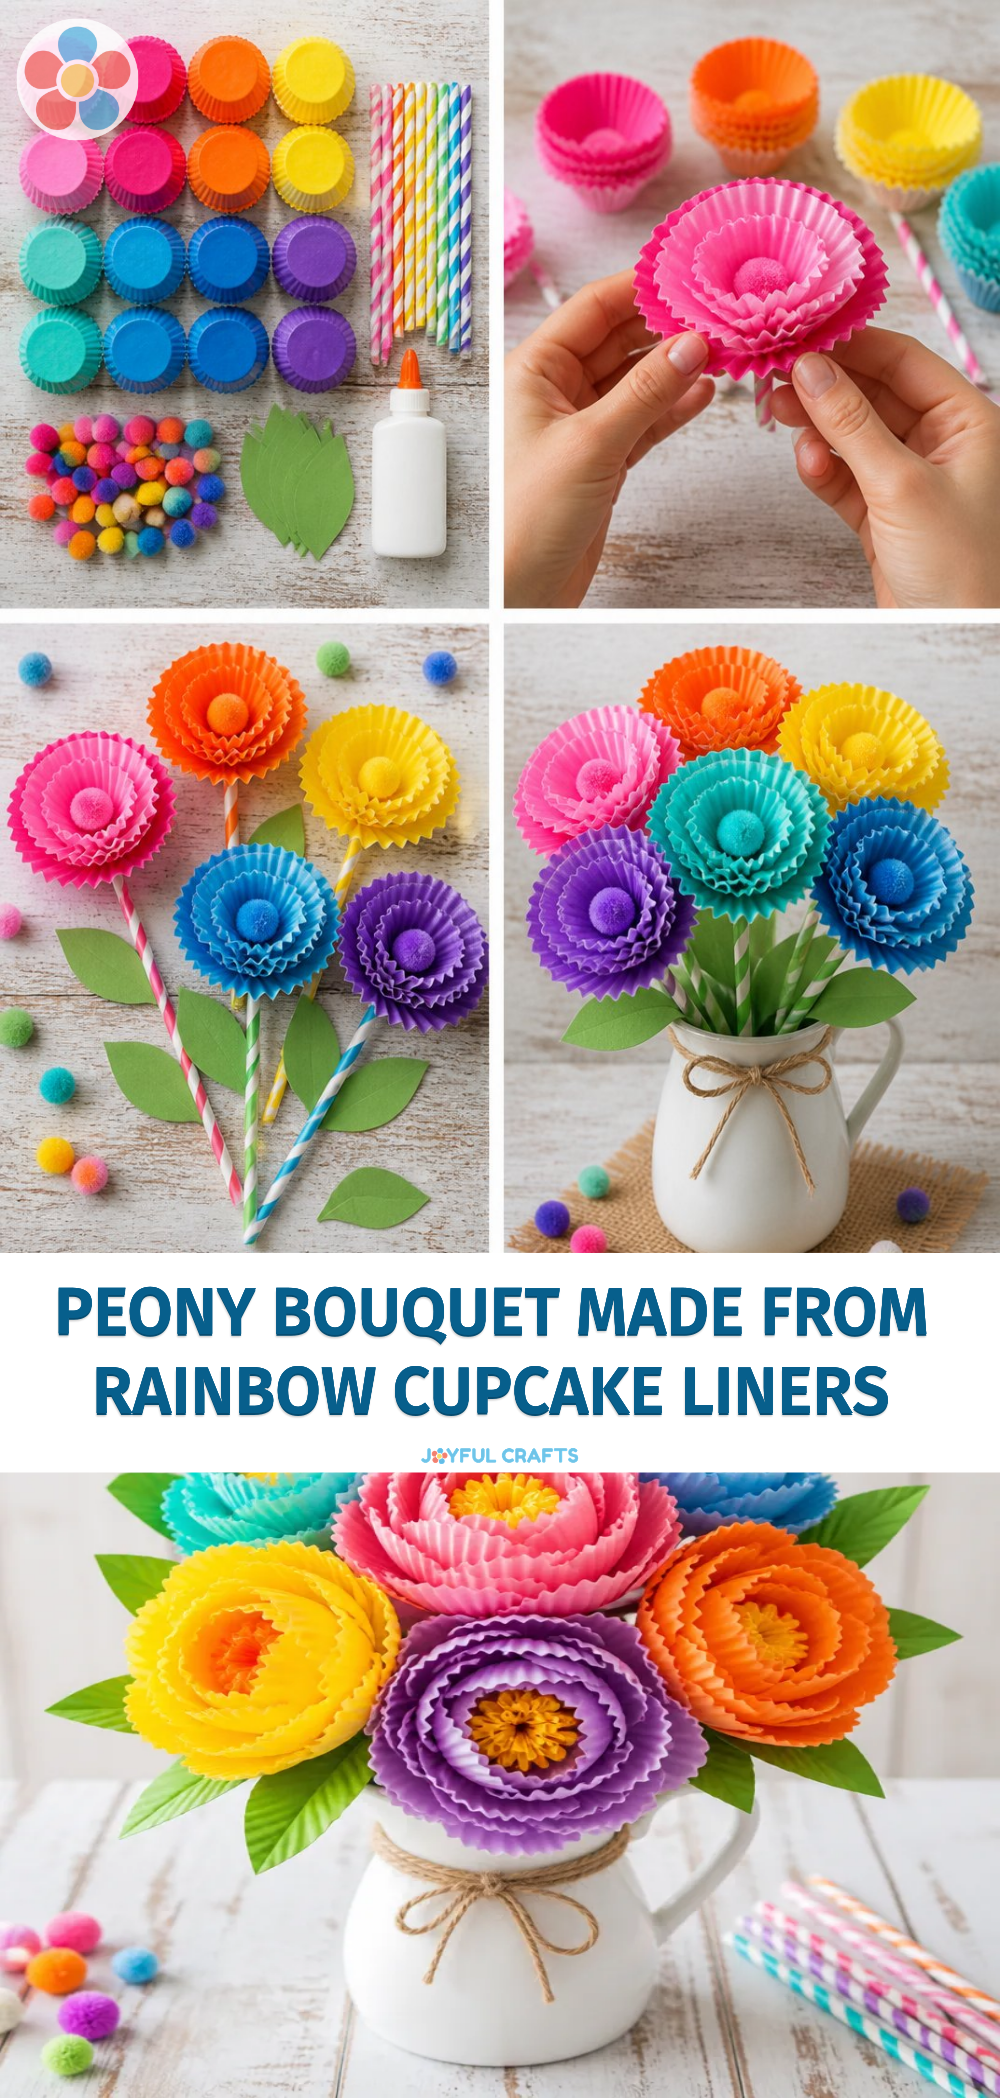
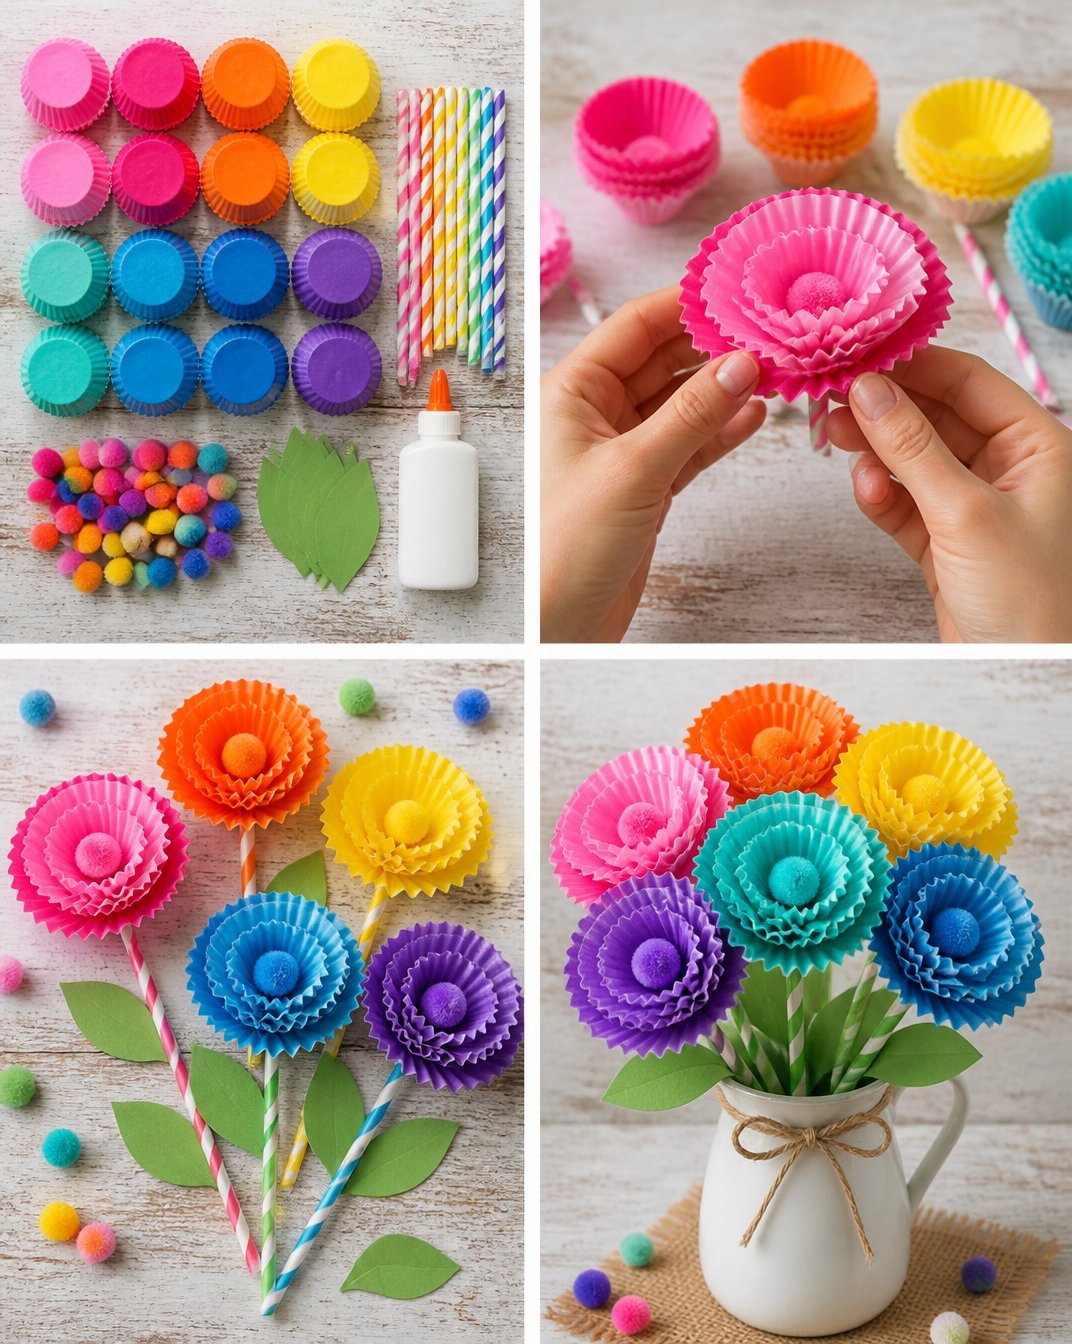
Prepare the Cupcake Liners: Start by taking your colorful cupcake liners and flattening them out. You can use different sizes and colors to create a vibrant bouquet. You may also find Rainbow Cupcake Liners Ghost Wreath useful.
Create the Flowers: Layer several cupcake liners together to form a flower shape. You might want to use three to five liners per flower, depending on how full you want them to look. You may also find Colorful Rainbow Monster Pencil Holder For Kids useful.
Attach the Flowers: Using floral wire, poke the center of the layered liners and twist them securely to hold the liners in place. This will create the flower head.
Shape the Petals: Gently fluff the cupcake liners to give a natural bloom appearance. This step can be particularly fun for kids, allowing them to shape their flowers as they wish.
Add Leaves: Cut small strips of leftover cupcake liners or use floral tape to create leaves and attach them to the base of each flower.
Assemble the Bouquet: Once you have several flowers made, arrange them together. Use the floral tape or ribbon to bind the stems together at the base.
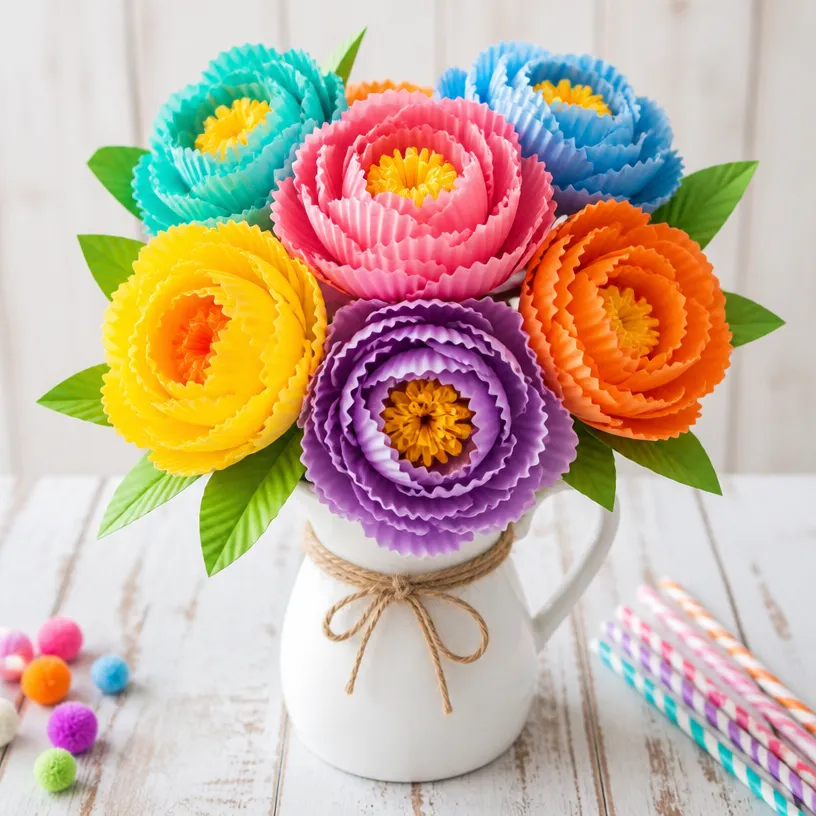
Display Your Bouquet: Place the finished bouquet in a vase or any decorative container you like. You can even present it as a gift, showcasing your craftsmanship.
Helpful Tips
- For added stability, consider using a heavier decorative container for your bouquet.
- If you’re crafting with kids, keep the scissors handy but supervise their use to ensure safety.
- These flowers can also be used to create a stunning centerpiece for parties or special occasions.
Creative Variations
- Instead of traditional cupcake liners, use decorative paper, fabric, or even old book pages to create unique flower designs.
- Experiment with different shapes and sizes of cupcake liners to see what types of flowers you can create.
- Add embellishments like beads or sequins to make the flowers sparkle.
Making It With Kids
When crafting with children, ensure they understand the safety measures, especially when using scissors. Allow them to choose their favorite colors and patterns of cupcake liners so they feel a sense of ownership over their creations. This project is not only a craft but also a fun way to engage in storytelling about flowers and nature.
How to Display, Use, or Gift It
Once your colorful peony bouquet is complete, it can be a fantastic addition to your home decor. Place it in your living room, kitchen, or even your child’s room to brighten the atmosphere. You can also give it as a thoughtful gift for birthdays or special celebrations, showcasing a personal touch in your gift-giving.
Frequently Asked Questions
1. Can I use any type of cupcake liners?
Yes, any colorful or patterned cupcake liners will work perfectly for this project.
2. How long will my bouquet last?
Since the flowers are made from paper, they won’t wilt, making them a long-lasting display.
3. What if I don’t have floral wire?
You can use string or even sturdy tape to secure the flower layers instead.
4. Can I make larger flowers?
Absolutely! You can use bigger cupcake liners or layer more of the smaller ones to create larger blooms.
5. Is this project suitable for very young children?
While younger children can help with assembling flowers, adult supervision is recommended for cutting and handling sharp objects.
Conclusion
Crafting a colorful peony bouquet with rainbow cupcake liners is not only a wonderfully creative project but also a delightful way to bond with family and friends. If you’re looking for additional inspiration for your next baking adventure, consider trying out this exquisite Peony and Pearls Cake from Jenna Rae Cakes!
Print
Colorful Peony Bouquet with Rainbow Cupcake Liners
- Total Time: 15 minutes
- Makes: 1 bouquet
Description
Create a vibrant peony bouquet using rainbow cupcake liners for a delightful home decor project.
Materials
- Rainbow cupcake liners
- Floral wire
- Scissors
- Green floral tape or green ribbon
- A vase or decorative container
Instructions
- Prepare the cupcake liners by flattening them out.
- Create the flowers by layering several cupcake liners together.
- Attach the flowers using floral wire to hold the liners in place.
- Shape the petals by fluffing the cupcake liners for a natural look.
- Add leaves using leftover cupcake liners or floral tape.
- Assemble the bouquet by binding the stems together with floral tape or ribbon.
- Display your bouquet in a vase or decorative container.
Notes
For stability, use a heavier decorative container. Supervise children when using scissors.