Description
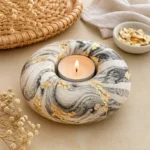
Engage in a delightful family activity by creating beautiful marbled air dry clay projects that encourage creativity and result in unique, displayable pieces.
Materials
- Air dry clay (white works best for marbling)
- Acrylic paint or food coloring
- Rolling pin
- Wax paper (for easy cleanup)
- Craft knife or shape cutters
- Bowl of water (to keep hands moist)
Instructions
- Prepare Your Workspace: Lay out wax paper on your table to catch any mess.
- Color Your Clay: Divide the air dry clay into small portions, add paint or food coloring, and knead.
- Form the Base: Roll marbled clay into a ball and flatten it to your desired thickness.
- Shape Your Creation: Use cutters or knives to create different forms like coasters or ornaments.
- Drying Time: Allow pieces to dry completely for 24-48 hours depending on thickness.
Notes
Keep hands moist while working to prevent sticking. Apply a clear acrylic sealer for a glossy finish.