

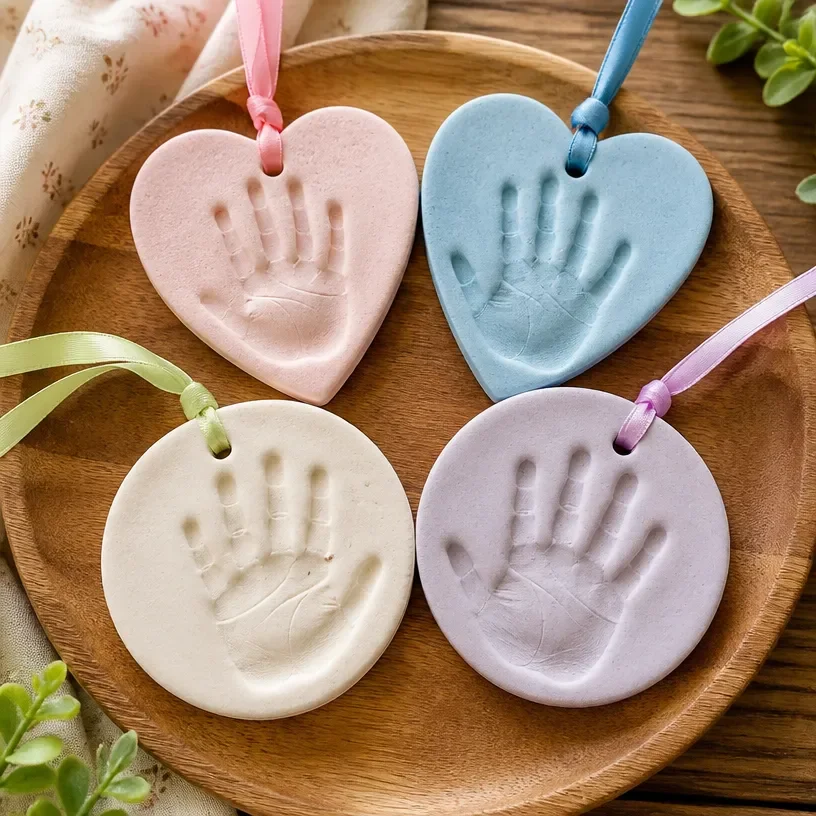
Salt Dough Handprint Keepsake
Creating a salt dough handprint keepsake is a delightful way to capture your child’s tiny handprints that you can cherish for years. This project is not only simple but also allows for creativity and personalization, making it a wonderful activity to do together as a family. You’ll love how this craft serves as a beautiful memory while also providing a fun experience for your little ones! You may also find 3D Raised Salt Painting Colorful Artwork For Kids useful.
Why You’ll Love This Project
- Meaningful Keepsake: This handprint keepsake is a unique way to preserve your child’s handprint in time, serving as a precious reminder of their growth.
- Creative Expression: You can personalize the craft by adding colors and decorations, turning a simple craft into a unique piece of art.
- Fun for Everyone: This activity is a great way to engage children in a hands-on project they can enjoy and be proud of.
- Affordable Materials: The supplies needed for this craft are minimal and inexpensive, making it accessible for all families.
You may also find Bubble Dough Sensory Play For Kids useful.
Materials You’ll Need
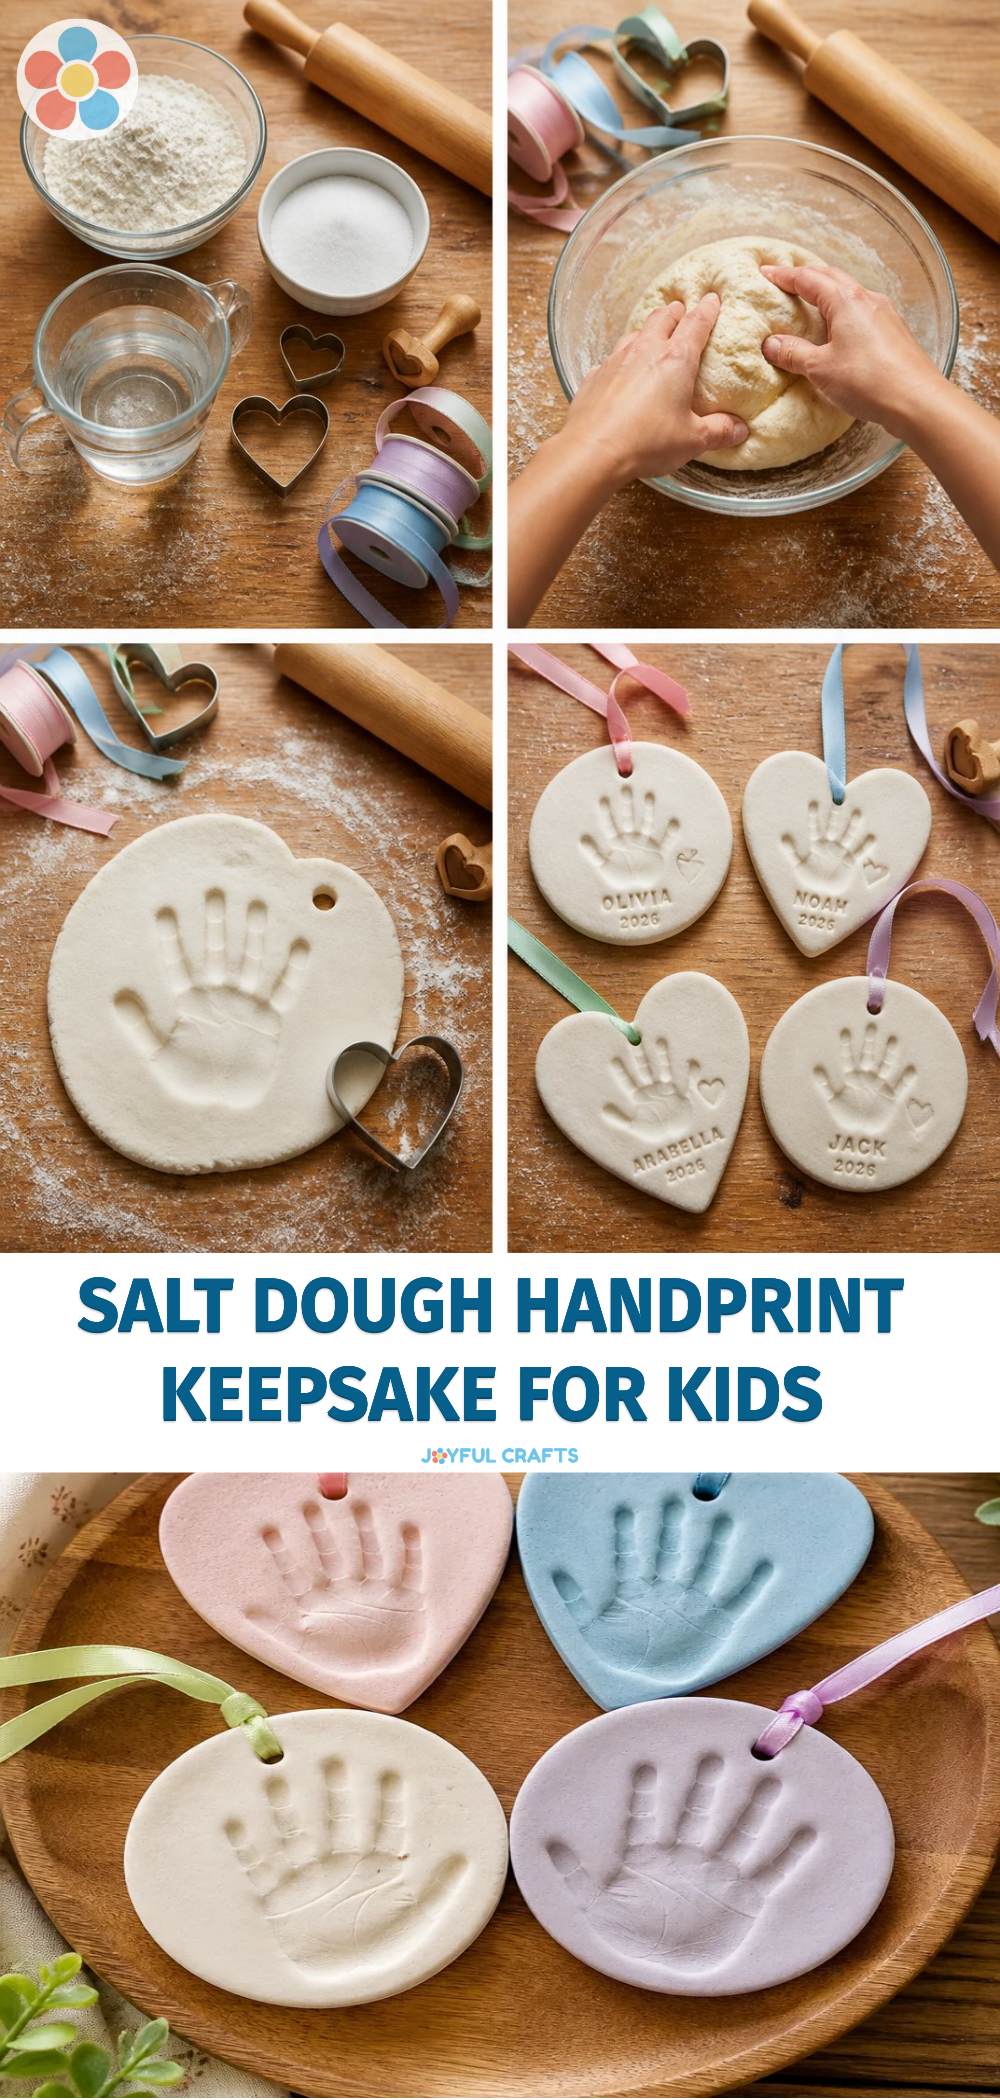
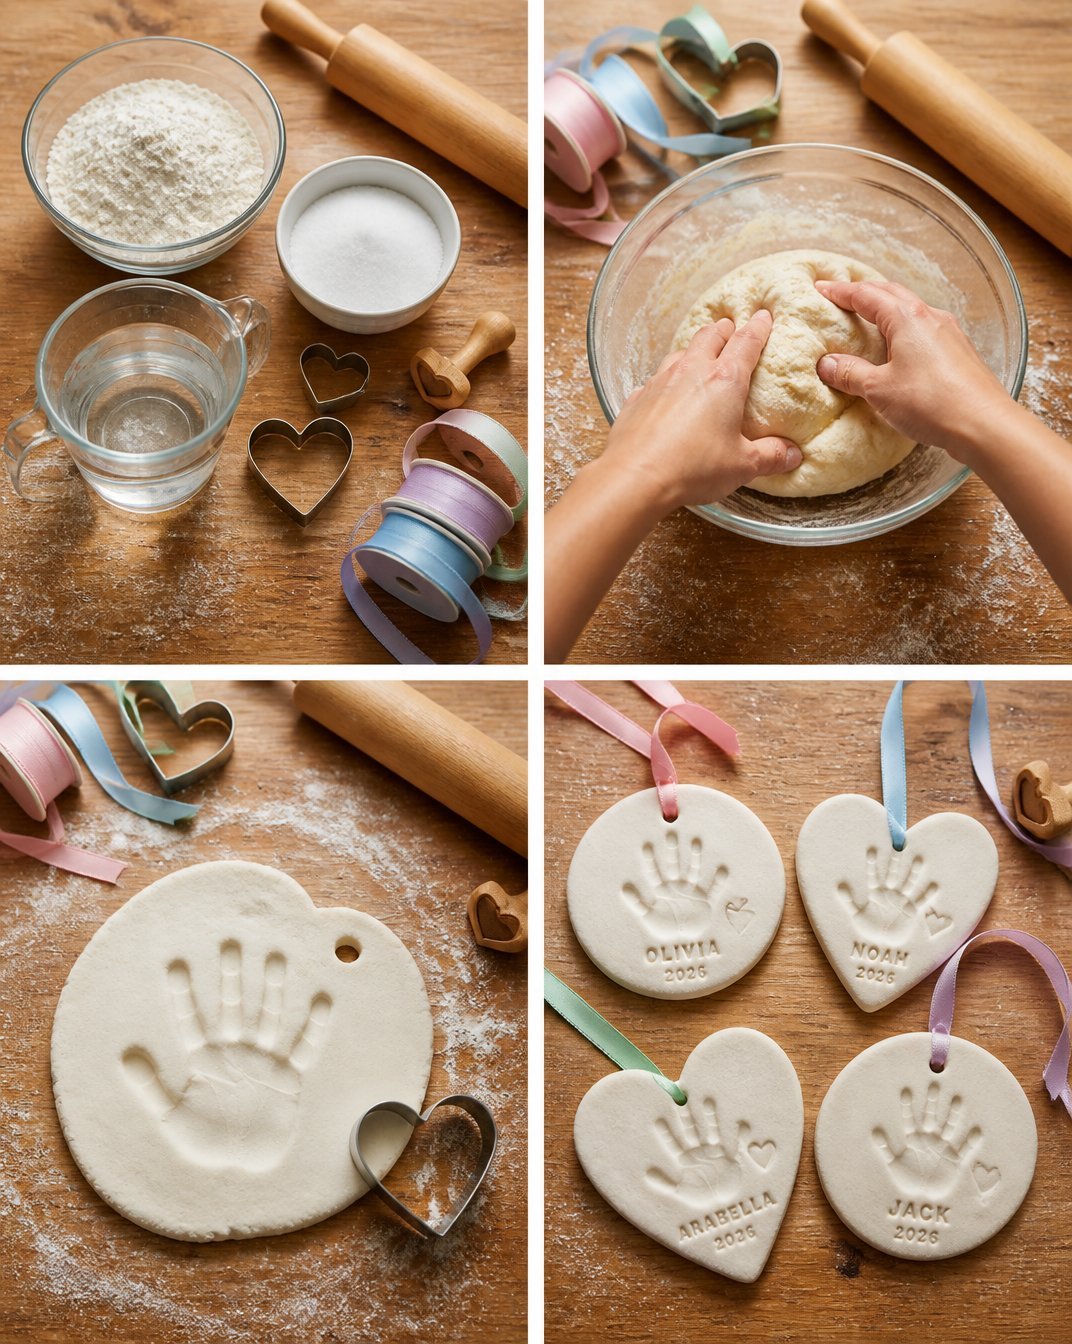
- 2 cups all-purpose flour
- 1 cup salt
- 1 cup water
- Optional: Acrylic paint for decoration
- Optional: Clear sealant
How to Make Salt Dough Handprint Keepsake
- Preheat the oven to 200°F (93°C).
- In a mixing bowl, combine the flour and salt.
- Gradually add water, mixing until a dough forms. You may need to adjust the water amount for the right consistency.
- Knead the dough for a few minutes until smooth.
- Roll out the dough to about 1/2 inch thick and use your hands to press your child’s handprint into the dough.
- Use a straw or other tool to create a hole for a ribbon if desired.
- Place the handprint dough on a baking sheet and bake for about 2-3 hours until hardened.
- Allow to cool, then decorate with acrylic paint if you wish.
- Finish with a clear sealant to protect your decoration if needed.
Helpful Tips
- Right Consistency: If your dough feels too dry, add a little more water; if it’s too sticky, sprinkle in a bit more flour. A smooth dough is essential for a clean handprint.
- Avoid Cracks: Keep the dough at a consistent thickness during rolling to prevent cracking while baking.
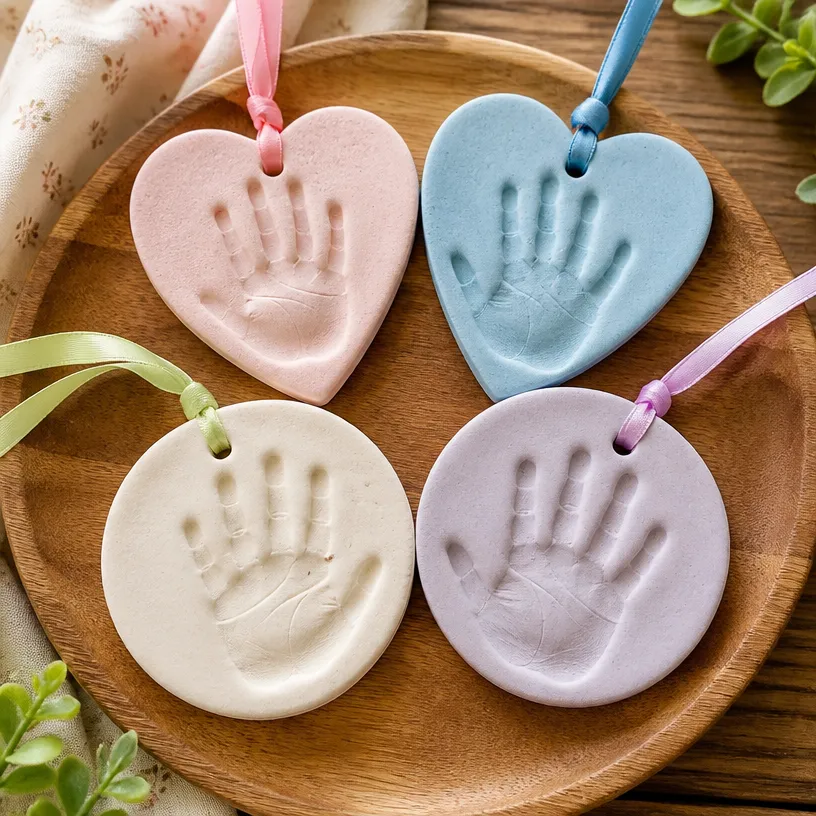
- Painting Fun: Let the kids decorate their creations with acrylic paints once cooled; this will spark their imagination!
- Display Ideas: Hang the finished keepsakes around the house as decorative pieces or gift them to grandparents or other family members.
Creative Variations
- Colorful Designs: Use different acrylic paint colors to personalize the handprint keepsake, allowing your child to explore their creativity.
- Themed Decorations: For special occasions like Mother’s Day or Christmas, consider making themed decorations using additional materials like glitter or small embellishments.
- Size Adjustments: Feel free to create multiple smaller handprints or one large one, depending on how you want to display them.
Making It With Kids
This craft is perfect for all ages! Younger children can help mix the ingredients, while older kids can roll out the dough and press their handprints. Always supervise younger children, especially when using tools like straws or when handling the baking sheet after the dough has been baked. You may also find Bubbly Dough Sensory Activities For Kids useful.
How to Display, Use, or Gift It
These handprint creations are not just fun to make; they also make heartfelt gifts for family members. You can display them in your home or even hang them on the holiday tree. Consider wrapping them up as gifts with a little note about the memory behind the handprint! You may also find Diy Rainbow Handprint Flower Frame Grandparents Day useful.
Frequently Asked Questions
1. Can I use regular paint on the dough?
Acrylic paint is best as it bonds well to the salt dough and provides vibrant colors.
2. How long will the keepsake last?
When properly sealed, your keepsake can last for many years, making it a cherished memento.
3. What if I don’t have a straw?
Any small tool, like a pencil or the end of a paintbrush, can make a hole for hanging if a straw is unavailable.
4. Can I add food coloring to the dough?
Yes, adding food coloring while mixing can create colored dough, leading to fun and vibrant handprints!
Conclusion
Making a salt dough handprint keepsake is a joyful way to engage in crafting with your children, providing lasting memories. For an easy recipe for salt dough that’s great for ornaments and other crafting ideas, you can visit The Best Salt Dough (for Ornaments and Crafting!). Enjoy crafting together!
Print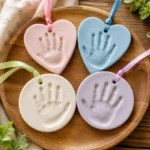
Salt Dough Handprint Keepsake
- Total Time: 135 minutes
- Makes: 5 keepsakes
Description
A delightful way to capture your child’s handprints that you can cherish for years.
Materials
- 2 cups all-purpose flour
- 1 cup salt
- 1 cup water
- Optional: Acrylic paint for decoration
- Optional: Clear sealant
Instructions
- Preheat the oven to 200°F (93°C).
- Combine the flour and salt in a mixing bowl.
- Gradually add water, mixing until a dough forms.
- Knead the dough for a few minutes until smooth.
- Roll out the dough to about 1/2 inch thick and press your child’s handprint into the dough.
- Create a hole for a ribbon using a straw or other tool if desired.
- Place the handprint dough on a baking sheet and bake for about 120-180 minutes until hardened.
- Allow to cool, then decorate with acrylic paint if you wish.
- Finish with a clear sealant to protect your decoration if needed.
Notes
Ensure the dough is at the right consistency for a clean handprint. Supervise younger children closely.