

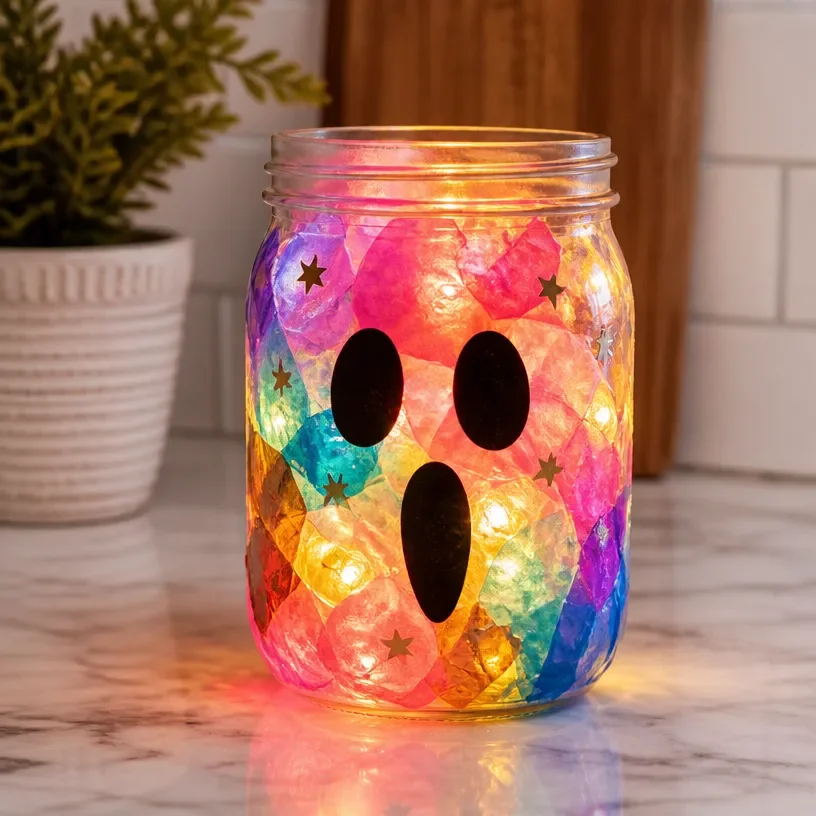
Clear Rainbow Neon Ghost Light Jar
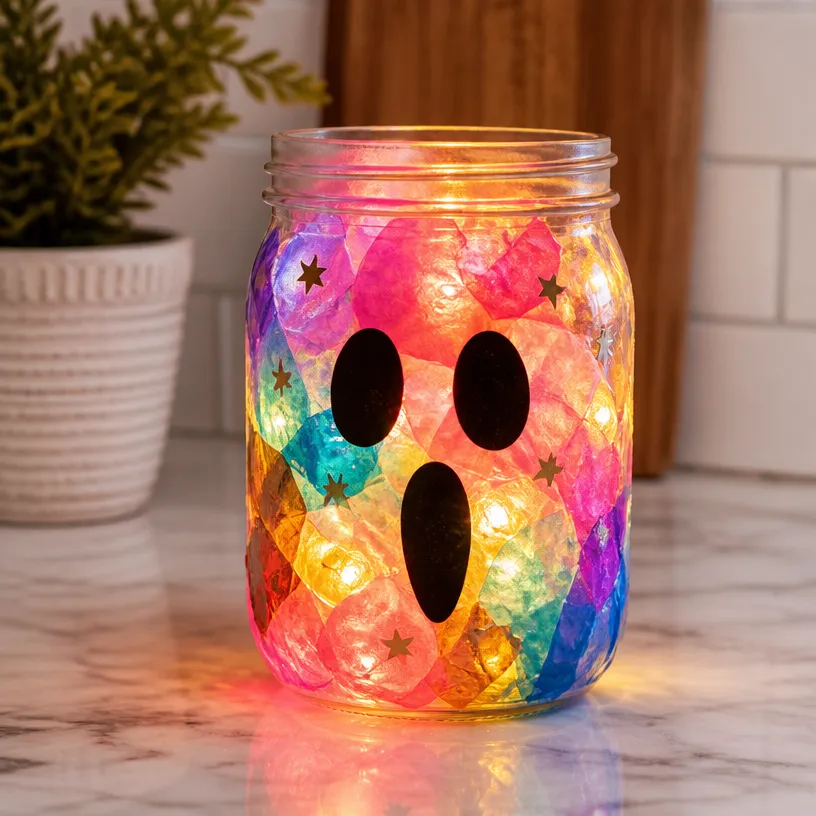
Brighten up your space with this delightful Clear Rainbow Neon Ghost Light Jar. It’s a simple yet enchanting project that will add a pop of color and a touch of whimsy to your home decor. Whether you’re celebrating a spooky season or just want to create a cheerful nightlight, this project is both enjoyable and easy to make. You may also find Clear Rainbow Ghost Shaker Suncatcher Craft For Kids useful.
Why You’ll Love This Project
- Easy to Follow: The steps are straightforward, making it perfect for crafters of all skill levels.
- Customizable Colors: Use any colors you like to match your home or the season, creating a unique look.
- Fun Family Activity: This project is great for kids and adults alike, offering a creative outlet for families to bond.
- Versatile Use: Besides being a nightlight, these jars can be fantastic decorations for parties or festive occasions.
You may also find Colorful Rainbow Puppy Lantern Ghost Glow Nightlight useful.
Materials You’ll Need
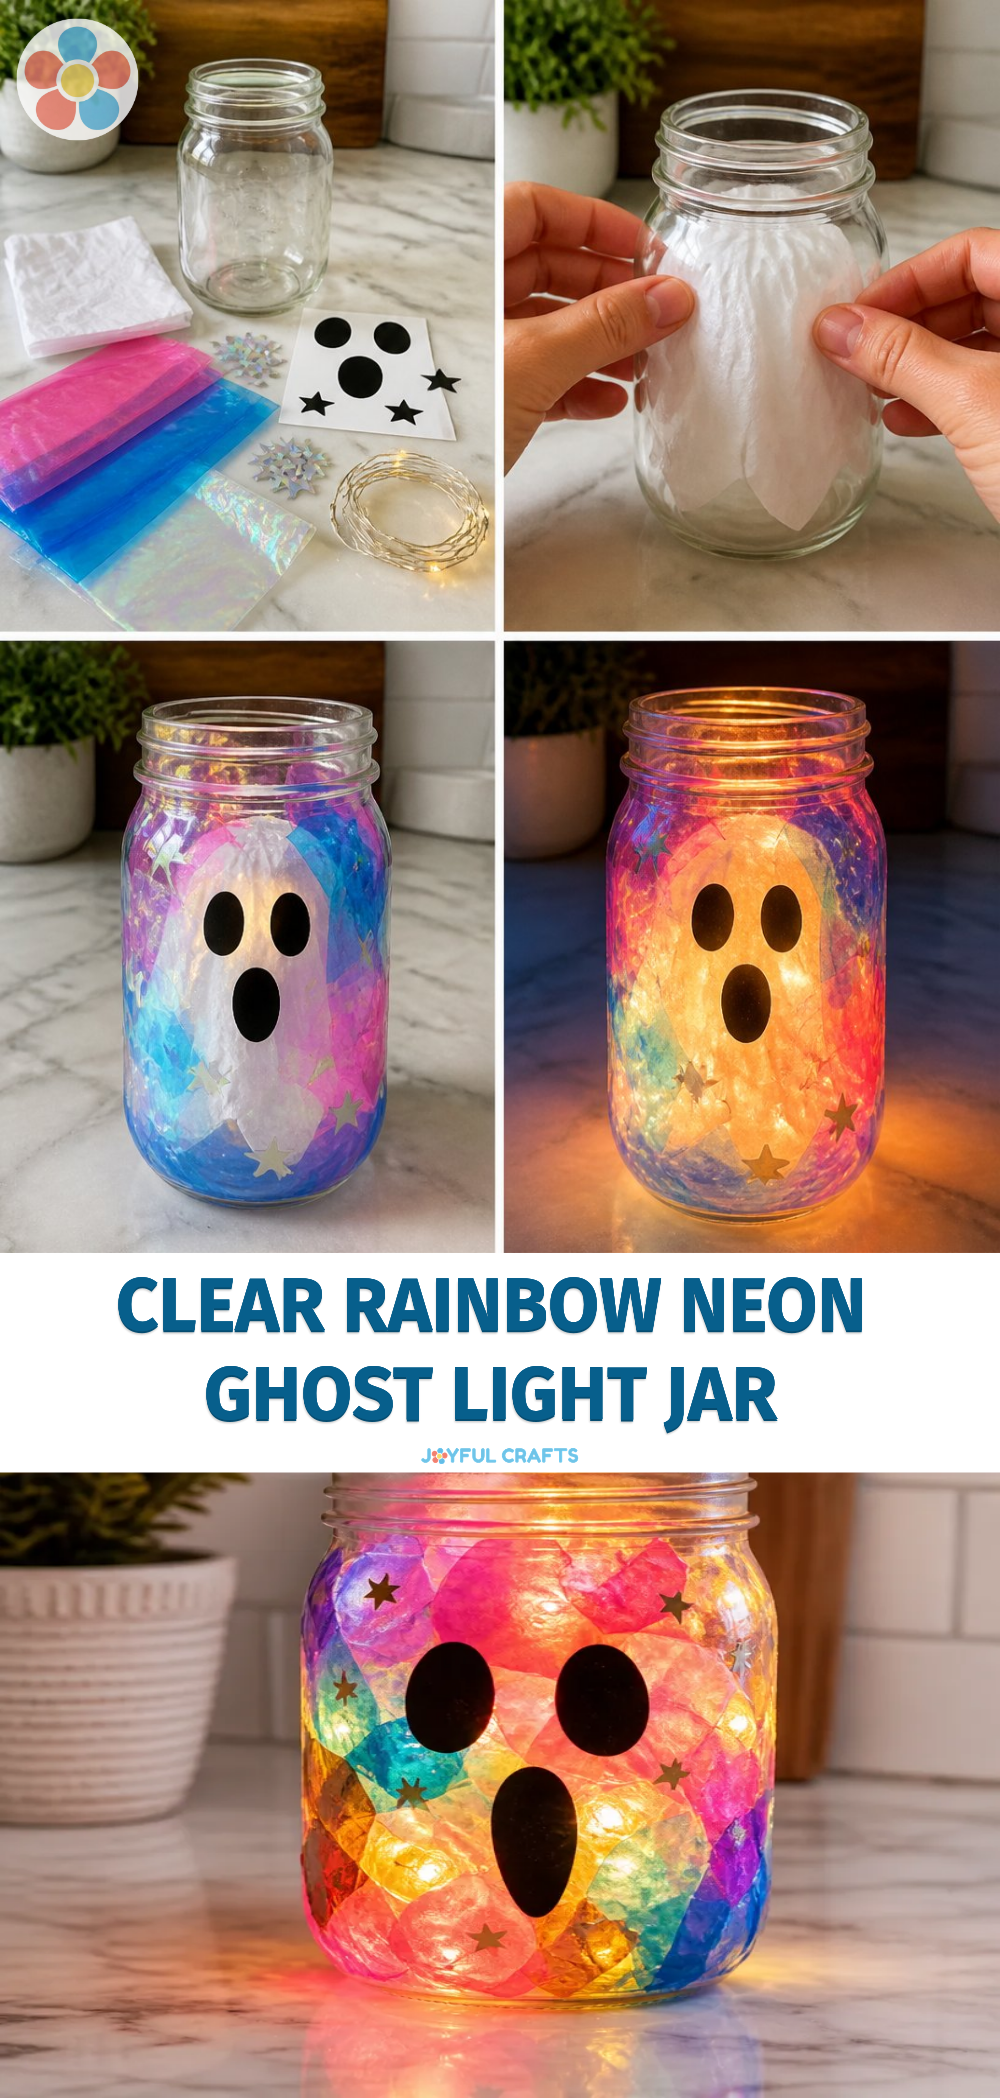
To make your Clear Rainbow Neon Ghost Light Jar, gather the following supplies: You may also find Diy Glass Bottle Lanterns Spooky Ghost Lighting useful.
- Clear glass jar with a lid
- Neon-colored paints (acrylic or glass paint)
- Paintbrush
- Battery-operated tea light or jar light
- Ghost template (optional)
- Water for rinsing brushes
How to Make Clear Rainbow Neon Ghost Light Jar
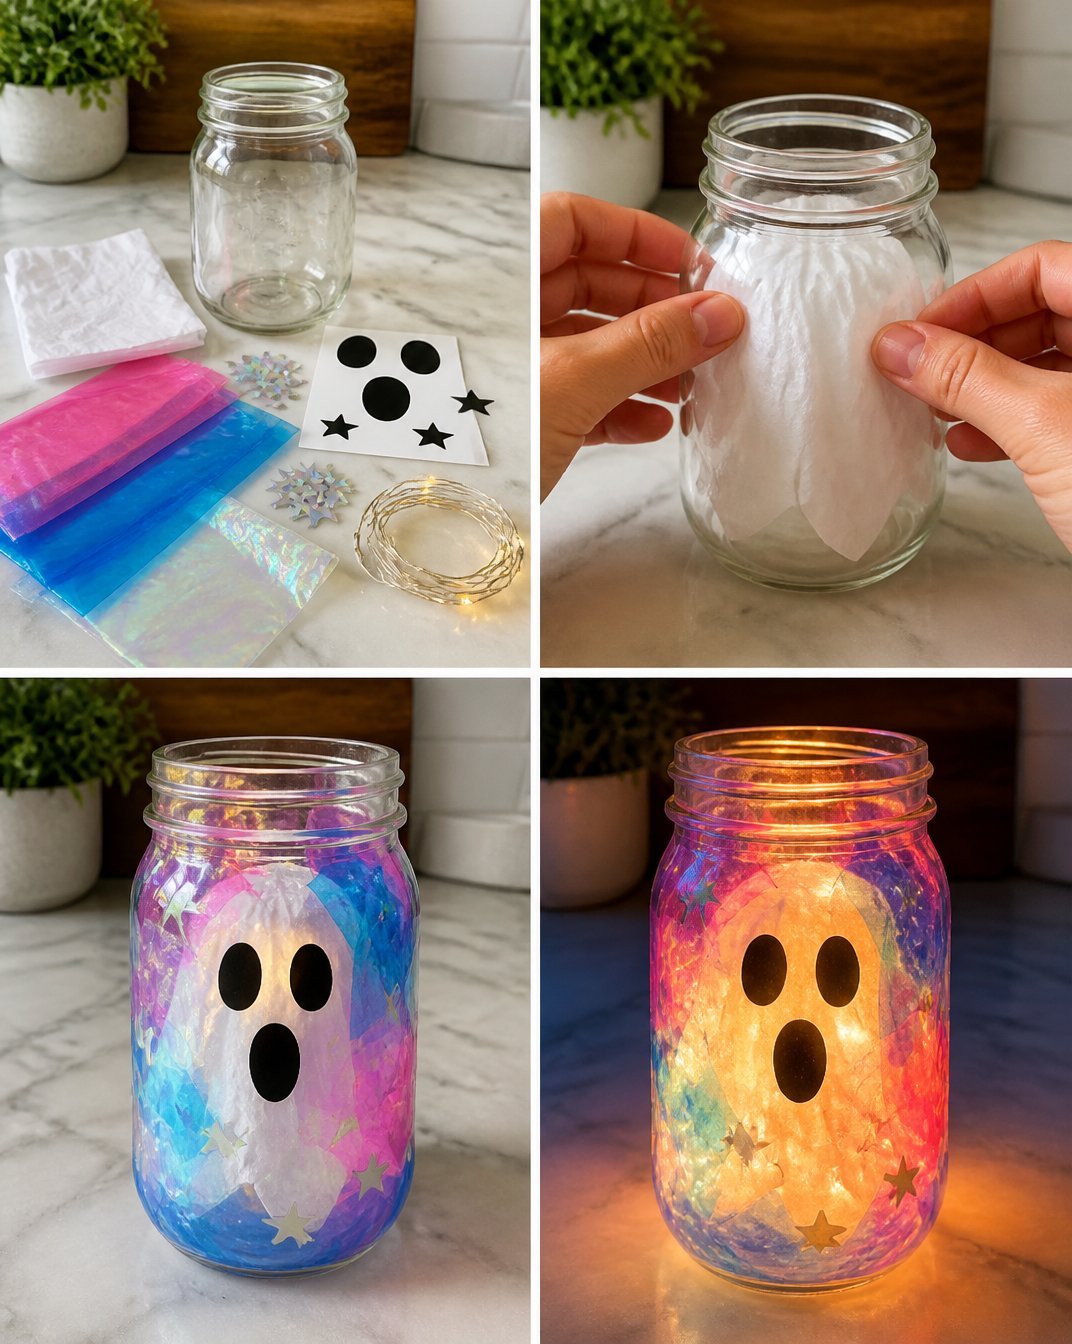
Prepare Your Workspace: Lay down a protective covering on your table to catch any spills. Gather all your materials close by. You may also find Glowing Rainbow Ghost Lanterns useful.
Paint the Jar: Using a paintbrush, start applying neon colors to the outside of the clear glass jar. You can either create patterns or a gradient effect. Allow each layer to dry before adding another color to avoid mixing.
Add the Ghost Design: If you want a ghost design, you can use a stencil or paint freehand on one side of the jar. Remember, it doesn’t have to be perfect each ghost can have its own personality!
Seal the Paint: Once the paint is completely dry, apply a clear acrylic sealer to the outside of the jar to protect your vibrant colors.
Insert the Tea Light: Place a battery-operated tea light inside the jar. If you used a lid, you can even poke a hole in it to allow light to shine through.
Display and Enjoy: Place your completed jar in a desired location and watch it glow!
Helpful Tips
- Ensure you are in a well-ventilated area when using paints and sealants.
- If you’re crafting with kids, supervise the use of paints and tools to ensure safety.
- Try to use bright colors as they will show up more vividly when lit.
Creative Variations
- Consider changing the shape of the jar for a different look; square jars can offer a modern twist.
- Add glitter to your paint for an extra sparkle effect.
- Instead of ghosts, paint festive designs for different holidays, like pumpkins for Halloween or snowflakes for winter.
Making It With Kids
This project is an excellent choice for crafting with kids. Ensure adult supervision when handling paints and tools. You can let children paint freely, encouraging their creativity with colors and patterns. Keep additional paint and brushes handy to make it easier if they want to modify their designs mid-project.
How to Display, Use, or Gift It
These jars make wonderful gifts for friends or family and can be used as party centerpieces, nighttime decor in children’s rooms, or as unique nightlights. They can even brighten up outdoor spaces when used as luminaries during evening gatherings.
Frequently Asked Questions
What type of paint works best for glass jars?
Acrylic or glass paints designed for crafting work best, as they adhere well to glass surfaces.
Can I use this project outdoors?
Yes, as long as you use battery-operated lights. Make sure to apply a weatherproof sealer if exposed to rain or moisture.
How long does the paint need to dry?
It generally takes about an hour for each layer to dry, but always refer to the paint’s instructions for specific drying times.
What if I don’t have a ghost template?
You can easily draw your ghost freehand or find simple ghost outlines online to trace.
Can I use regular candles instead of tea lights?
It’s safer to use battery-operated tea lights, especially with children’s crafts, to avoid fire hazards.
How do I clean the brushes after use?
Rinse your brushes in water immediately after use. If using acrylic paint, soap and water will work effectively.
Conclusion
Creating a Clear Rainbow Neon Ghost Light Jar is a fantastic way to embrace your creativity while making something beautiful for your home. Enhance your decoration with unique pieces from Mud Pie’s Ghost Shop, where you can discover more delightful decor options to complete your festive look. Happy crafting!
Print
Clear Rainbow Neon Ghost Light Jar
- Total Time: 15 minutes
- Makes: 1 jar
Description
Brighten up your space with this delightful Clear Rainbow Neon Ghost Light Jar. It’s a simple yet enchanting project that adds color and whimsy to your home decor.
Materials
- Clear glass jar with a lid
- Neon-colored paints (acrylic or glass paint)
- Paintbrush
- Battery-operated tea light or jar light
- Ghost template (optional)
- Water for rinsing brushes
Instructions
- Prepare your workspace: Lay down a protective covering on your table to catch any spills and gather all materials.
- Paint the jar: Start applying neon colors to the outside of the jar, allowing each layer to dry before adding another color.
- Add the ghost design: Use a stencil or paint freehand on one side of the jar.
- Seal the paint: Once completely dry, apply a clear acrylic sealer to protect the colors.
- Insert the tea light: Place the battery-operated tea light inside the jar and ensure it is secure.
- Display and enjoy: Place your completed jar in a desired location to watch it glow.
Notes
Ensure to work in a well-ventilated area. Supervise children when using paints and tools.