

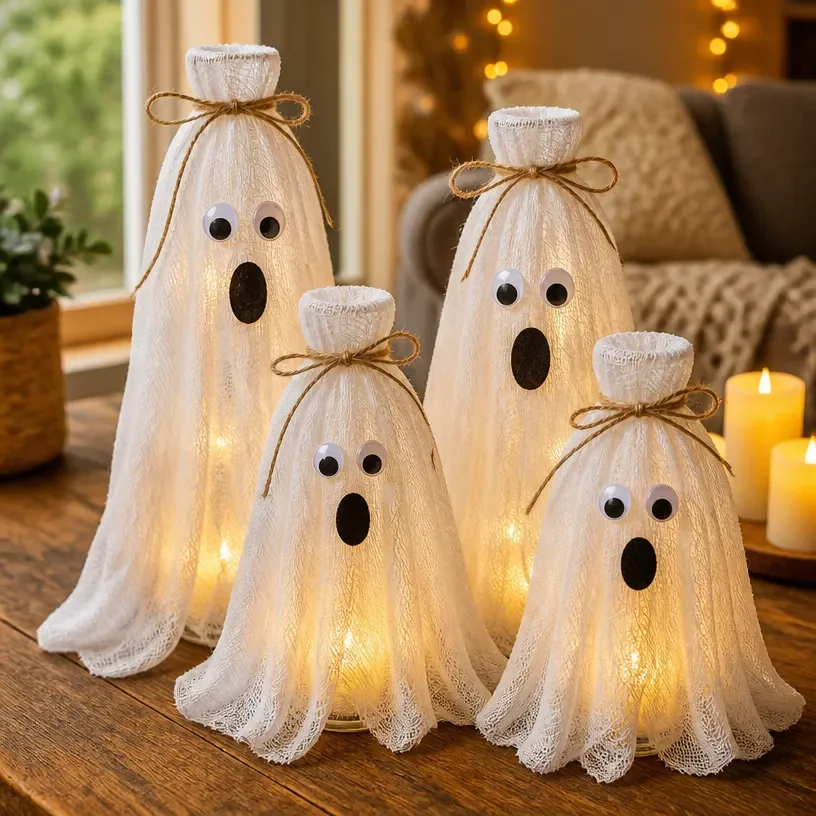
DIY Glass Bottle Lanterns for Spooky Ghost Lighting
Creating beautiful glass bottle lanterns is a delightful way to add a touch of whimsy to your Halloween decorations. These spooky ghost lanterns not only illuminate your space but also provide a fun crafting experience for both kids and adults. You’ll enjoy making them as much as you’ll love displaying them! You may also find Glow Bottle Lanterns For Ambient Glow useful.
Why You’ll Love This Project
- Easy for Beginners: This project is straightforward, making it perfect for beginners of all ages.
- Customizable Designs: You can easily personalize the lanterns with different colors and decorations.
- Perfect for Halloween: These lanterns create a festive glow for your haunted house or party.
- Recyclable Materials: Using glass bottles means you’re giving a second life to materials that might otherwise be discarded.
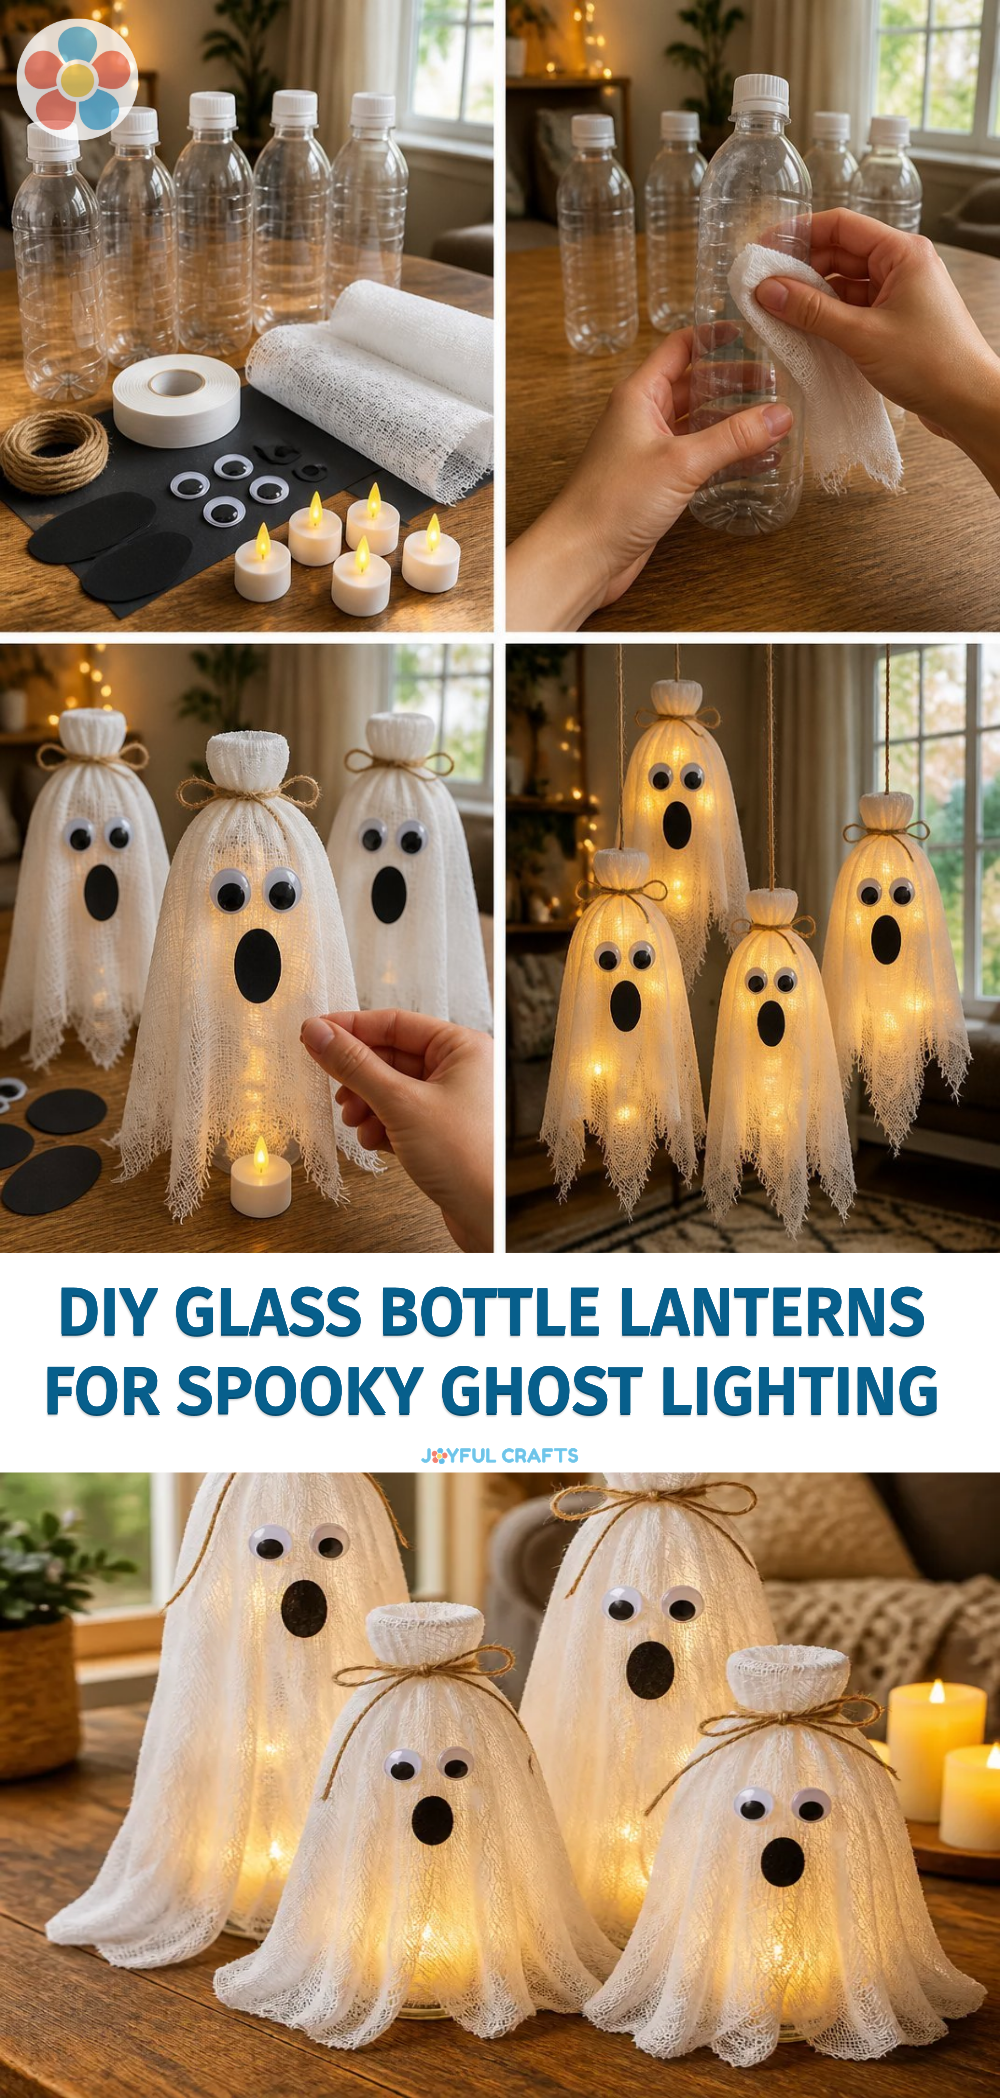
You may also find Clear Rainbow Ghost Shaker Suncatcher Craft For Kids useful.
Materials You’ll Need
- Empty glass bottles (like wine or soda bottles)
- White paint (acrylic or spray paint)
- Black marker or paint
- LED tea lights or candles
- Ribbon or twine (optional for decoration)
- Scissors (if needed for adornments)
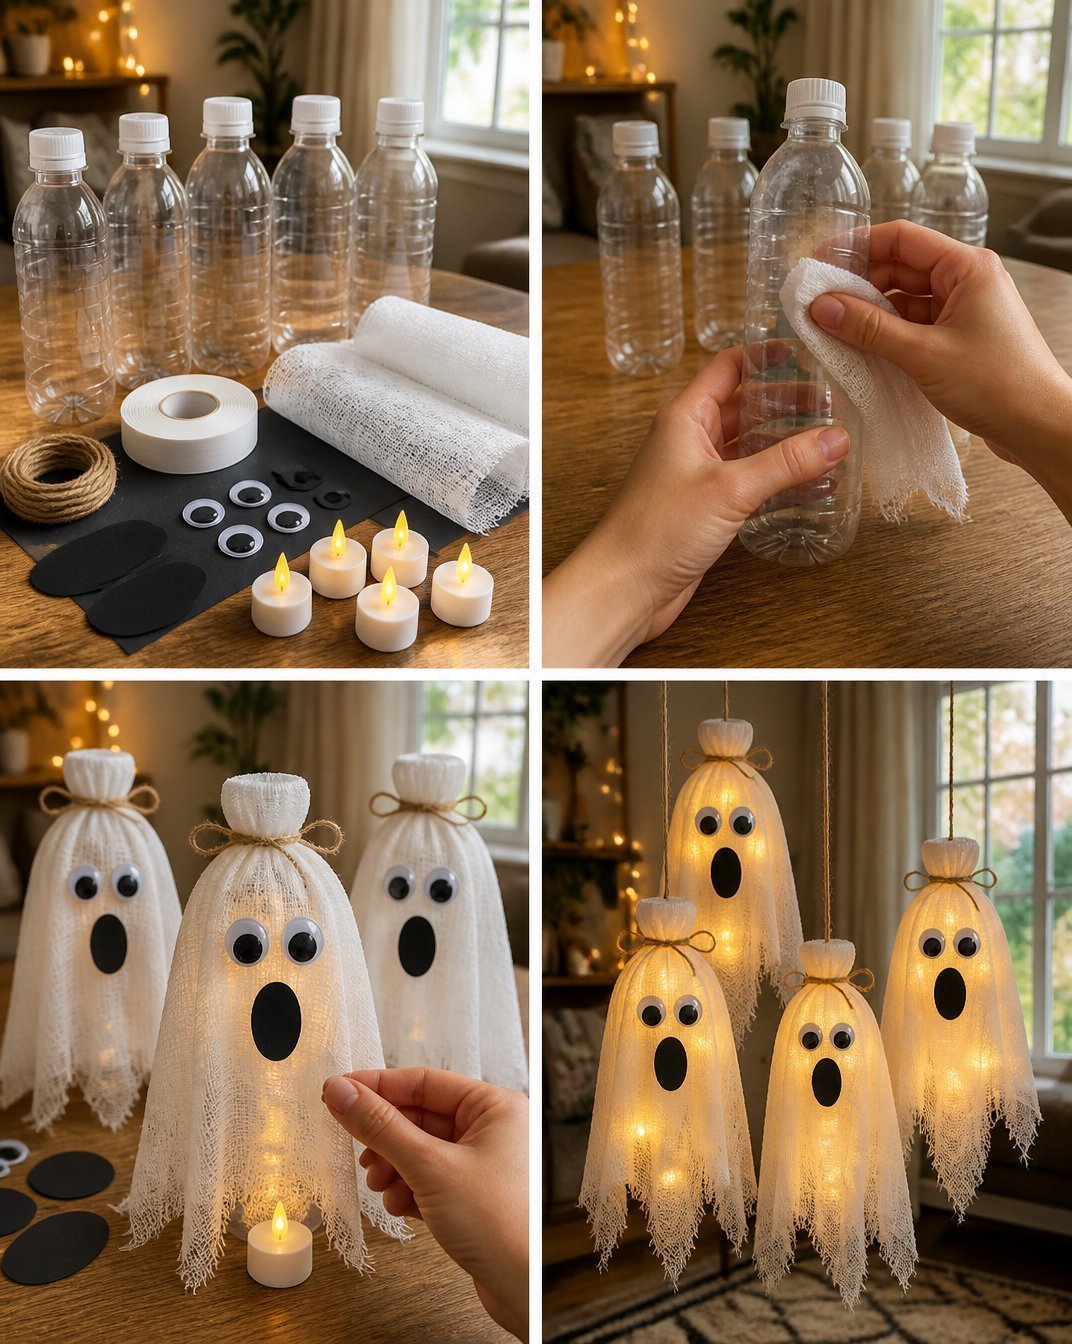
How to Make DIY Glass Bottle Lanterns for Spooky Ghost Lighting
- Prepare the Bottles: Make sure your glass bottles are clean, dry, and free from labels. If needed, soak them in warm soapy water to remove any sticky residue.
- Paint the Bottles: Using white paint, coat the outside of each bottle. You can use a brush for a textured look, or spray paint for a smoother finish. Allow the paint to dry completely.
- Add Ghost Faces: Once the paint is dry, take your black marker or paint and draw spooky ghost faces on each bottle. You could create traditional spooky expressions or cute ghost faces it’s entirely up to you!
- Insert the Lights: Place an LED tea light inside each painted bottle. Using LED lights is safer than candles, especially if you have little ones around.
- Decorate (Optional): Tie some ribbon or twine around the neck of the bottle for an added decorative touch. This step can enhance the lanterns’ rustic appeal and make them more festive.

Helpful Tips
- For added effects, you can experiment with different bottle shapes and sizes to create a more dynamic display.
- If working with children, ensure they have proper supervision when using scissors or other supplies that may require adult assistance.
- Allow plenty of time for the paint to dry to avoid smudging your designs.
Creative Variations
- Consider painting the bottles in different colors to celebrate all autumn aspects, not just Halloween.
- Instead of ghost faces, try creating pumpkin or bat designs for a broader seasonal display.
- Use glow-in-the-dark paint for extra spooky night effects after the sun sets.
Making It With Kids
This project is a fantastic way to work with children! They can help paint the bottles and create fun designs. It’s crucial, however, to supervise them during the painting and when using scissors. Encourage them to express their creativity through their ghost designs, allowing them to choose colors and styles. You may also find Diy Rainbow Tissue Paper Balloons For Kids useful.
How to Display, Use, or Gift It
Once your ghost lanterns are complete, display them on your porch, in the windows, or even inside your home for a festive touch. You can also gift these lanterns to friends or family as charming homemade decorations. You may also find Rainbow Ghost Suncatcher For Kids useful.
Frequently Asked Questions
1. Can we use real candles instead of LED lights?
While you can use real candles, it’s safer to use LED tea lights, especially if you have young kids or if the lanterns will be in areas with flammable materials.
2. How do I remove labels from bottles?
Soaking the bottles in warm soapy water usually loosens the labels, making them easy to peel off. For stubborn labels, you can try using rubbing alcohol.
3. Can I paint the inside of the bottles?
Yes! Painting the inside can create a more opaque appearance, but be mindful that it may change the way light shines through.
4. How long will the paint last on the bottles?
If sealed well, your painted bottles can last for several seasons! Just keep them stored safely when not in use.
Conclusion
These DIY glass bottle lanterns are a delightful way to bring some spooky charm into your home this Halloween. They combine creativity with fun, resulting in a project you can enjoy with family and friends. For additional inspiration on Halloween decor, check out Light-Up Halloween Decorations to Make and Upcycle.
Print
DIY Glass Bottle Lanterns for Spooky Ghost Lighting
- Total Time: 10 minutes
- Makes: 4 lanterns
Description
Create whimsical glass bottle lanterns to add a festive glow for Halloween with this easy DIY project.
Materials
- Empty glass bottles (like wine or soda bottles)
- White paint (acrylic or spray paint)
- Black marker or paint
- LED tea lights or candles
- Ribbon or twine (optional for decoration)
- Scissors (if needed for adornments)
Instructions
- Prepare the bottles: Make sure your glass bottles are clean, dry, and free from labels.
- Paint the bottles: Using white paint, coat the outside of each bottle and allow to dry completely.
- Add ghost faces: Use a black marker or paint to draw spooky designs on each bottle.
- Insert the lights: Place an LED tea light inside each painted bottle for safety.
- Decorate (optional): Tie ribbon or twine around the neck of the bottle for a festive touch.
Notes
Supervise children when using scissors or paint. Allow enough time for paint to dry.