

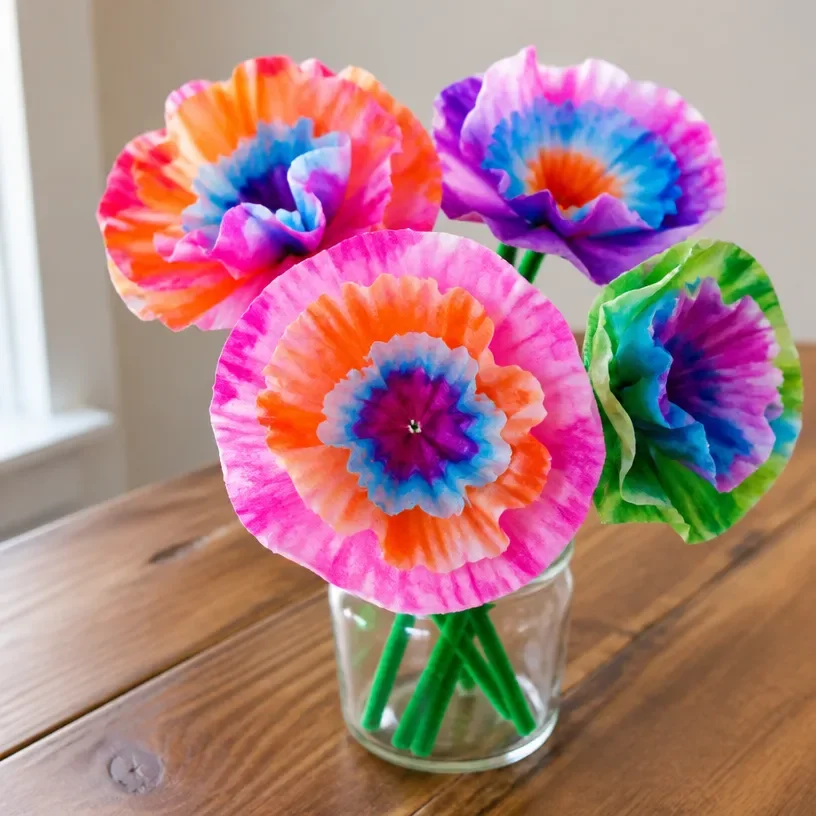
How to Make Coffee Filter Tie-Dye Flowers
Crafting with coffee filters can be a delightful and colorful experience, especially when creating vibrant tie-dye flowers. This project is not only enjoyable; it allows you to transform simple materials into beautiful decorations or gifts. Whether you want to brighten up your home or create something special for a loved one, these flowers will surely bring a smile to anyone’s face. If you’re looking for more creative ideas, you might also enjoy making these witch hat flowers!
Why You’ll Love This Project
- Fun and Easy: This craft requires simple materials and steps, making it suitable for all ages.
- Customizable Colors: You can use any colors you like, allowing for unique designs tailored to your taste.
- Beautiful Displays: The finished flowers are stunning and can be used as home decor, gifts, or even as part of a centerpiece.
- Great for Kids: This project encourages creativity and is an excellent way to spend time together as a family.
You may also find Rainbow Tie Dye Coffee Filter Apple Suncatcher useful.
Materials You’ll Need
- Coffee filters
- Washable markers (various colors)
- Spray bottle filled with water
- Pipe cleaners or straws (for the flower stems)
- Scissors
- Cardboard (to protect your work surface)
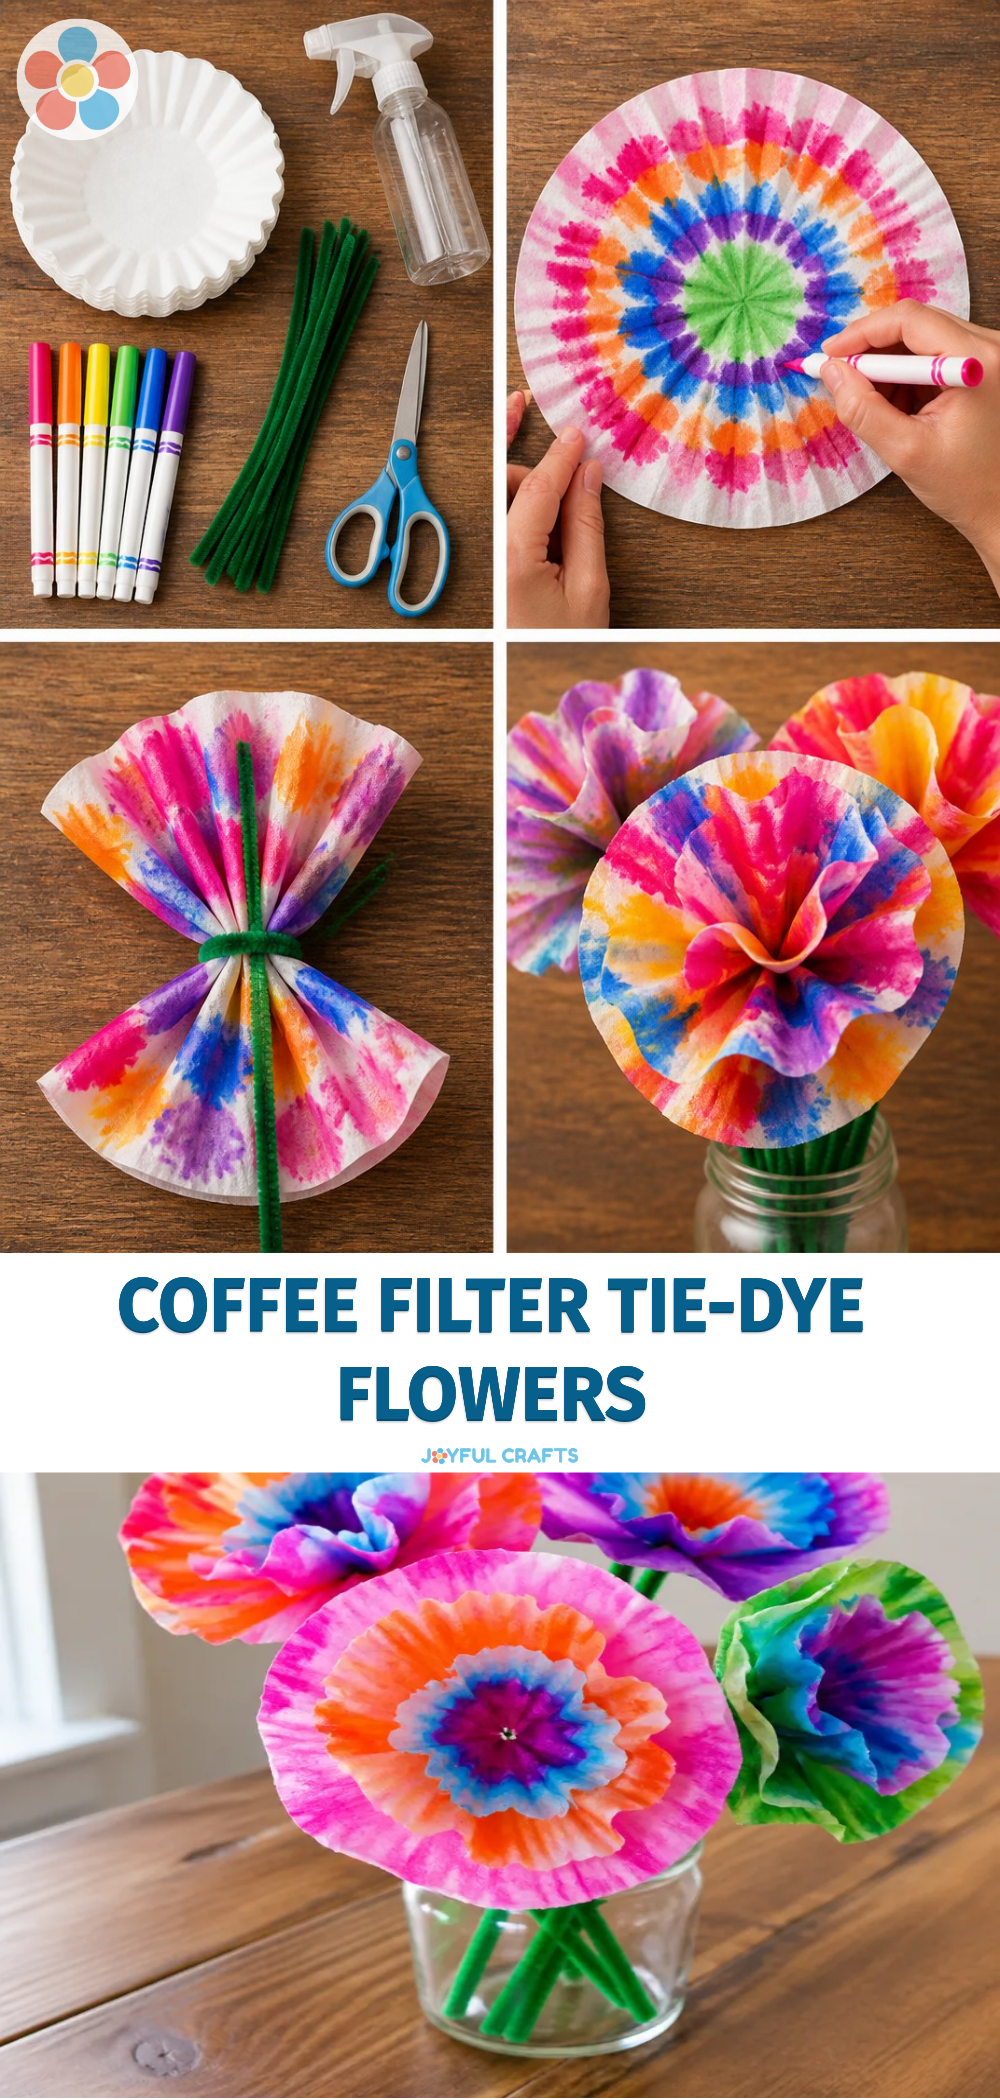
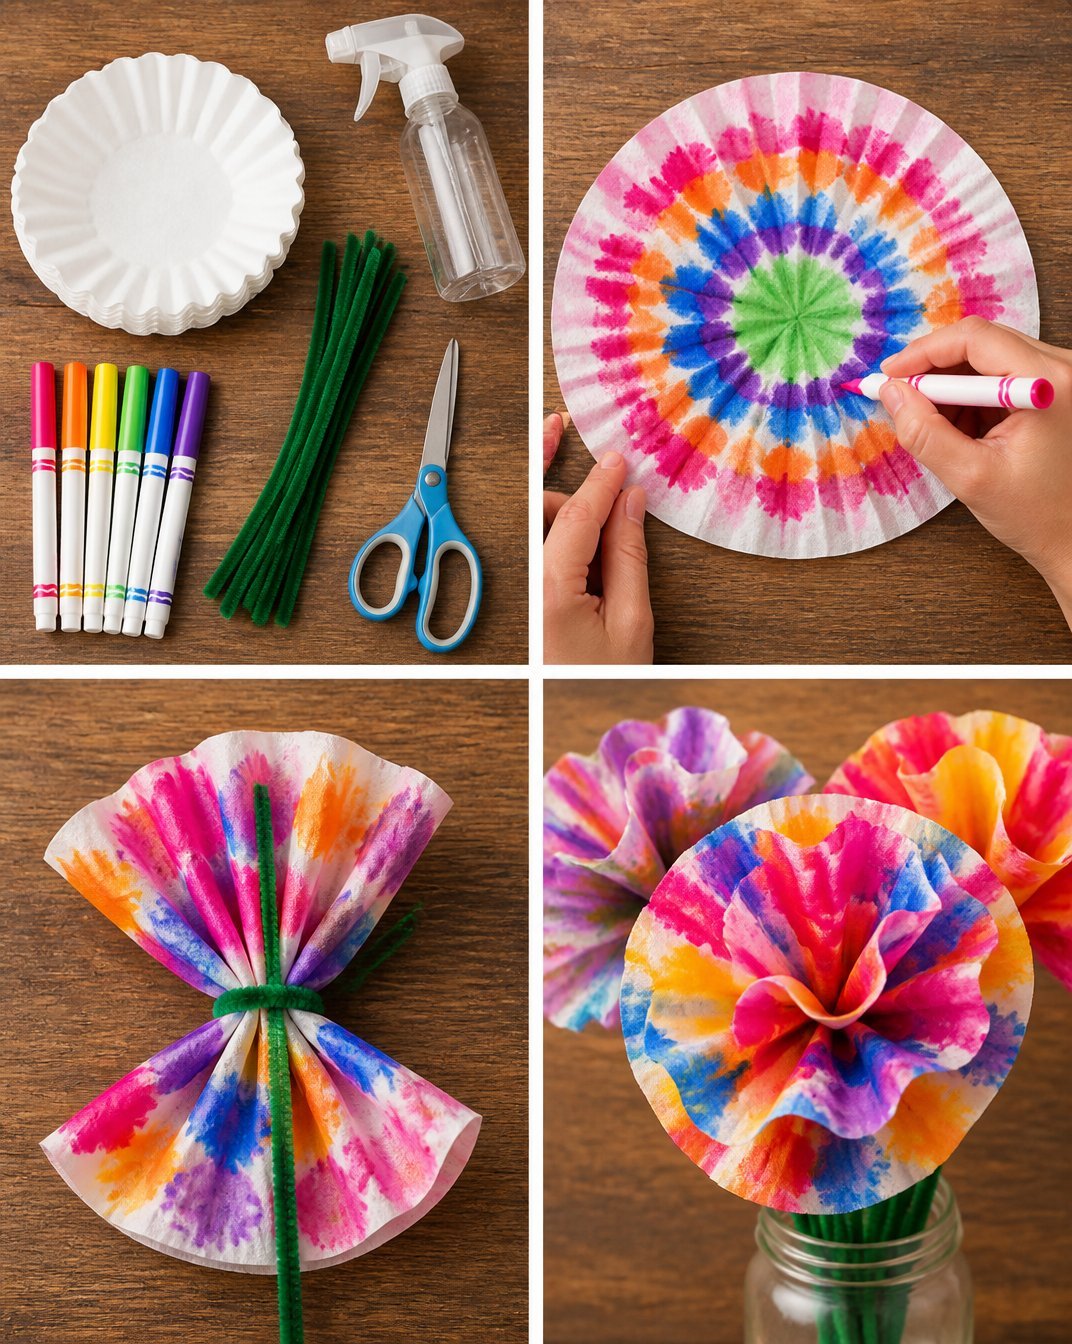
How to Make Coffee Filter Tie-Dye Flowers
Prepare Your Workspace: Lay out your cardboard on a flat surface to protect it. This will also help absorb any spills or excess liquids while you’re working. You may also find Rainbow Tie Dye Coffee Filter Sun Catcher useful.
Color the Filters: Take a coffee filter and use washable markers to color it. You can fill in the entire filter or create patterns as you like.
Spritz with Water: Fill your spray bottle with water and lightly mist the colored coffee filter. The colors will start to blend and spread, creating a beautiful tie-dye effect. Be careful not to soak it too much!
Let It Dry: Carefully set the wet filter aside to dry completely. This can take a while, so plan to do this part ahead of time.
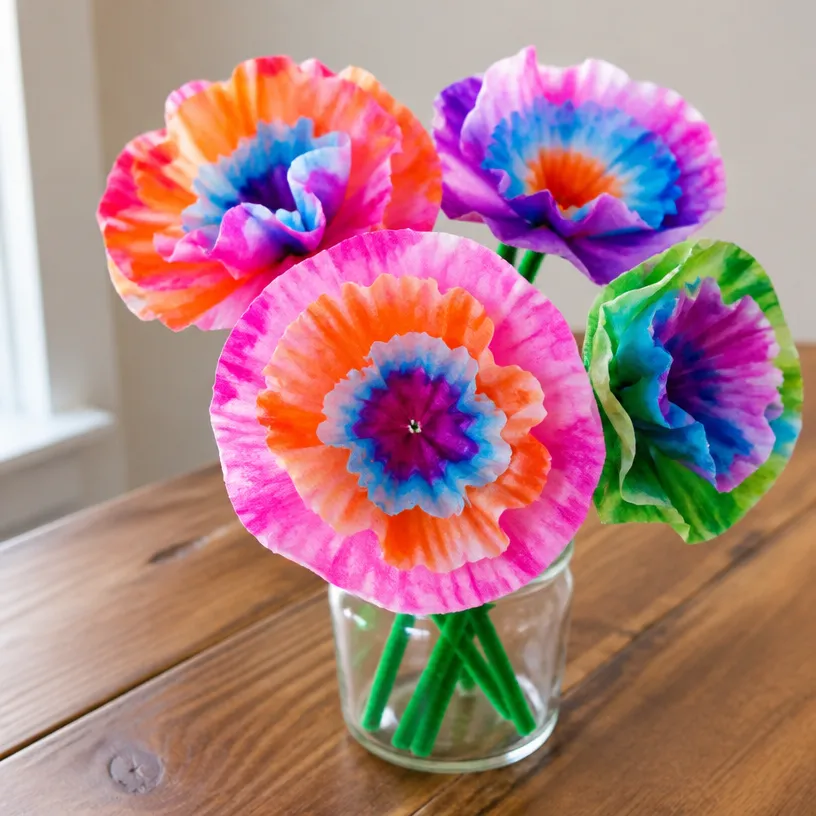
Shape the Flowers: Once dry, stack multiple colored filters to create fuller flowers. Gently pinch the center and secure it with a pipe cleaner or straw.
Create the Stems: Take the pipe cleaner or straw and insert it into the center of the flower. Bend the pipe cleaner as desired to shape the stem.
Display Your Creations: You can arrange your flowers in a vase, use them as decorative pieces, or give them as gifts!
Helpful Tips
- If you’re crafting with children, consider using non-toxic markers to ensure safety.
- Experiment with different spraying distances; closer spraying will create a more intense blend of colors, while further away spraying will give a more subtle effect.
- For added texture, scrunch the filters before coloring and unfold them just before spraying.
Creative Variations
- Seasonal Themes: Use fall colors like oranges and browns for autumn or bright pastels for spring.
- Add Glitter: Before the filters dry, sprinkle a bit of glitter onto them to make them sparkle.
- Size Alterations: Experiment with larger filters for bigger flowers or smaller ones for mini bouquets.
Making It With Kids
This craft is perfect for kids as it encourages creativity and involvement. Ensure to supervise them while using scissors and spray bottles, and involve them in the design choices. Kids can express themselves through their color choices and flower shapes.
How to Display, Use, or Gift It
These charming coffee filter flowers can brighten up any space. Use them in a simple vase for a colorful centerpiece, attach them to gifts for a personal touch, or even incorporate them into wreaths or holiday decorations.
Frequently Asked Questions
Can I use different types of markers?
Yes, you can experiment with different markers, but make sure they are washable to achieve the best tie-dye effect.
What if I don’t have a spray bottle?
You can lightly dip the filters in a bowl of water instead, but spraying is more effective for achieving a blended look.
How long does it take for the filters to dry?
Drying times may vary depending on the humidity in your area. Typically, they take about 1-2 hours to dry completely.
Can these flowers be preserved?
While they are primarily decorative, you can spray them with a clear acrylic sealer to help protect them if you want to display them for an extended period.
What’s the best way to store them?
Store your finished flowers in a cool, dry place, preferably in a box or container to prevent crushing them.
What can I do with leftover coffee filters?
Leftover coffee filters can be used in various crafts, such as making butterflies. Check out this fun tutorial on making coffee filter butterflies for the garden!
Conclusion
Crafting coffee filter tie-dye flowers offers a wonderful way to express creativity while bringing joy to your surroundings. You can explore more fun crafting ideas, like making tie-dye flowers, on various crafting websites. For additional inspiration, check out this engaging DIY tutorial on coffee filter flowers. Happy crafting!
Print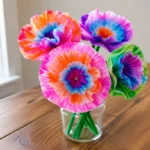
Coffee Filter Tie-Dye Flowers
- Total Time: 120 minutes
- Makes: Multiple flowers
Description
Transform simple coffee filters into vibrant tie-dye flowers with this fun and engaging craft project, perfect for all ages.
Materials
- Coffee filters
- Washable markers (various colors)
- Spray bottle filled with water
- Pipe cleaners or straws (for the flower stems)
- Scissors
- Cardboard (to protect your work surface)
Instructions
- Prepare your workspace: Lay out your cardboard on a flat surface to protect it.
- Color the filters: Use washable markers to color the coffee filter as desired.
- Spritz with water: Lightly mist the colored coffee filter with water to blend the colors.
- Let it dry completely on the cardboard.
- Shape the flowers: Stack multiple colored filters and pinch the center, securing with a pipe cleaner or straw.
- Create the stems: Insert the pipe cleaner or straw into the center of the flower.
- Display your creations in a vase or as gifts.
Notes
For kids, use non-toxic markers and supervise during cutting. Consider experimenting with different colors and sprays.