
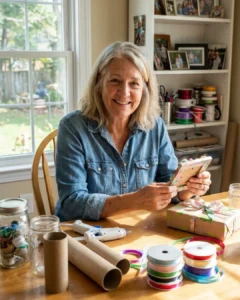

First Day of School Teacher Door Hanger – Rainbow Classroom Decor
Creating a cheerful first day of school teacher door hanger adds a wonderful touch to any classroom. This project combines vibrant colors and fun designs, making it a creative way for teachers to welcome students. With simple materials and straightforward steps, you can craft a rainbow-themed door hanger that showcases your enthusiasm for the school year. You may also find First Day Of School Rainbow Teacher Door Hanger useful.
Why You’ll Love This Project
- Bright and Cheerful: The rainbow design is sure to bring smiles to both students and parents, setting a joyful tone for the school year.
- Easy to Customize: Personalize your door hanger with different colors or decorations to reflect your unique style.
- Fun Crafting Experience: This project is perfect for individuals or groups, creating a great opportunity to bond with friends or family while crafting.
- Affordably Priced: Most materials needed are easily accessible and budget-friendly, making this a very doable project for everyone.
- Eye-Catching Decor: A delightful door hanger brightens up your classroom space and makes a memorable first impression on your students.

You may also find Rainbow Button Apple Teacher Frame Classroom Decor useful.
Materials You’ll Need
- Wooden door hanger
- Acrylic paints (various colors for the rainbow)
- Paintbrushes
- Mod Podge or clear sealant
- Stencils (optional for lettering)
- Ribbons or embellishments (like buttons)
- Hot glue gun (with adult supervision)
- Scissors
How to Make First Day of School Teacher Door Hanger – Rainbow Classroom Decor
Prepare Your Surface: Begin by laying down some newspaper or a protective covering on your workspace to catch any spills. You may also find Rainbow Crayon Suncatcher Classroom Decor useful.
Paint the Base: Choose your favorite background color and paint the wooden door hanger. Allow it to dry completely.
Create the Rainbow: Using a variety of colors, paint arcs to form a rainbow across the top of the door hanger. Allow the paint to dry between layers for a vibrant look.
Add Personal Touches: If you’re using stencils, now is the time to add any lettering, such as “Welcome” or “First Day of School.” Use contrasting colors to make the text stand out.
Seal the Hanger: Apply a coat of Mod Podge to protect your design from wear and tear. Make sure to let this dry completely before proceeding.
Finishing Touches: Use a hot glue gun to attach ribbons or other embellishments. You can add buttons and decorations that resonate with your theme.

Helpful Tips
- When painting, start with lighter colors and gradually add darker hues to create depth in your rainbow.
- For a smooth finish, use quality brushes and small strokes to avoid dripping or uneven paint.
- If working with children, ensure they have proper supervision while using hot glue or scissors.
- Consider letting kids paint their own versions as well, making this a fun group activity, which can be inspired by other crafts like the rainbow pencil wreath.
Creative Variations
- Experiment with different shapes, such as stars or clouds, to embellish your rainbow design.
- Use glitter for an extra sparkly effect to catch the eye.
- Change the colors according to seasonal themes or school colors, adapting your door hanger throughout the year.
Making It With Kids
This craft is an excellent way for younger children to engage in creativity; just ensure that any cutting or gluing is supervised by an adult. Encourage kids to express themselves through their choice of colors and decorations, making each piece truly unique.
How to Display, Use, or Gift It
Hang your finished door hanger on your classroom door to greet students and parents. If you’d like to gift it, consider wrapping it in clear cellophane tied with ribbon for a delightful surprise for a fellow teacher or a back-to-school gift.

Frequently Asked Questions
1. Can I use markers instead of paint?
Yes, permanent markers can be a mess-free option for decoration, especially for younger children.
2. How can I make the door hanger more durable?
Applying multiple coats of Mod Podge not only protects the paint but also enhances its longevity.
3. What if I can’t find a wooden door hanger?
You can easily create your own using cardboard or canvas, just be sure to adapt the materials accordingly.
4. Can I include student names on the door hanger?
Absolutely! Personalizing your door hanger with student names makes it special and welcoming.
5. Is it appropriate for every grade level?
Yes, this project is suitable for all grades as it can be customized for any age group with varying complexity.
6. How long does it take to complete the craft?
Planning for about 2-3 hours will allow for paint drying time and personalizing at a comfortable pace.
Conclusion
This rainbow teacher door hanger not only serves as a beautiful decoration, but also sets a positive tone for the school year ahead. If you’re looking for additional classroom decor ideas, you might consider exploring this rainbow classroom decor gift for teachers. Enjoy crafting and have a wonderful school year!
Print
First Day of School Teacher Door Hanger – Rainbow Classroom Decor
- Total Time: 140 minutes
- Makes: 1 door hanger
Description
Craft a vibrant rainbow-themed door hanger for the first day of school, adding a cheerful touch to any classroom.
Materials
- Wooden door hanger
- Acrylic paints (various colors for the rainbow)
- Paintbrushes
- Mod Podge or clear sealant
- Stencils (optional for lettering)
- Ribbons or embellishments (like buttons)
- Hot glue gun (with adult supervision)
- Scissors
Instructions
- Prepare your surface: Lay down newspaper or a protective covering on your workspace.
- Paint the base: Choose your favorite background color and paint the wooden door hanger. Allow it to dry completely.
- Create the rainbow: Paint arcs across the top of the door hanger using various colors, allowing layers to dry.
- Add personal touches with stencils for lettering like ‘Welcome’.
- Seal the hanger: Apply a coat of Mod Podge and let it dry completely.
- Finish off by attaching ribbons or embellishments using hot glue.
Notes
For a creative group activity, encourage children to paint their versions under supervision. Experiment with embellishments and seasonal themes for variation.