


Glowing Rainbow Kitchen Sensory Bottles Become Art
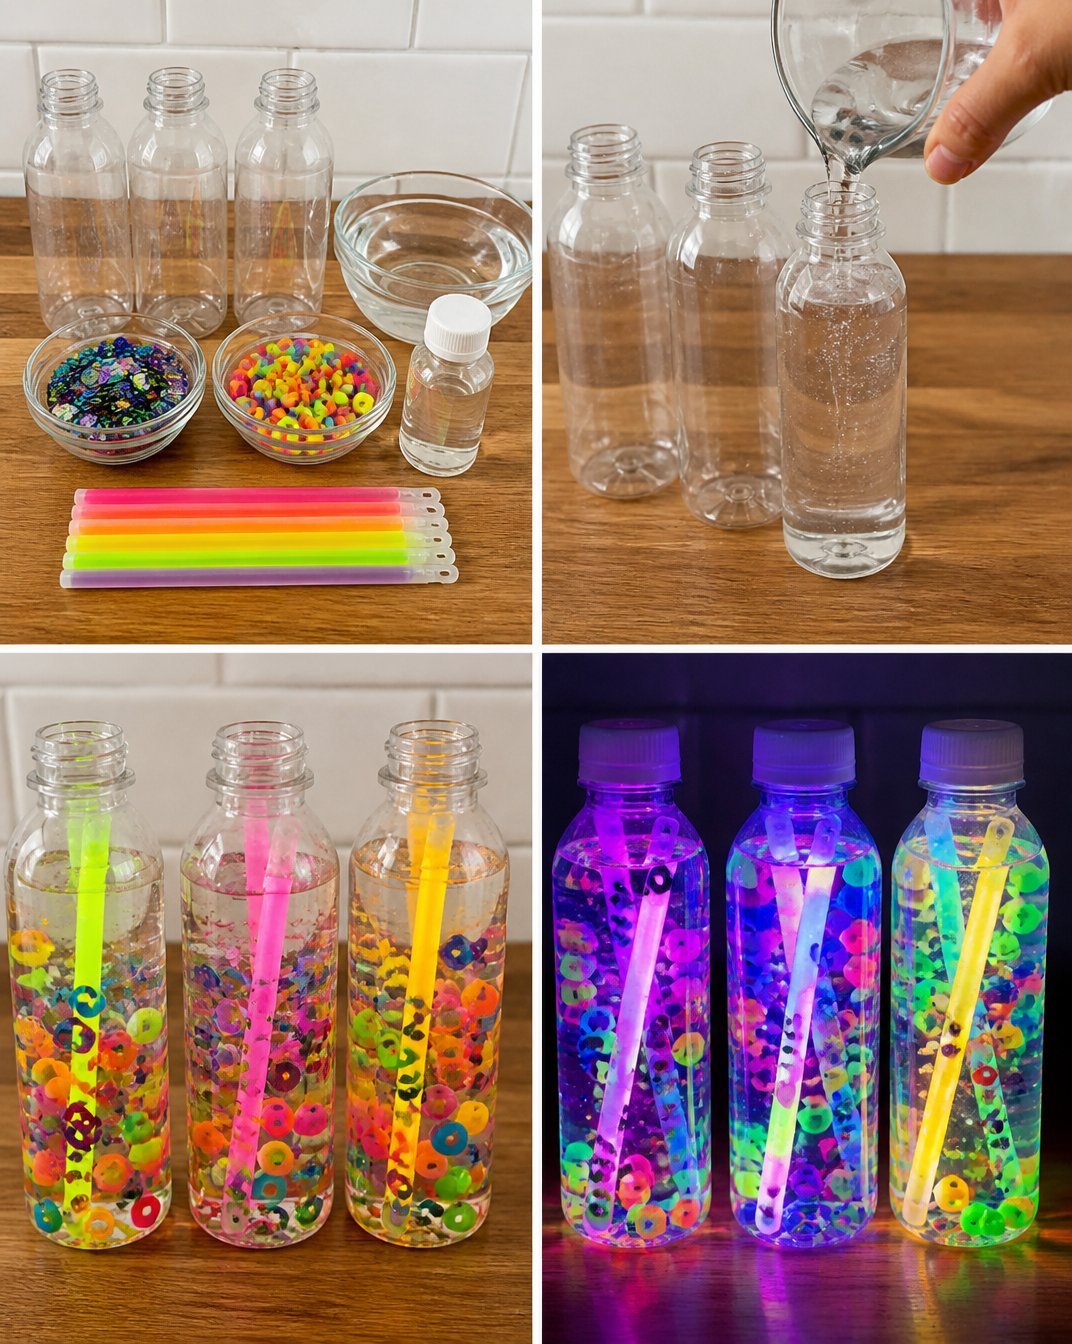
Creating Glowing Rainbow Kitchen Sensory Bottles is not only a fun and colorful activity but also a fantastic way for kids to engage in sensory play. These bottles serve as beautiful art pieces in your home while providing calming sensory input. With simple materials and easy steps, you can transform ordinary kitchen items into shimmering rainbow treasures. You may also find Colorful Rainbow Tree Bubble Paint Artwork useful.
Why You’ll Love This Project
- Sensory Play: These bottles provide tactile and visual stimulation, great for relaxation and focus.
- Creative Expression: Kids can customize the colors and designs, making it uniquely their own.
- Educational Fun: This project can spark discussions about colors and light, enhancing learning.
- Versatile Art: Once finished, these bottles can serve as decor in any room or even be used for gift-giving.

You may also find Glowing Rainbow Ghost Lanterns useful.
Materials You’ll Need
- 2 plastic bottles (empty and clean)
- Food coloring (various colors)
- Vegetable oil
- Water
- Glitter or small beads (optional)
- Funnel (optional but helpful)
How to Make Glowing Rainbow Kitchen Sensory Bottles Become Art
Prepare Your Bottles: Start by removing any labels from your bottles and cleaning them thoroughly. This ensures a clear view of your art. You may also find Melted Crayon Rainbow Heart Suncatcher For Kids useful.
Mix Your Colors: Using a funnel, fill each bottle with water halfway. Then, add drops of food coloring to create vibrant rainbow colors. Consider using red, blue, green, and yellow for a classic rainbow effect. You may also find Rainbow Butterfly Stakes Recycled Bottles useful.
Add Glitter or Beads: To make your sensory bottles even more magical, you can add glitter or small beads to the water. This will create a beautiful shimmer when the bottles are moved.
Top with Oil: Fill the rest of the bottle with vegetable oil. This creates a separation between the water and oil, enhancing the visual effects. The oil should float on top of the colored water.
Seal and Decorate: Secure the cap tightly on the bottle. You may decorate the outside with stickers or ribbons to enhance the presentation.
Enjoy and Play: Shake the bottles to watch the colors mingle or watch as the glitter floats through the oil, providing a soothing visual experience.

Helpful Tips
- Supervise Young Children: Always supervise younger kids, especially if using small items like glitter or beads.
- Experiment with Colors: Don’t be afraid to mix colors! Try combining blue and yellow for green or adding a touch of black for a darker effect.
- Cover Caps with Tape: If your child is particularly energetic, consider sealing the cap with tape to prevent spills during play.
Creative Variations
- Seasonal Themes: Change the color scheme according to the seasons red and green for Christmas or orange and black for Halloween.
- Bottle Shapes: Use different-sized or shaped bottles for unique looks and varying sensory experiences.
- Lighted Bottles: Place the bottles on a light source or inside a transparent container with a light for a glowing effect.
Making It With Kids
This project is ideal for children of various ages. For younger children, adult supervision is essential, especially when handling small decorative elements or sealing the bottles. Let their creativity shine while guiding them with safety tips.
How to Display, Use, or Gift It
Once completed, these sensory bottles can brighten up a shelf, become a part of playtime for kids, or make thoughtful, personalized gifts for family and friends. Their unique aesthetic ensures they will be appreciated in any setting.
Frequently Asked Questions
1. Can I use any type of bottle?
Yes, any clean, transparent plastic or glass bottle can work as long as it has a secure cap.
2. What if I don’t have vegetable oil?
Any light oil can serve as a substitute, but ensure it is safe and non-toxic.
3. How long will the bottles last?
As long as they remain sealed, your sensory bottles can last for a long time. However, if opened, the contents may eventually degrade.
4. Can older kids make these on their own?
Yes, older kids can follow the steps independently, but it’s always good to be nearby for guidance.
Conclusion
Creating Glowing Rainbow Kitchen Sensory Bottles is an enjoyable project full of opportunities for exploration and creativity. Have fun making these delightful bottles, and if you want to expand sensory experiences, check out this guide on How to Make DIY Sensory Bottles for more ideas!
Print
Glowing Rainbow Kitchen Sensory Bottles
- Total Time: 10 minutes
- Makes: 2 sensory bottles
Description
Transform ordinary kitchen items into shimmering rainbow sensory bottles that provide colorful and calming experiences for children.
Materials
- 2 plastic bottles (empty and clean)
- Food coloring (various colors)
- Vegetable oil
- Water
- Glitter or small beads (optional)
- Funnel (optional but helpful)
Instructions
- Prepare Your Bottles: Start by removing any labels from your bottles and cleaning them thoroughly.
- Mix Your Colors: Using a funnel, fill each bottle with water halfway, then add drops of food coloring.
- Add Glitter or Beads: To enhance the bottles, add glitter or small beads for a magical effect.
- Top with Oil: Fill the rest of the bottle with vegetable oil, creating a visual separation from the colored water.
- Seal and Decorate: Secure the cap tightly and decorate the outside with stickers or ribbons.
- Enjoy and Play: Shake the bottles to watch the colors and glitter create soothing visuals.
Notes
Supervise young children during the project and consider using tape to secure bottle caps.